Children's sandbox for giving: how to make and fill on your own (20 photos)
Content
Rest in a country house is loved by all family members. Adults have a rest there from heavy everyday life, enjoying the fresh air. When they get bored of lounging, they will find a useful lesson in the garden or vegetable garden. What should children do at this time?
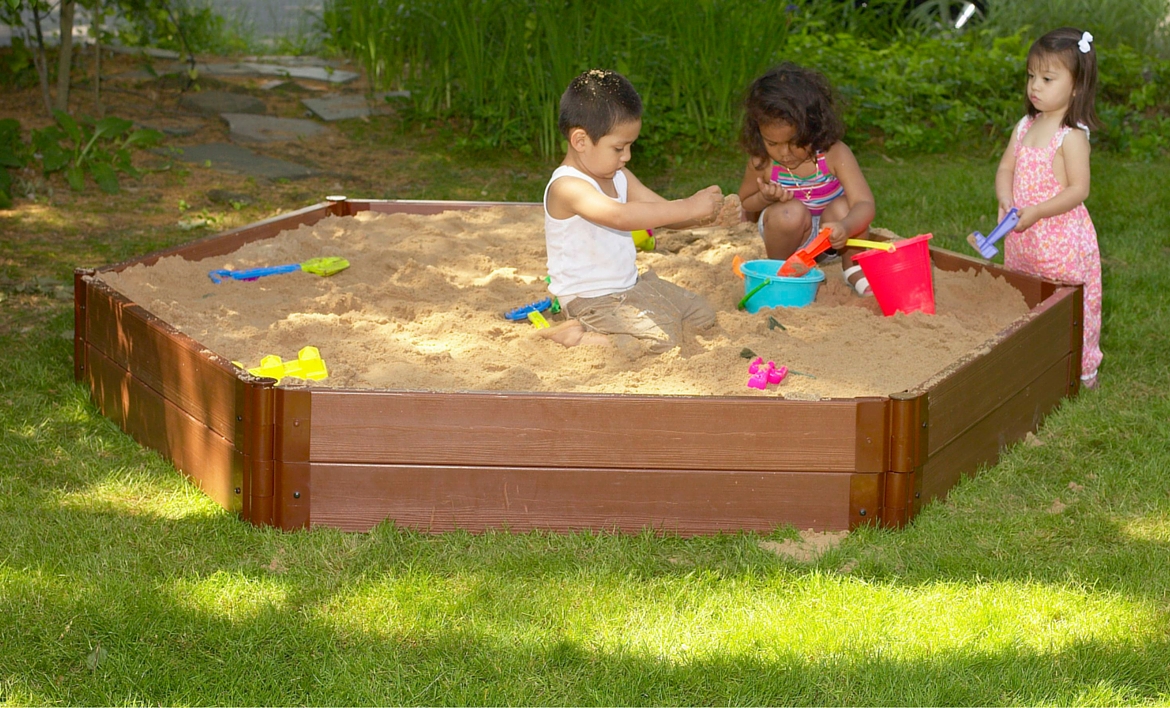
So that the kids do not get bored, you need to build a playground for them. You can start construction with a sandbox. Making it yourself is easy, and the benefits of playing with sand are huge. The child develops sensory perception and creative thinking. Of course, you can simply buy a sandbox, but we suggest building your own sandbox. Moreover, it is very simple to do.
Sandboxing Rules
You should create children's sandboxes for a summer residence, based on several principles of placement:
Prudence
Think about your placement in advance. You need to choose a flat area where the children's sandbox will not make it difficult to move around the yard. At the same time, it should be in the field of view of parents so that children do not remain unattended.
Comfort
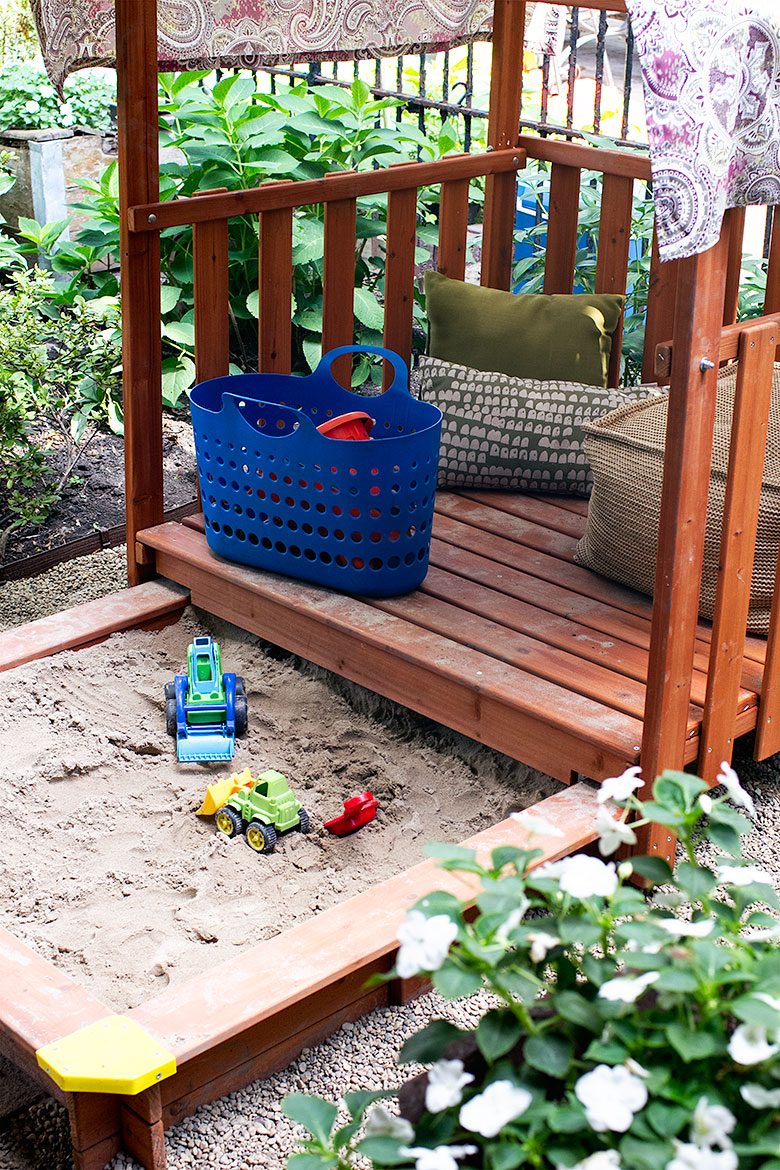
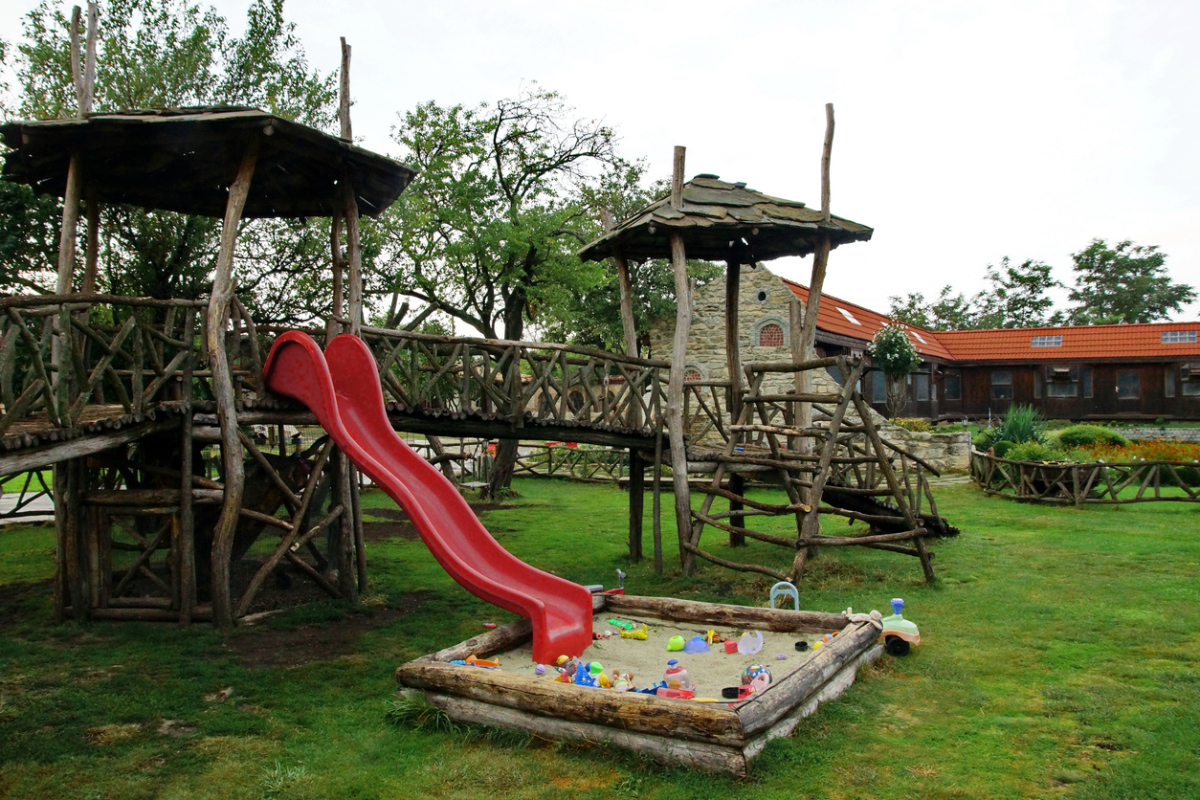
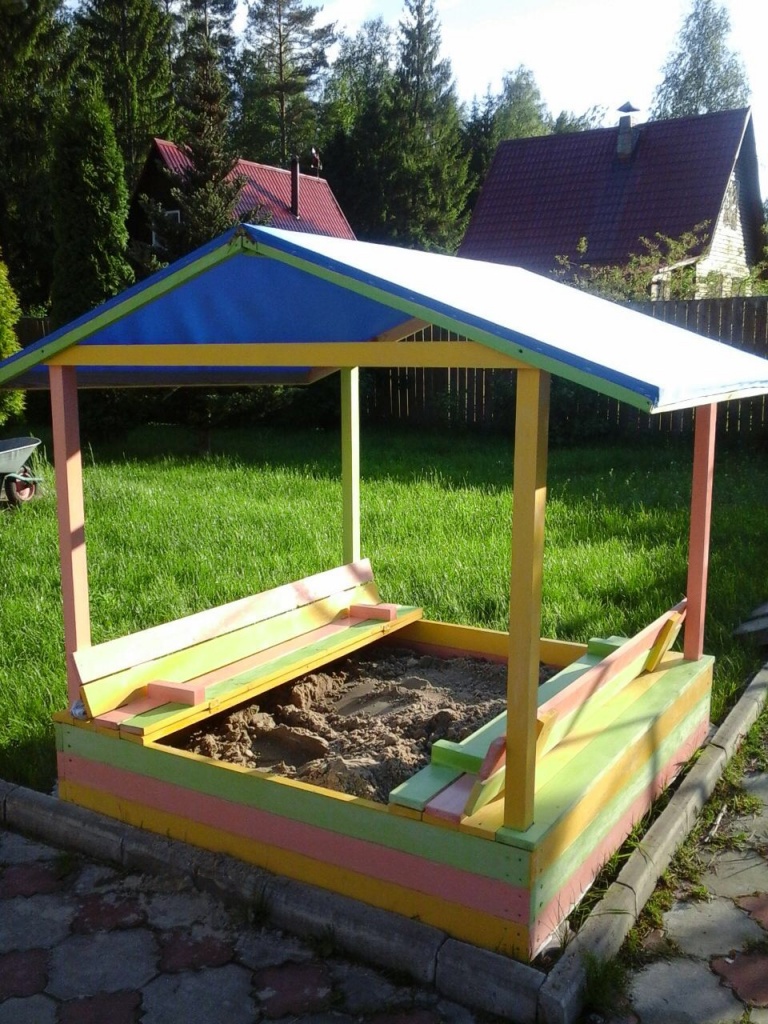
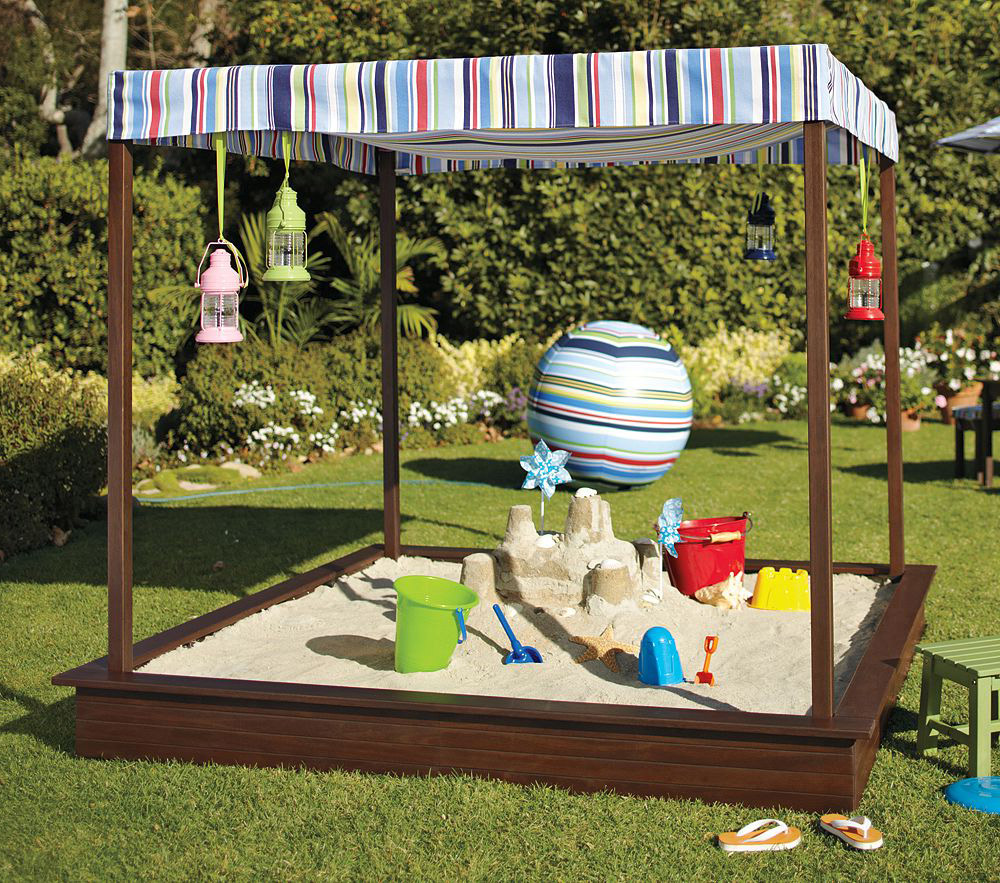
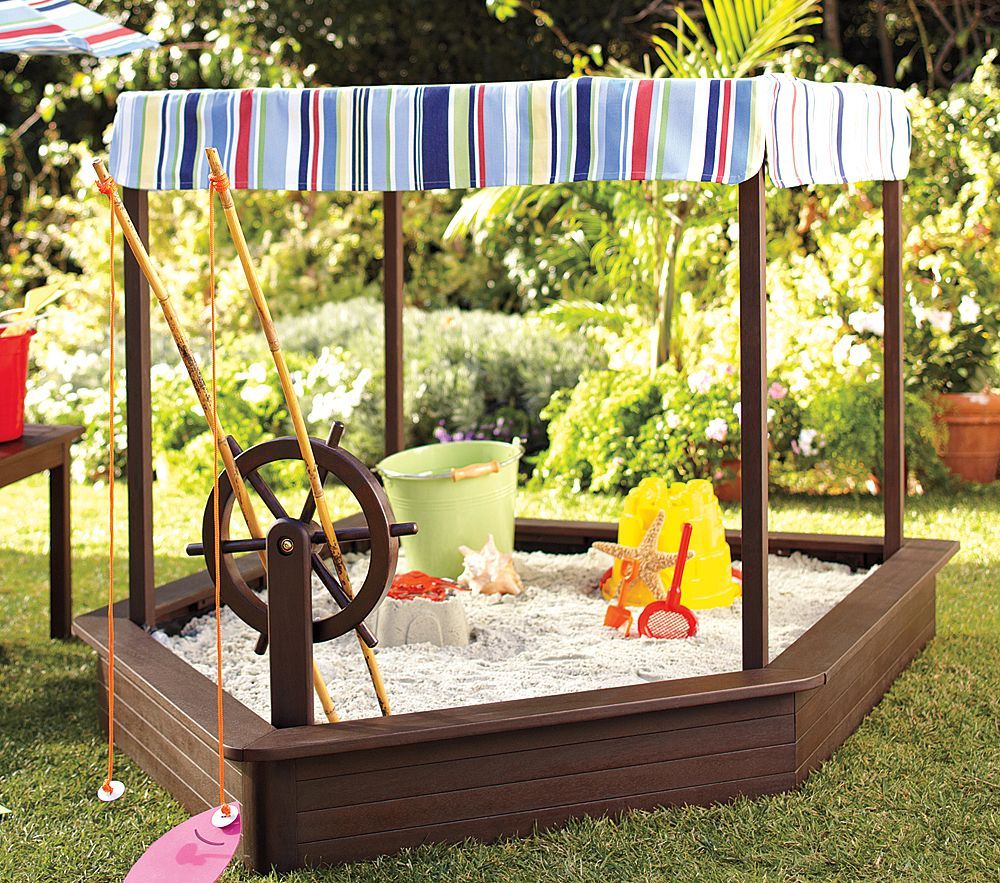
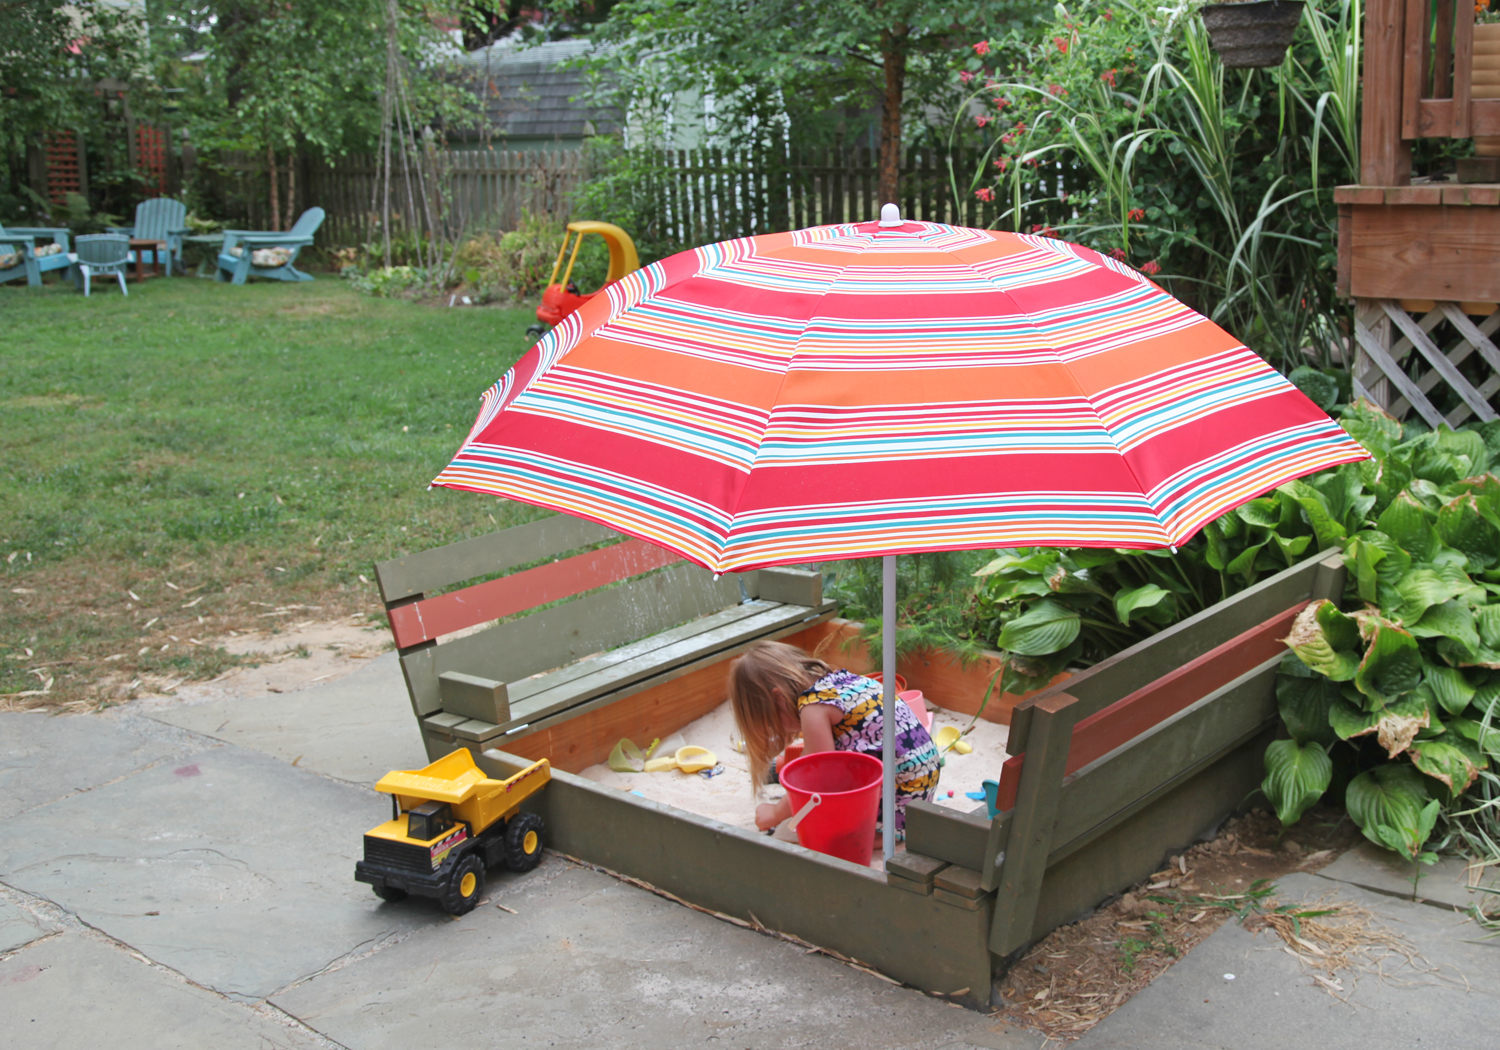
Sandbox for children - a place where kids often spend more than one hour. The child should not overheat in direct sunlight. Therefore, it is worth considering creating a shadow. It can be a shadow from a tree, a canopy or an umbrella.
Hygiene Requirements
In order not to waste extra effort on the implementation of the previous paragraph, some have a place for games under the spreading trees or tall bushes. Doing this is not worth it, because you have to regularly clean the fallen leaves.
You already know how to choose a place, now let's talk about how to make a sandbox in the country with your own hands.
How to make a sandbox yourself?
A do-it-yourself sandbox for a summer house is an inexpensive way to improve the play area for kids in the country. The choice of material depends entirely on the preferences and financial capabilities of the owners. If you do not want to buy ready-made wooden or plastic sandboxes, then you can make them yourself.
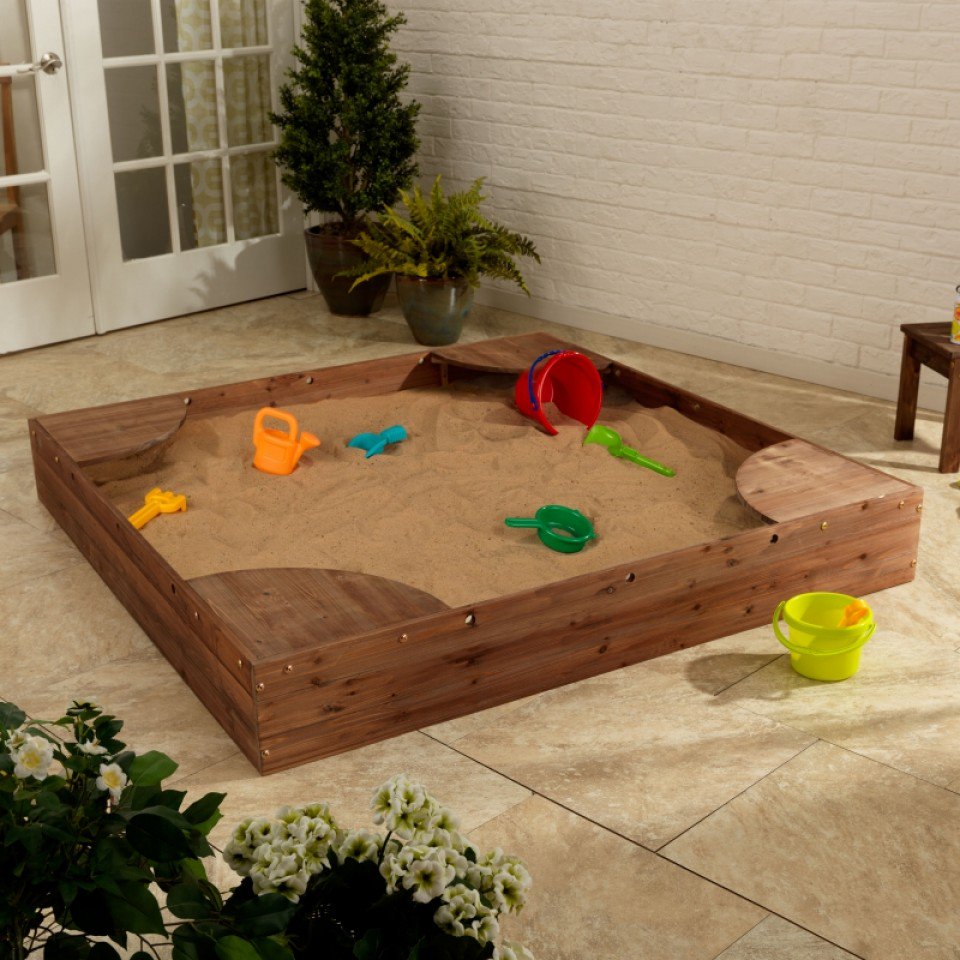
When choosing material, it is worth considering that wood is the cheapest way to make a sandbox. Such models are stationary and durable, with proper care they will last more than one season. The disadvantages include the fact that it is impossible to remove wooden sandboxes for summer cottage for the winter. In addition, they will have to be tinted every season, if you want to see a bright element of the playground in your suburban area.
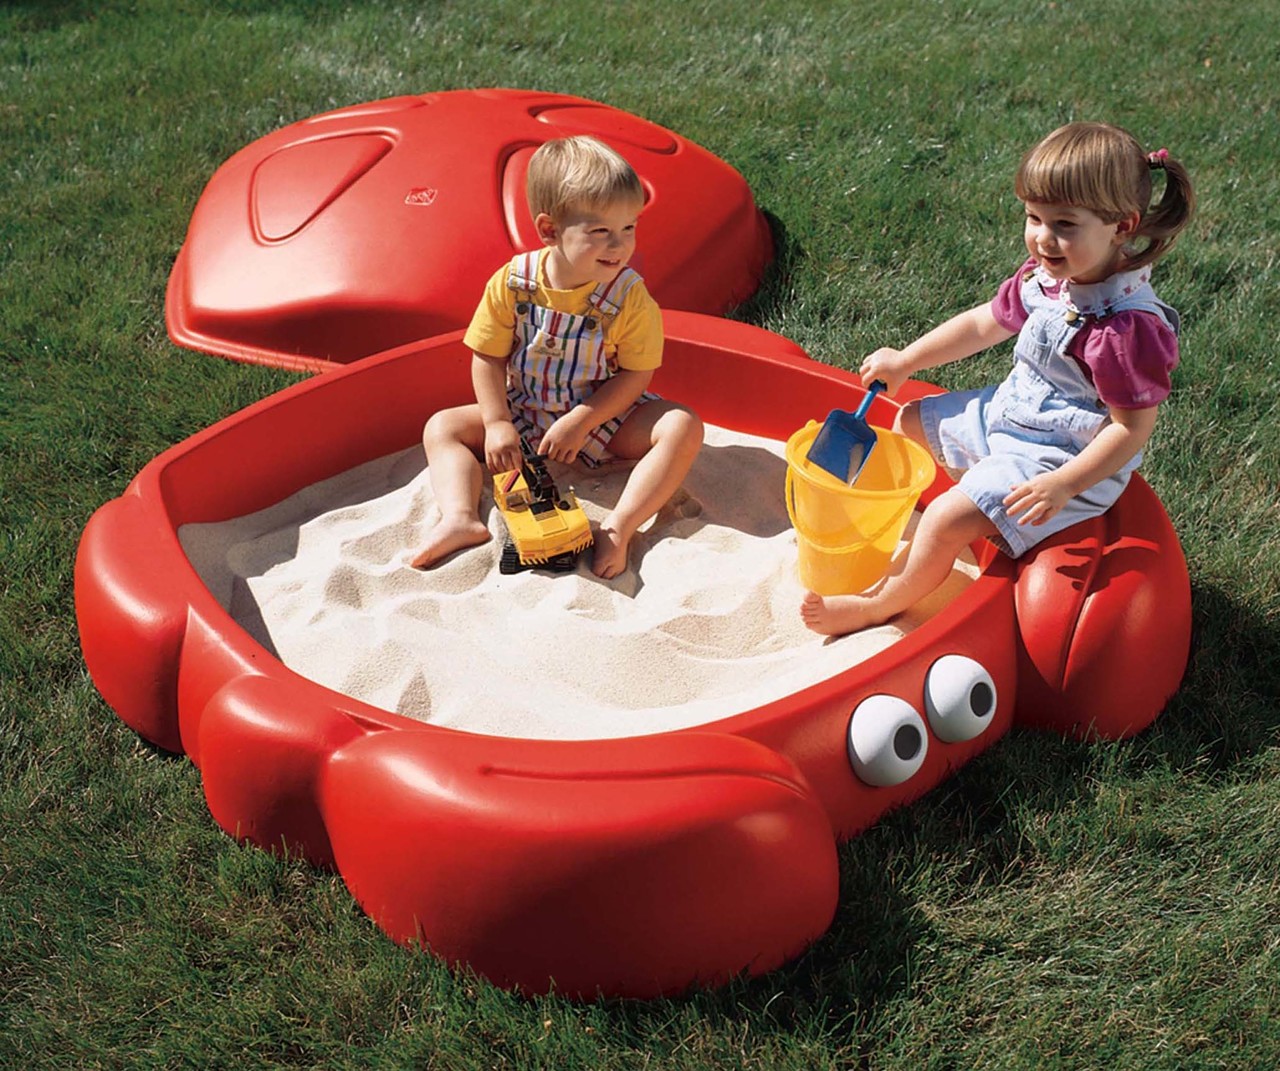
Plastic sandboxes are usually bought ready-made in stores, but you can also make them yourself. Purchased plastic sandboxes are usually small in size. To play in such a tiny capacity will appeal only to kids. Older children will want more space. You can make a more capacious sandbox from plastic parts. Multi-colored elements look good and attract the attention of children with their rich color. They do not lose brightness in the sun and do not deteriorate when exposed to rain.
Sandbox size
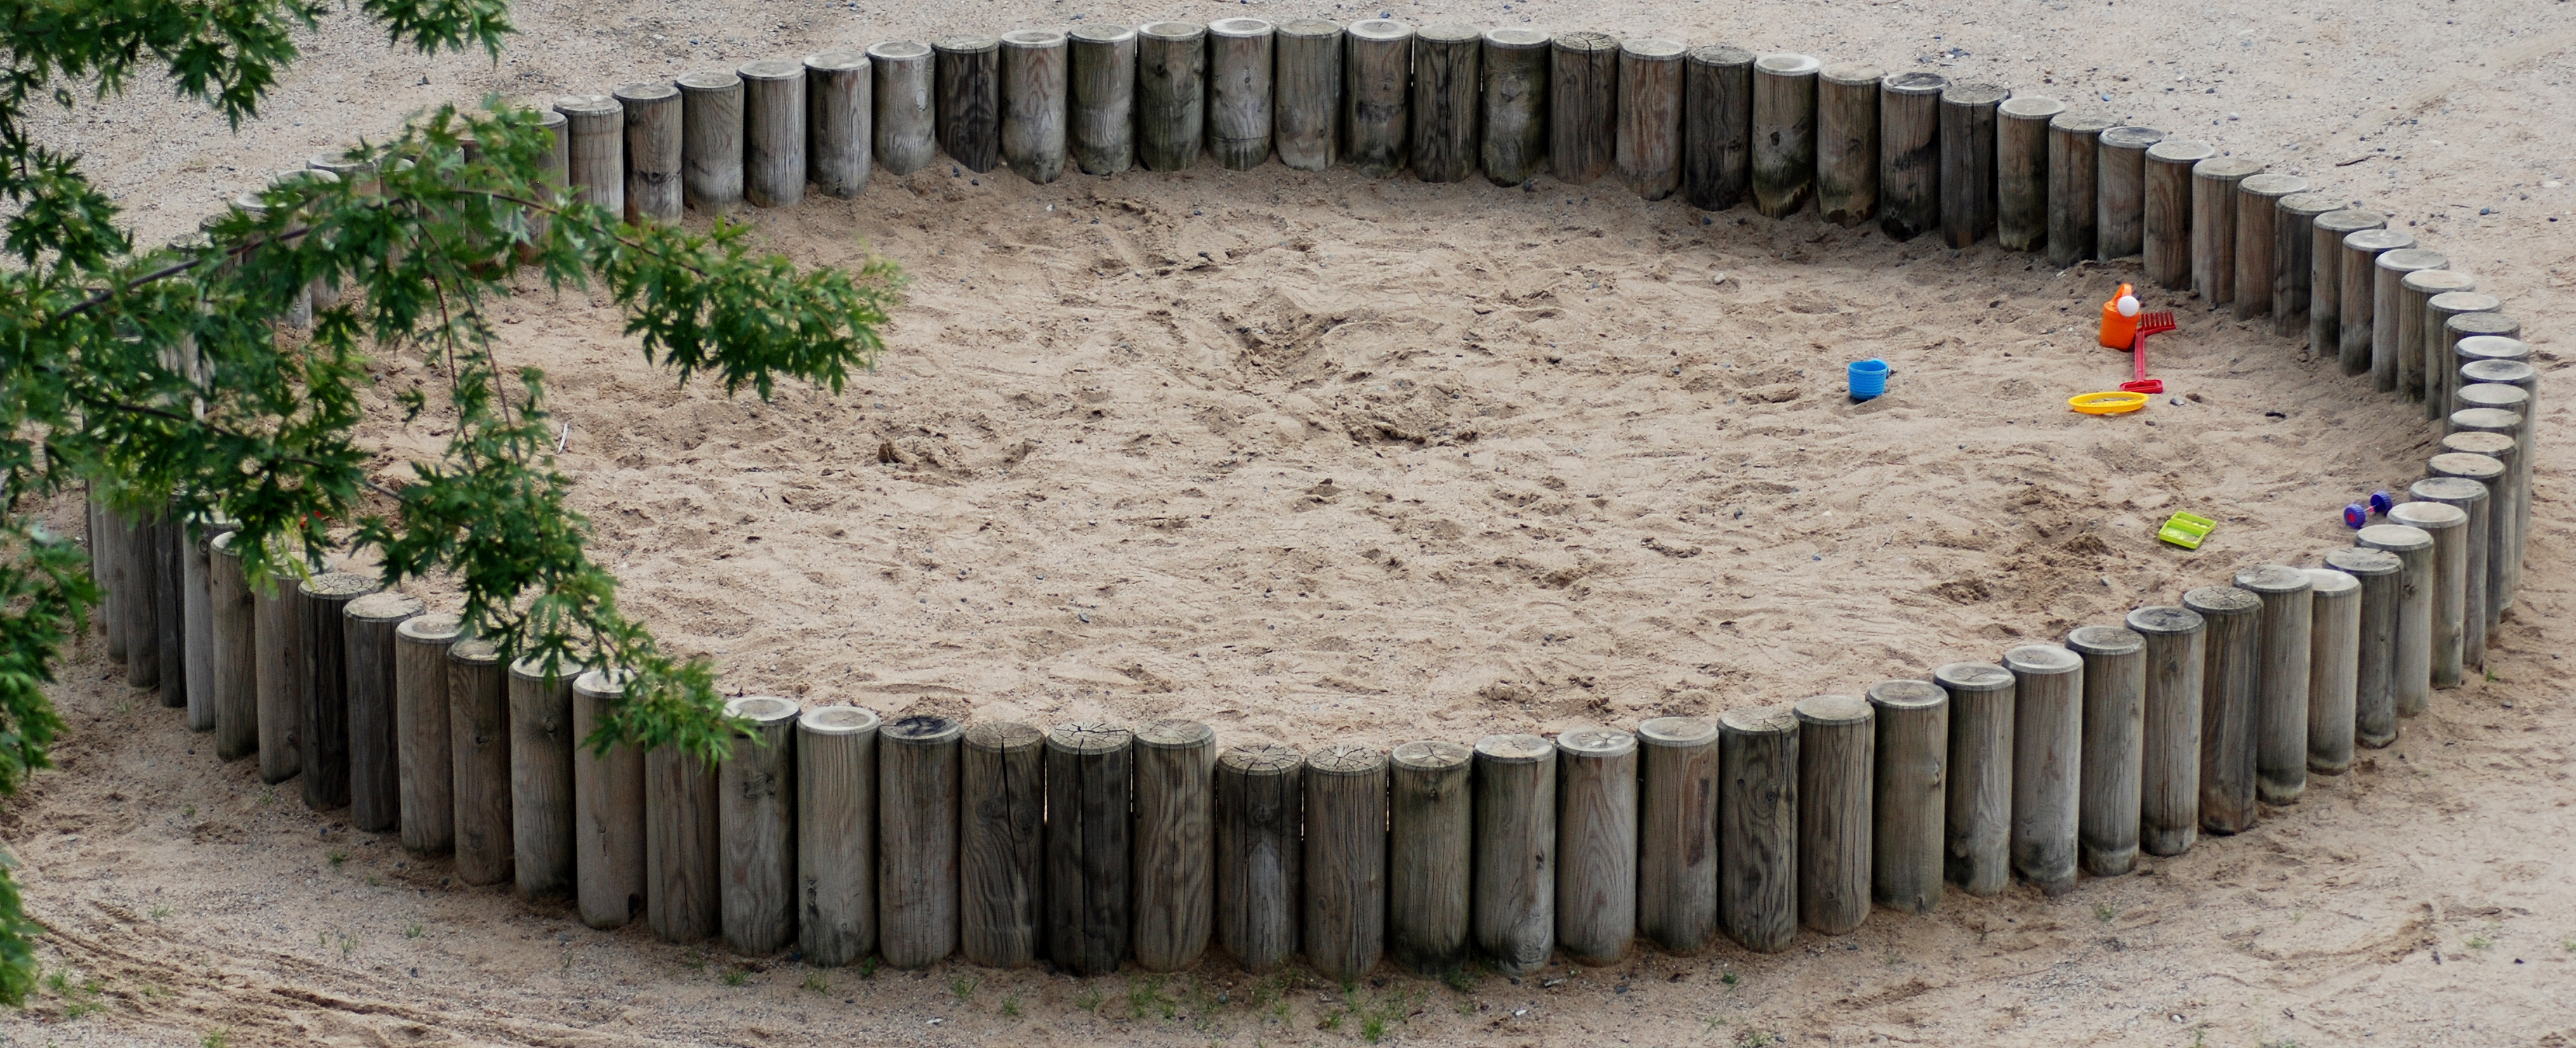
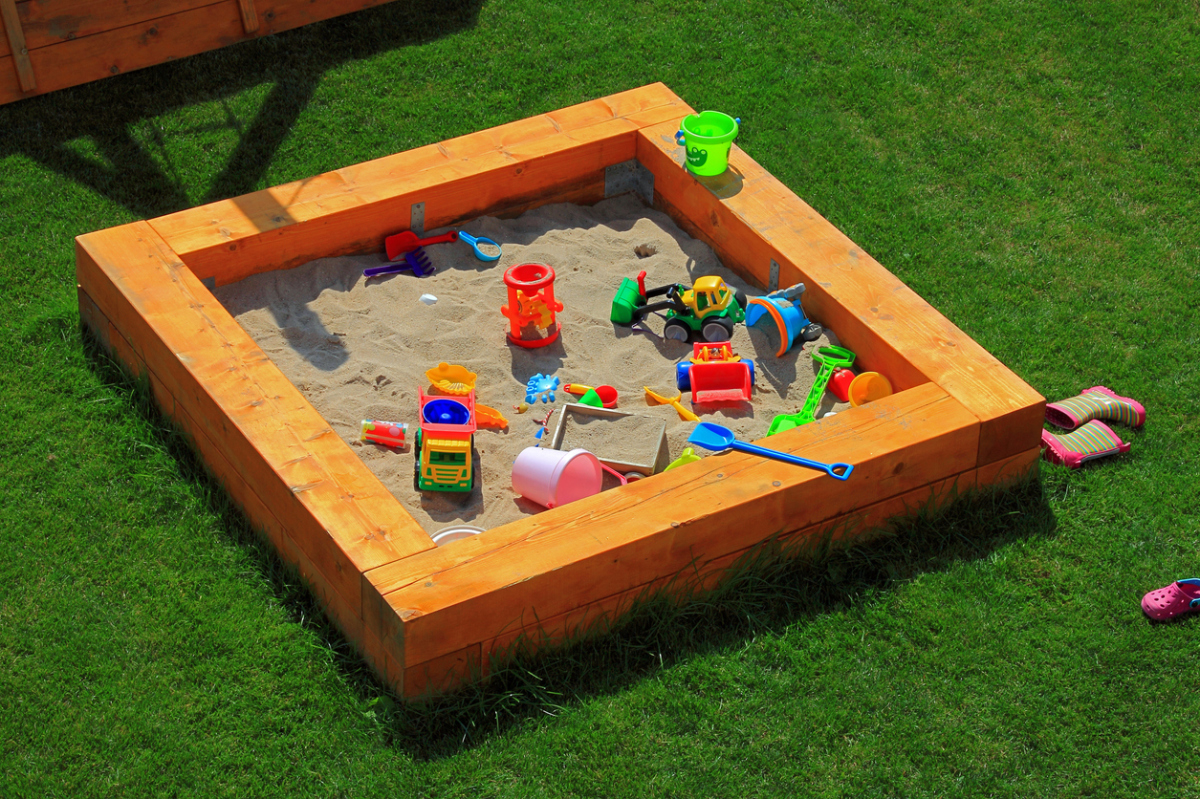
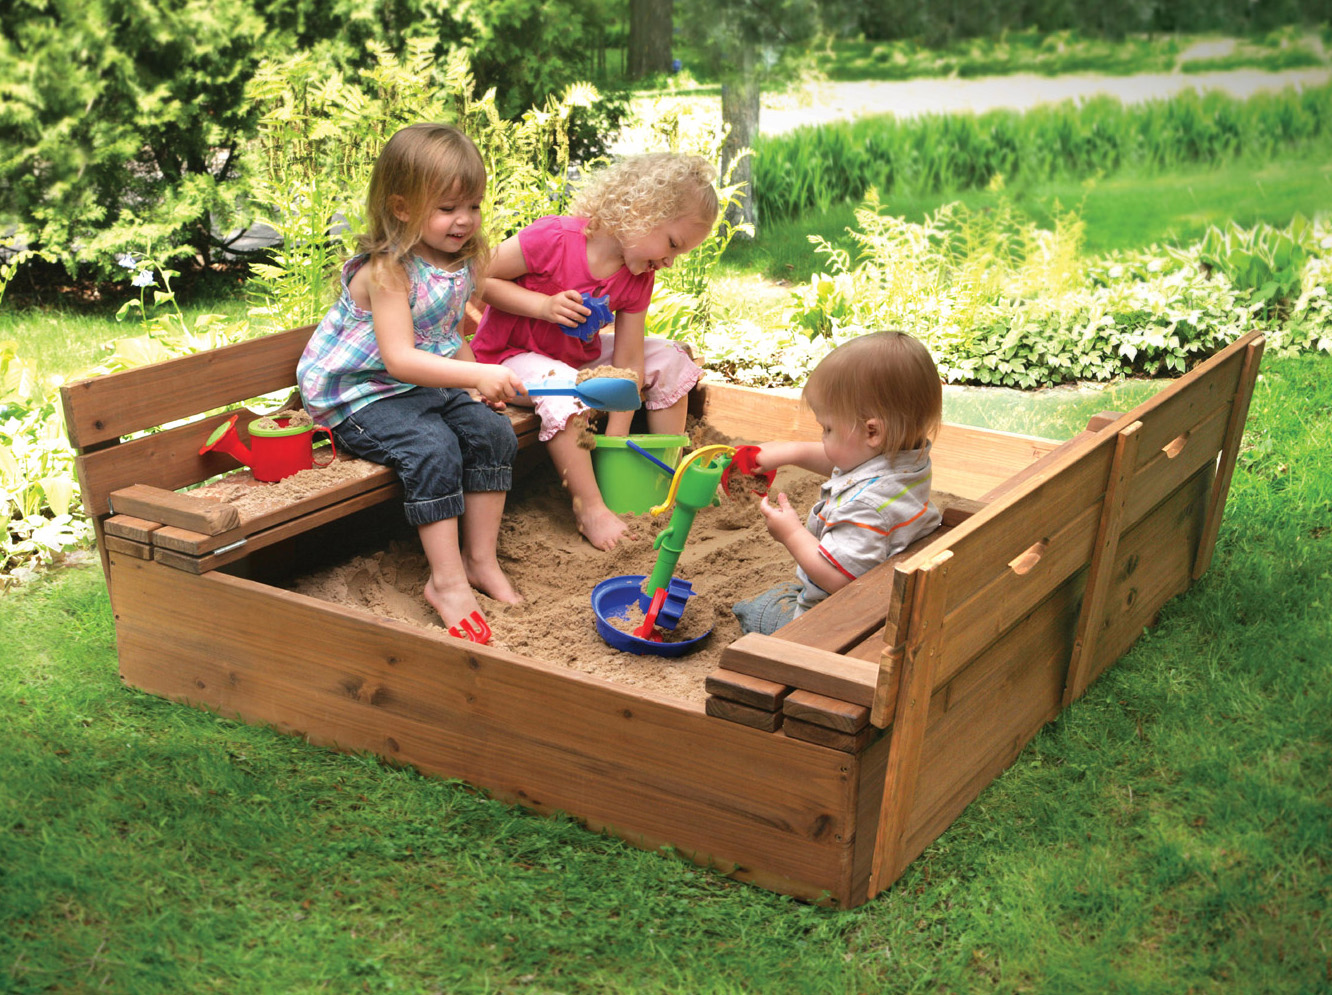
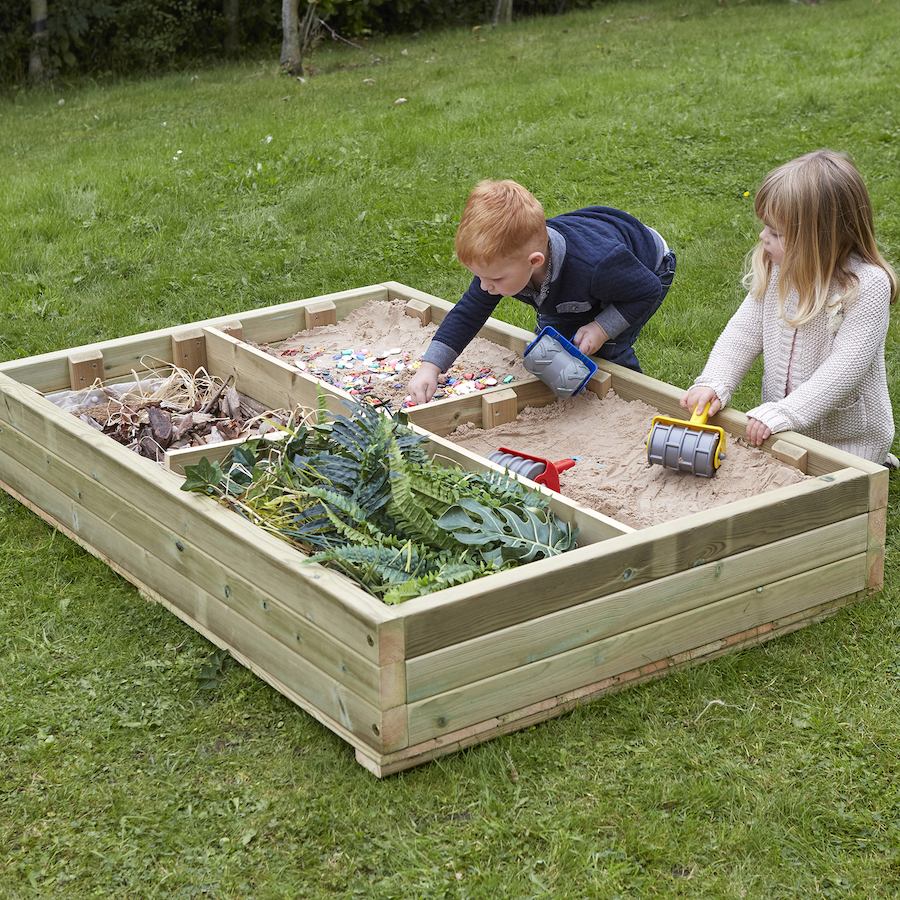
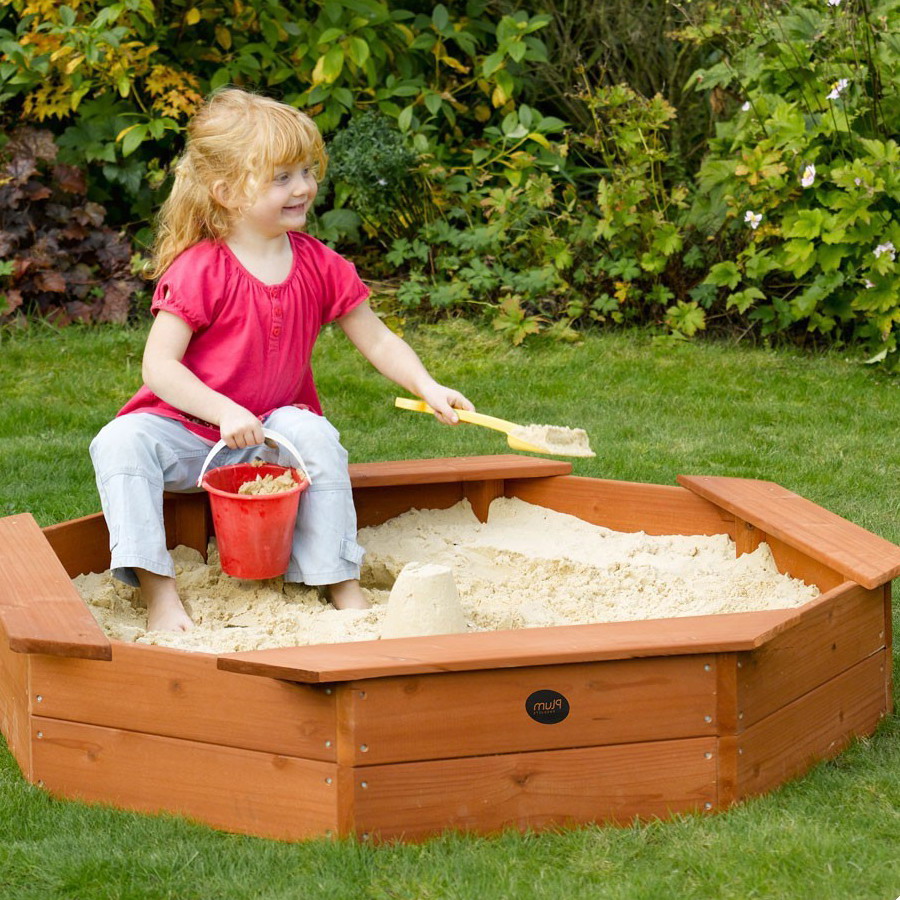
Children's sandboxes for a summer residence can be of any dimensions. Size is usually chosen based on the age and number of children.A common option is a square sandbox with sides of 1.5 m. This will be enough for a couple of children from 3 years old to play. In addition, such a compact model does not require much space on the site. For one child or two children under 3 years, a meter in diameter is enough.
The option with 1.5 meter boards is also good for its efficiency. It will take only 2 boards of 6 meters. There will be a minimum of scraps. The universal height of the sides is 2 boards (approximately 25 centimeters). This will be enough so that the sand does not spill out. And the baby will be able to climb into the sandbox on their own. The recommended sand layer is 10 to 15 cm.
Preparing the base for the sandbox
You need to start building the sandbox with preparing the place where the structure will be installed. Using a tape measure, a cord and four pegs, the perimeter of the sandbox is marked. Inside the fence, a layer of earth is removed, the depth of the pit is 25-30 cm. A removed fertile layer can be useful in the garden or garden plot. On this, you can finish the preparatory phase, but in this case, the sandbox for giving will eventually become dirty. Sand will mix with the ground and lose its original appearance. Children will not want to play in the mud.
The base, which will not allow the earth and sand to mix, can be geotextiles or agrofibre. These modern materials pass moisture well, so after rain the accumulated water will go to the ground. For the base, plywood is also used (having previously made drainage holes in the sheets) and even a plastic film. But the latter option is not so good, because water will accumulate in the structure due to tightness. The base is laid on the bottom of the pit, which is sprinkled with sand (5 cm layer).

Sandbox making
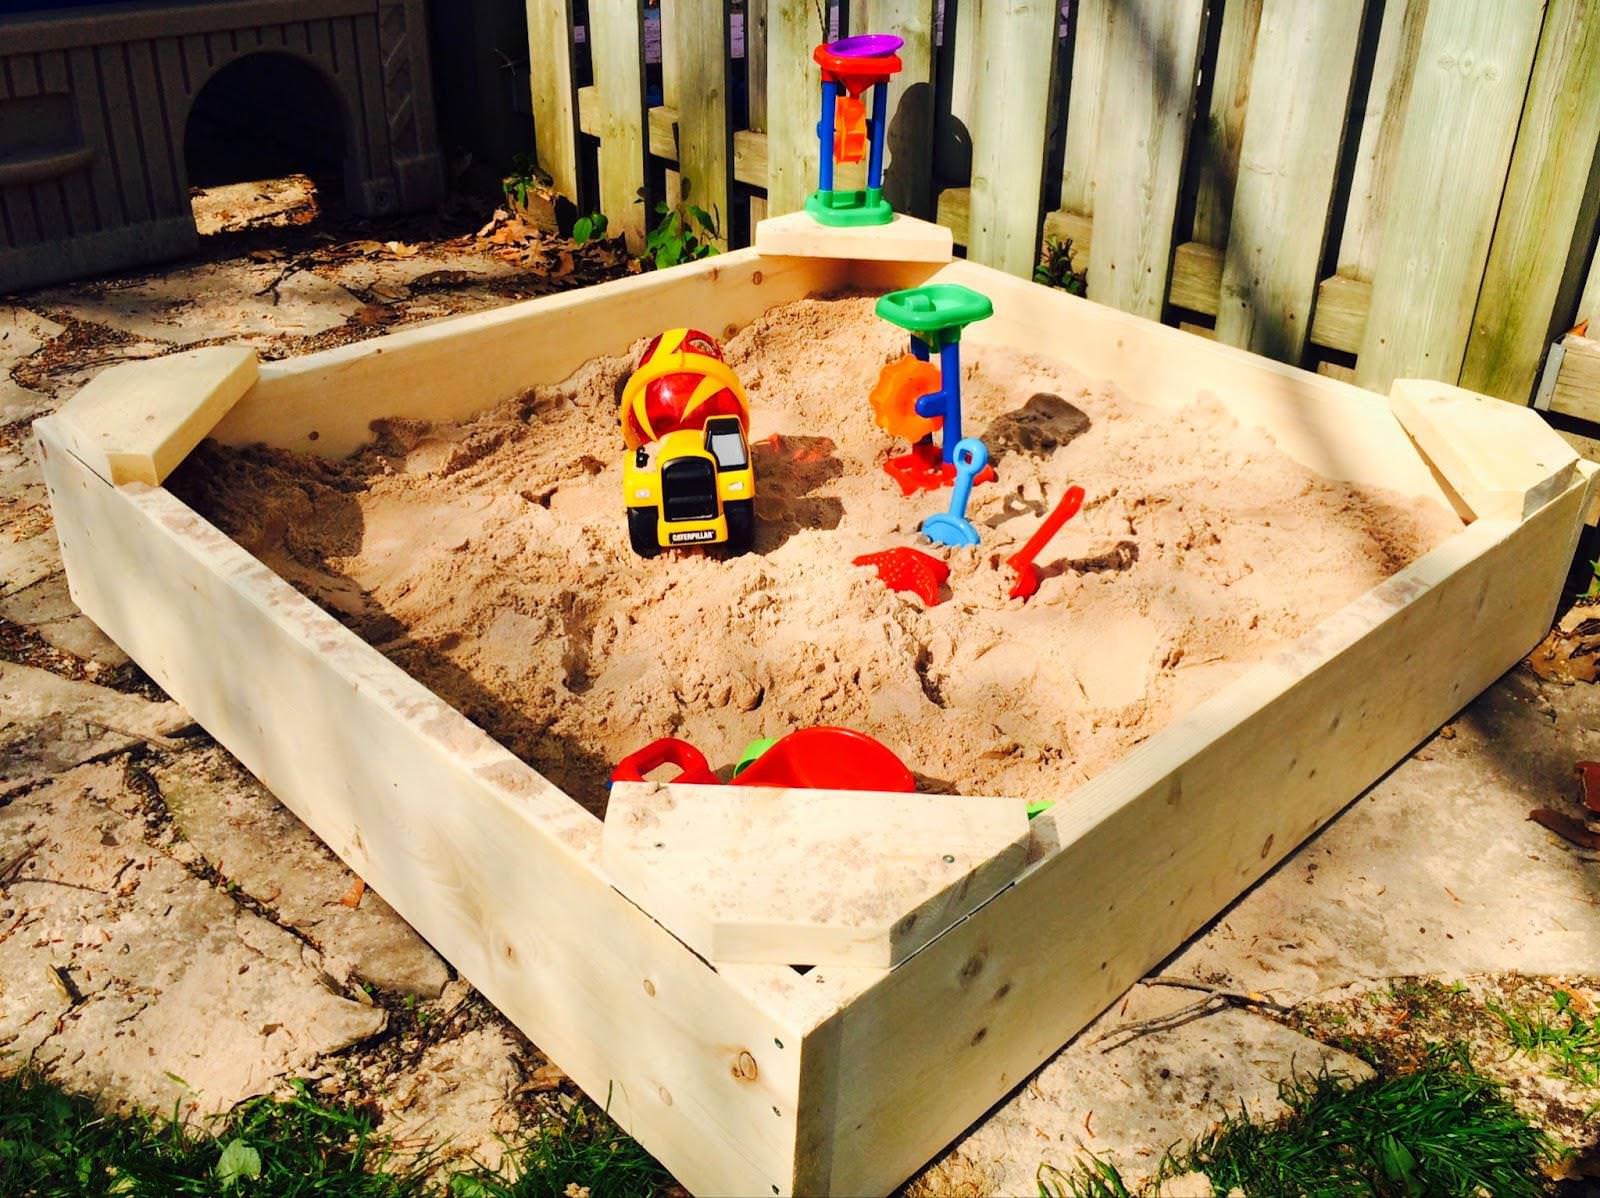
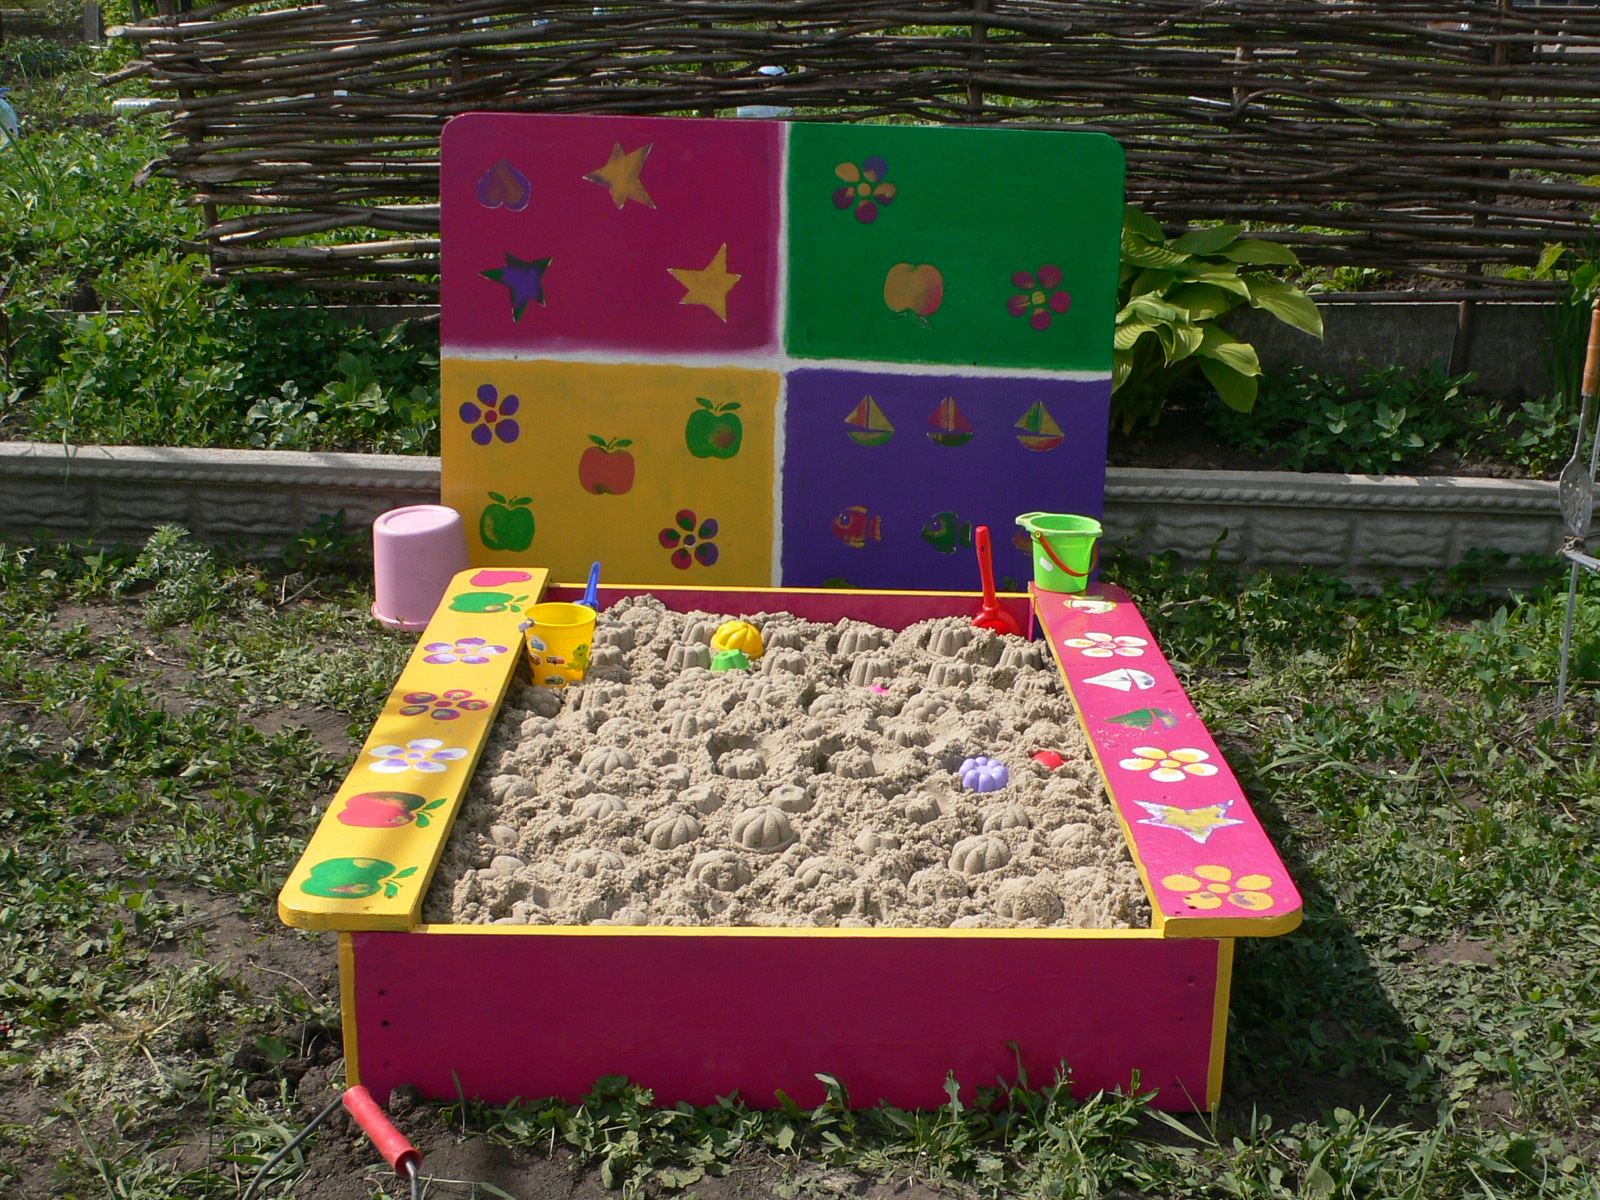
First you need to prepare the bars (size 45 × 5x5 cm). It will take 4 pieces: they will be located at the corners of the structure. 4 boards are also needed. For the average sandbox, the size of the board is 150 × 30 × 2.5 cm. If there are no wide boards, you can take some narrow ones. If you want the sandbox to be made with side-seats, then you need 4 more boards.
The surface is carefully treated so that there are no protruding chips. You don’t want to pull out splinters? You can grind the boards with a grinder or an electric drill with a special nozzle. Children's sandboxes for giving stand directly on the earth. To protect the product from decay and the formation of fungus, you need to treat the boards and bars with an antiseptic.
Now we proceed directly to the manufacture of the sandbox body. First of all, the bars are dug 15 cm into the ground at the corners of the structure. Further from the boards a single frame is made. Use screws or self-tapping screws for fastening. Nails do not fit, because the kids are sitting on the sides, and they eventually begin to diverge. The main work is done!
If desired, horizontal seats can be fixed around the perimeter. Usually, children use them as a display case for their sand masterpieces. Seat boards must also be sanded and coated with an antiseptic.
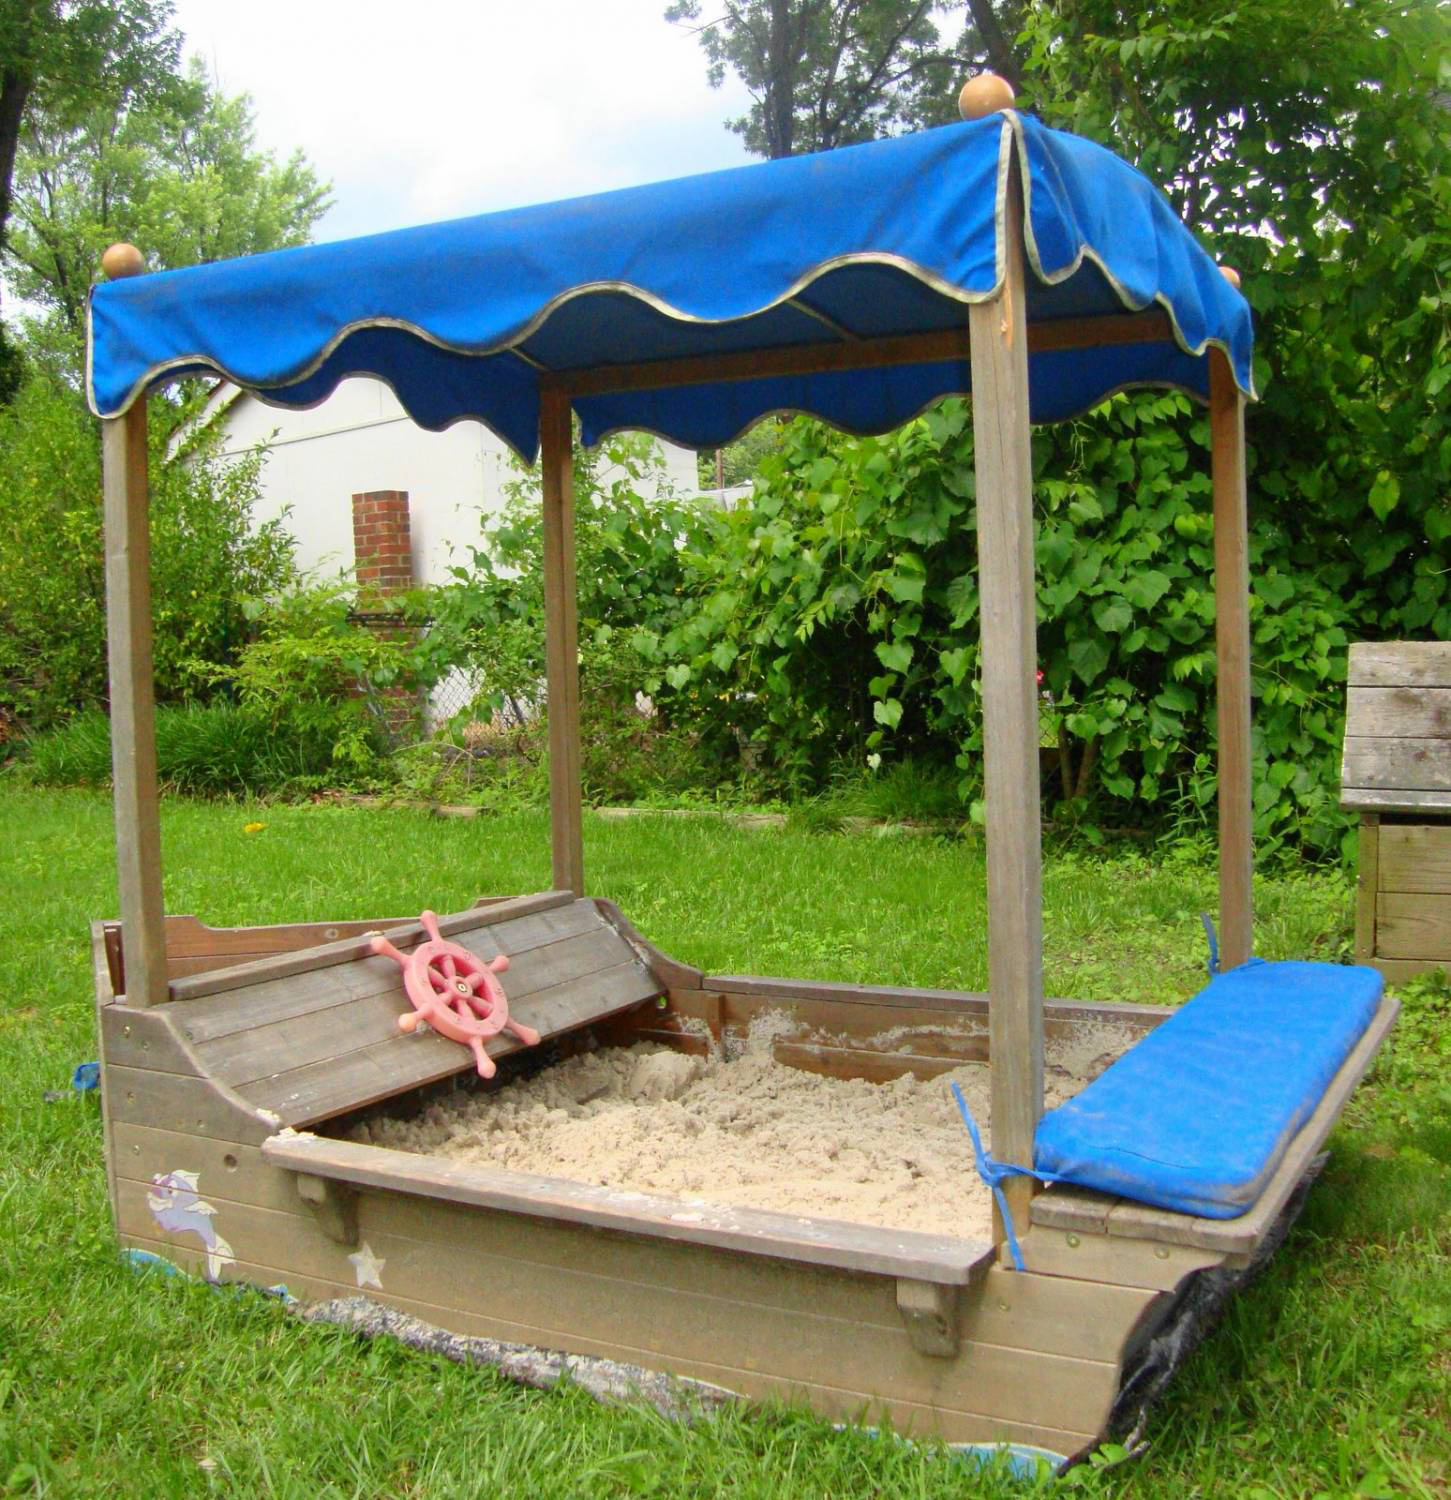
The final stage is painting. Of course, you can leave the natural color of wood, but you can also show imagination! Water repellent paint is best for painting. Get some colors and create. The surface can be painted, alternating bright colors. You can paint wooden sides with various patterns: animals, birds, numbers, letters, geometric shapes, etc. We are sure that children will help you in this exciting activity.

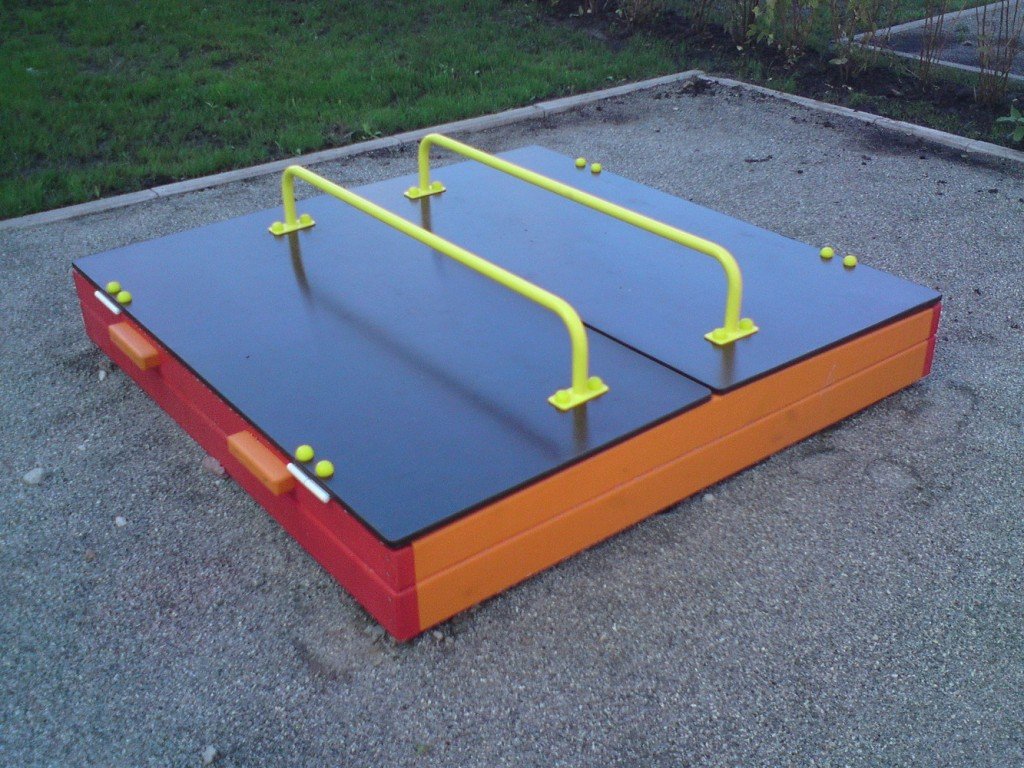
Why do I need a cover?
A sandbox lid is an attribute that is optional, but very desirable. It will protect the contents from rain. Also, you do not have to constantly remove from the sandbox with a lid foliage or "surprises" from pets, because they will not be able to use the sandbox as a toilet tray. Often door-hinges are made.A child can open them even without the help of parents. If there is no possibility or desire to build a cover, get an awning or a thick film.
Varieties of sand for the sandbox
When the sandbox for giving is ready, you need to deal with its filling. Many companies produce and sell sand, but not all bulk material is suitable for games. It is strictly forbidden to use building sand for children's sandboxes! The following types of sand are most often used on sites:
- Career;
- River;
- Quartz.
We will tell you more about each of them.
Career
By name, it is easy to guess that this species is mined in quarries. With the help of special hydromechanical equipment, the rock is destroyed. Thus, pure sand is obtained, in which there are no harmful impurities. Small grains have a reddish tint, because there is clay in the composition. Thanks to her, her sticky abilities improve. Before use, quarry sand must be washed and subjected to annealing procedure. After processing, such sand will not leave red spots on hands and clothes.
River
This type is most often used for playgrounds. River sand is extracted from natural reservoirs, where it is independently cleared of organic components. Such bulk material has been under water for a long time, so it may contain pieces of shells. To remove large particles, sand must be sieved thoroughly before use. Then heat treated to surely get rid of infections that often live in the aquatic environment. Among the presented options, river sand is the cheapest.
Quartz
Every year, quartz sand is gaining more and more popularity. It is obtained by applying polymer to quartz chips. It differs in its homogeneity and rather large sizes of grains of sand. Also this type of sand is popular due to color diversity. Absolutely safe and environmentally friendly, there are no harmful components in the composition. The disadvantages include the high cost and excessive flowability, because of which it is almost impossible to blind something. Often used for apartment mini sandboxes.
General requirements for choosing sand
When choosing sand, you need to pay attention not only to its origin. Equally important are the quality, composition, uniformity, purity, size of grains of sand.
We recommend buying sand in hardware stores. There you can definitely ask for a certificate that will indicate the quality of the product.
Cheaper you can buy bulk material in the market. If you search, then there you can find a good option. The most budgetary way to get sand to the cottage is to dig it up by the ponds yourself, and then clean and calcine.
Before buying, first study the composition of the sand. There should be no rubbish in it. Pebbles, pieces of shells, plant debris and other impurities will make the sandbox unsuitable for children. In addition, this indicates that the bulk material was not processed, which means that there may be dangerous bacteria and microorganisms in the sand.
The optimal size of grains of sand is from 1 to 2 mm. Smaller particles will fly apart even with the slightest blow of the wind. As a result, the child “eats” sand. Larger diameter options are not suitable because they are difficult to sculpt.
By following these guidelines, you can create the perfect sandbox for children.
How to care for the sand?
Buying quality sand is only half the battle. After this, you should be puzzled by the proper care. So you extend the life of the sand and ensure the safety of the child who will play with him.
If you made a children's sandbox on your own, guided by our recommendations, then the place for playing with sand at your place will be reliably fenced. So you will avoid the entry of debris from the environment, as well as reduce the rate of sand escaping.By marking the sandbox in a green area, you will reduce the amount of dust that gets into the sand if there is bare land around.
Do not forget to cover the sandbox with a lid at night, if the design provides for its presence. If there is no lid, then ordinary tarpaulin will help protect against unnecessary pollution. So the sand will not get wet if it starts to rain. In damp sand, bacteria multiply easily. And children often out of curiosity pull sand cakes in their mouths. Dirty sand can cause serious indigestion. But even strictly adhering to these requirements, be prepared for the fact that bulk material will have to be updated once a year. So a fun game will not be able to harm the health of your child.
By including imagination, you can make an original corner for games, which will be a favorite place for children in a summer cottage.