Alignment of the walls of the room
Almost always repairs in a new apartment begins with an event such as leveling the walls. Unfortunately, the geometry of their surface in most cases is far from ideal and in order to bring an apartment into an appropriate form, it is necessary first of all to solve this issue.
Wall alignment technology is no big deal. To do this, you must have minimal experience in construction and repair, as well as appropriate tools and materials. There are several methods to resolve this problem, the first is plastering and the second is plastering the wall surface. Each of the methods has both advantages and disadvantages, so it is worth considering them in more detail.
Wall plastering
The main disadvantages of plastering are the complexity of the process, the mandatory presence of skills in this area, a significant amount of dust and dirt that will occur during work. Advantages - a wall with a perfectly smooth surface, which will require repair after a sufficiently long time.
What do you need for work? The primary task is to clean the walls of the layer old plasterif it is in stock. Then the surface is washed from dust and dirt adhering to it and covered primer. This process is of great importance because the better the preparatory work is done, the easier the subsequent process will be.
Tools and materials:
- Construction mixer
- Tanks for mixing plaster mixes
- Lighthouses
- Rule size from 1.5 to 2m
- Plumb
- Building level
- Plaster mix in the required amount
Calculating the right amount of mixture is quite simple. Based on the average data, in order to apply a layer 2 cm thick on 1 square meter of the surface, you need about 16 kg of building mixture. But you should buy the material with a margin, especially if there are significant flaws. In this case, the thickness of the plaster can reach 4-5 cm.
Use of beacons
First of all, the threads are stretched horizontally on the wall, approximately at a distance of 0.5 to 3 cm from the surface, this depends on the curvature present. Fixture of threads is made on nails hammered in the corners.
Next, you can place beacons. They are easy to install. For this, the lighthouse must be slipped under the threads and fixed vertically with putty or dowels.
Lighthouses are installed at a distance from each other no less than a meter and a half. The less often these elements are installed, the easier it will be to putty. But if they are too rarely located, then the process can be quite difficult, because applying the mixture between the beacons is one technological operation and is performed in one go.
Puttying
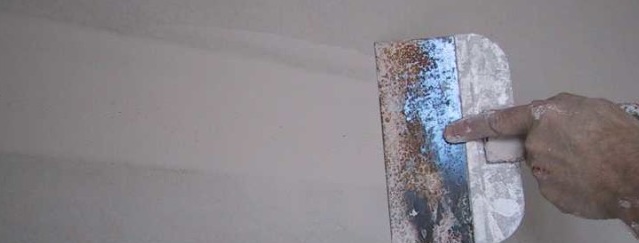
The pre-prepared mixture is applied to the surface using a special scoop, and then its leveling is carried out by the rule. Plastering is carried out in stages, between established lighthouses.
After applying a layer of plaster, let it dry. It usually takes 2 to 4 days depending on the room temperature.
When drying, it is undesirable to open windows to avoid drafts. It is also not recommended to perform work in the winter in a room that is not heated. Recommended temperature for wall plastering is +10 degrees Celsius and above.
Aligning the base surface of the wall with plasterboard sheets
Working with drywall is less complicated than plastering. The main advantages of this approach are the small complexity of the process, a minimum of dirt and dust, and a low weight of materials.The disadvantage is that due to the need to install the frame and a certain thickness of drywall sheets, there is a decrease in the total area of the room. So this method is not recommended for use in small rooms.
Materials and Tools
- Building rule
- Screwdriver
- Gypsum plasterboard sheets
- Screws
- Support profile (60mm)
- Guide profile (27mm)
Preparatory work. First you need to make a frame from profiles. For this, preliminary marking is made on the ceiling and floor, on which the profiles will be placed. It is necessary to carefully check the location of the marking lines relative to each other. For this, it is optimal to use a plumb line. After marking and checking, the guide profiles are fastened to the surface using self-tapping screws.
Every 40-50 cm in the wall in a vertical line, again according to preliminary marking, the holes that are necessary for installing the dowels are drilled. Next, a supporting profile is installed, the fastening of which is carried out to dowels, as well as to the upper and lower guide profiles.
Before fixing the frame elements, it is necessary to check its geometry and the correct location of all its components relative to each other.
The space between the profiles can be used to warm the room. It is filled with mineral wool and in addition to obtaining a flat surface, the heat-saving characteristics of the room can be significantly improved.
Installation of drywall sheets. Before starting this operation, it is necessary to make marks on the floor by which the location of the profiles will be determined. Drywall sheet is applied to the profile and mounted on it using self-tapping screws. Fasteners should be located at least 15 cm from each other. When performing installation work, it is worthwhile to ensure that the screw head is on the same plane with the surface of the sheet or below the surface by no more than 0.5 mm.
Finishing work. After installing the drywall sheets, the joints are putty. To do this, use a special gypsum-based building mixture. It is convenient for this event due to the increased level of plasticity.
To prevent cracking at the joints, a mesh sticker is preliminarily made, and a putty layer is already applied to it.
After that you can produce wallpapering the wall or training them for painting.

