
Halloween pumpkin: do-it-yourself fun horror story
At the end of October, a meeting of the recently acquired holiday - Halloween is coming to us in our latitudes. You can relate to this event in different ways, but the questions of young household members “How will we celebrate the worst night of the year?” Will make you understand that the event is inevitable, and it’s better to prepare for it, and at the same time to attract especially active curious people to creatively useful to work. Run to the mall? But commercial proposals for decorating a monster event are not always encouraging with price, originality and quality of execution.

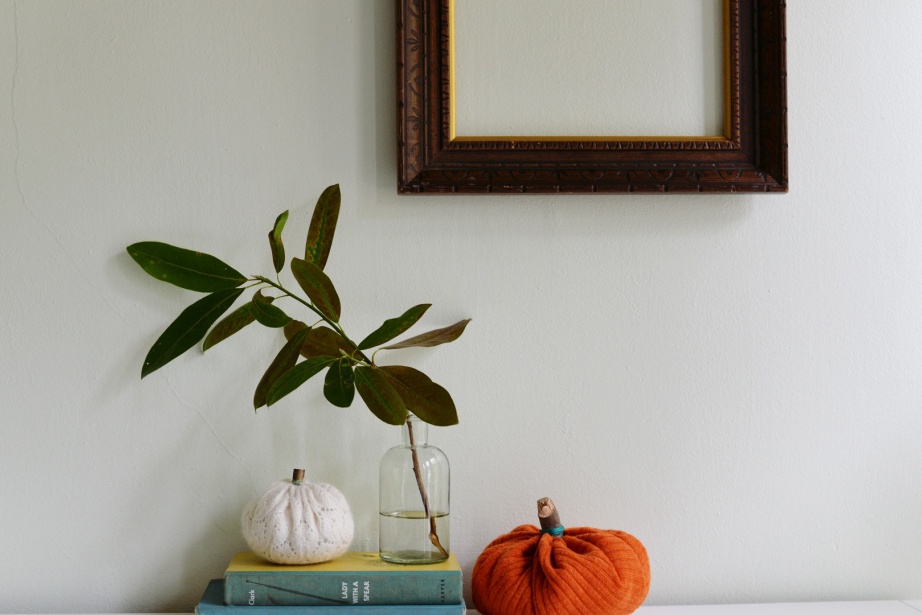
You planned on the eve of the New Year, according to the Italian tradition, to get rid of old things, just throwing them on the street? And do not rush to get rid of valuable Halloween raw materials - knitted sweaters and blouses! We have wonderful instructions on how to turn them into funny soft pumpkins of various shapes, sizes, colors and textures.
Bonus - you give new life to your outdated clothes or the one from which your children grew up long ago, you get great joy from joint family needlework, you get multifunctional decorative accessories.
What is needed

- old sweaters (any, but preferably, of course, bright cheerful colors will do)
- tailor scissors
- sewing threads (preferably thicker)
- needles (for convenience - with a big eye)
- filler (packing)
- several pieces of wood from branches of trees of different diameters and lengths
What to do with all this?
1. Cut (cut) the stick into small pieces (the size will depend on which pumpkin you plan to “grow” - a giantella or a mini-version. The trees will serve as the basis for the construction and means of transporting the product from place to place.

2. Cut oval blanks from the fabric and proceed to the formation of the vegetable. We don’t need to look for compasses throughout the house, we don’t need the correct geometric figure. Where did you see a perfectly round pumpkin?

3. Now it’s the turn of the filler. It needs to be made springy and light. Therefore, remember it in your hands, fluff, give the shape of a ball. Place the “stuffing” on the fabric.
4. We collect the ends of the fabric from the sides and proceed to sewing. Do not forget to make a knot at the end of the thread? Well, if it is green, as a hint of a plant stem or leaf. We make double stitches for reliability.

5. Now we begin to sew, moving to the center to connect all ends of the fabric in the upper part. Leave a small hole for the wooden workpiece.
6. Set the “tail” of the pumpkin, stitch it tightly around the stick, and then several times wrap the core with thread and firmly fix it.
7. We cut off everything superfluous, admire the result and proceed to the manufacture of the next copy.
8. We arrange a multi-colored soft garden around the house and wait for the dark moment of the horror holiday to come.


