Do-it-yourself 3D floors
Content
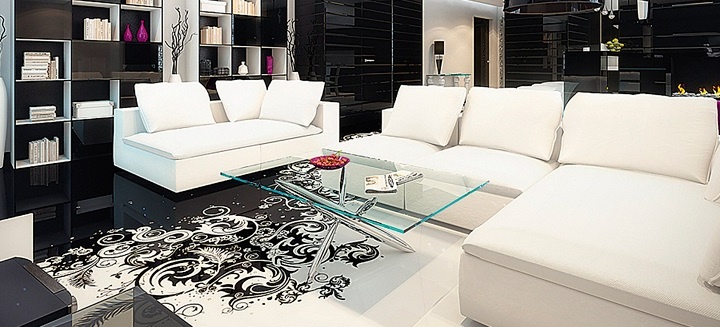
Probably, many have already seen unique “live” floor coverings in shopping centers or boutiques, which are called bulk 3D floors. Of course, somewhere having seen such an unusual and beautiful coating, I want to immediately have the same or similar at home. This desire is understandable, because the three-dimensional floor simply amazes the human imagination.
Unfortunately, arranging such a coating today is far from affordable for everyone, because such a “pleasure” is by no means cheap. Of course, the technology of creating such a sex requires certain knowledge and experience. It is better, of course, that professionals arrange it. However, if the landlord wants to have such a truly unique and beautiful cover at home, but he is limited in means, then you should not despair. Such floor can be created completely independently, at least initial construction skills are required, and, of course, special tools and materials.
Immediately it is worth noting that the arrangement of such an innovative coating is not an easy process, rather laborious and multi-stage. It must be treated with all responsibility, since the slightest deviation from technology can lead to a variety of floor defects that will not be easy to fix, and sometimes even simply impossible to do.
3D flooring tools and materials
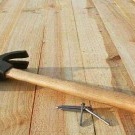
The following tools and materials will be required:
- aeration needle roller - needed to “roll” the coating to remove bubbles from the polymer;
- squeegee and putty knife (notched) - will be required for uniform distribution of the polymer;
- large capacity - for mixing the mass;
- construction mixer or drill with a special nozzle - for thorough mixing of components;
- kraskostoy - special shoes with spikes, so as not to damage the coating;
- vacuum cleaner - to remove dust from the base;
- primer - to cover the base;
- epoxy two-component or polyurethane one-component composition;
- protective equipment (gloves, goggles, respirator);
- image (drawing, photo canvas) - optional, you can add more voluminous objects (it can be pebbles, shells, beads, and so on);
- roller - to remove bubbles when laying the photo canvas.
Where to order 3D drawing
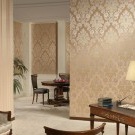
Of course, the whole "lively" 3D effect on the floor gives the image. The usual picture will not work. In order for the floor to turn out to be voluminous, a specially created drawing is required. You can order such an image in a specialized studio that is engaged in the development and printing of such photo paintings on large-format printers. Such studios employ specialists and designers who will advise and optimally correctly help you choose the image for a particular room. You can choose both a finished picture and order an individual one. The first, of course, will cost less.
Before deciding on the image, you should carefully weigh everything, since such a coating is not done for one year, so it is very important that it is constantly under your feet, because the picture can quickly get bored and it’s at the owner of the house over time, it can simply cause disgust.
After the drawing is selected and printed, you can, in fact, begin to create a bulk 3D coating.
Stage one: preparing the foundation
The creation of a “living” coating should begin with the preparation of the base. It is important to learn one important thing - the better it is prepared, the better the coating will turn out and the longer it will last. Filling of the polymer can be carried out practically on any clean, free of spots, dust and dirt base.Otherwise, in places of pollution, the coating can simply peel off in the future. Therefore, you should very carefully clean the base floor from any kind of contamination.
It is worth noting that it is best to fill the polymer mass on a concrete base or on a cement-sand screed, but only high strength. The floor should be absolutely even, so all bumps, bumps, notches should be eliminated. It will not be superfluous to grind the concrete floor and treat it with special impregnation. Grinding is done with a grinder, but if one is not available, then the so-called “grinder” with a diamond bowl can be used.
If the floor is laid with ceramic tiles, then it should be thoroughly washed and degreased, and in places where the material is poorly fixed or damaged, repair.
If the concrete base is flat and not damaged anywhere, it is definitely worth cleaning it with a household vacuum cleaner - dust when arranging a polymer 3D floor is simply unacceptable. After that, a primer is applied to it and maintained until it dries completely (at least a day).
The second stage: placing a photo canvas
The canvas can be placed both on the entire floor area, and only on its separate part, for example, in the middle. It all depends on the option chosen. The photo canvas should not have bubbles, so they must be removed with a roller, dispersing from the center to the edges.
It is very important that the canvas lies as evenly as possible - the quality of the coating depends on this. This is a very crucial moment, requiring experience. If there is any doubt that this will not work out on your own, it is better to contact an advertising agency - qualified installers can easily cope with this.
The third stage: preparation of the polymer mass for pouring 3D floor
The polymer mixture should be mixed in a large container with a hardener. All proportions indicated on the packaging should be strictly observed. When buying a composition, it is best to consult a specialist in the store who will tell you exactly what material is suitable for filling a 3D floor. The components are mixed only with a construction mixer or drill with a special nozzle - manual mixing is unacceptable! It is necessary to mix as carefully as possible so that no lumps remain in the resulting mass.
It should be remembered that the polymer mass will begin to harden literally in half an hour, so you need to immediately begin filling the floor after mixing it.
The fourth stage: filling 3D floor
The resulting composition is poured onto the floor and leveled with a squeegee and a notched trowel. The result should be a uniform layer, with a thickness of two to four millimeters. After that, it is necessary to carefully walk along the surface with a needle roller until all, even small bubbles, completely disappear. The needles of the tool should not be too long, as they can ruin the photo canvas. The length of the needles must be paid attention to when buying a roller. Before pouring the floor with polymer mass, it is imperative to wear protective equipment - a respirator, glasses and gloves. You need to move around the room during all work in special shoes - kraskostah. Until the polymer has frozen, it is possible to "immerse" any decorative objects (shells, pebbles, and so on) into it.