Laying paving slabs
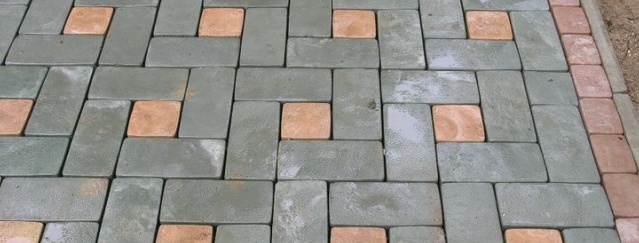
The laying of paving slabs over the past few decades has received the widest distribution. Tiles are used not only by road and utility services, decorating cities, but also many landscape designers often resort to this interesting material, decorating the garden and, in particular, its paths.
However, despite the beauty being created, the laying of paving slabs is quite troublesome, which has its own characteristics:
The bright and saturated color of the tile suggests that it should contain expensive pigments and that is why it can not be cheap. Also, special additives are added to the composition of the tile, as a result of which the tile shines. In this case, exactly the same brilliance can be achieved by adding water. To check, you need to tap the tile on the tile. Voiced sound - high-quality tile, deaf vice versa. It is also necessary to ensure that the tile is in one batch, because paving slabs of different lots will differ in their size and color. Begin arranging the track with the choice of material. At the same time, it is worth knowing that paving slabs are of only two types - either vibro-painted or vibro-cast. The first view is intended for the roads on which cars will move, and the second view is suitable for walkways.
Laying paving slabs:
- First, you need to deal with the drainage of water, which should go away from the building and in this direction it is necessary to make a small, 5%, slope.
- Then we proceed to marking the future track. To do this, it is enough to drive the pegs along the contour of the track and connect them with twine, if necessary, the location of the track can be changed.
- At the next stage, we prepare the base, for which we dig out the track profile to a depth of 28 cm. The soil at the bottom of the track is carefully rammed, if necessary, it can be watered.
- Then crushed stone is poured on top and its thickness in a tamped state should be 15 cm.
- The next layer is 10 cm of sand. To separate crushed stone and sand, geotextiles can be used. Sand it is necessary to level and fill with water, so that there are puddles on it.
- As soon as the puddles dry, we begin to prepare a pillow, which consists of 8 parts of sand and one part of M500 cement. The height of this layer is 3 cm. On this layer, accordingly, the tile lies in the direction from itself. At the same time, attention must be paid to each tile and if it is uneven, add a little sand and a tambour, periodically checking itself with a level.
- Having finished laying the tiles, we proceed to the vibratory rammer. There is nothing complicated in this, the main thing is to ensure that the tile does not begin to diverge to the sides.
- After vibratory ramming with a hammer and level, we align the pronounced irregularities and fill everything with sand. Sand ramming, thereby filling the seams, sweep away the excess with a broom. We fill the almost finished track with water through the diffuser and, if necessary, tamp the seams again and wash everything again.
The paving slabs are ready and the next day you can safely walk on it.


