

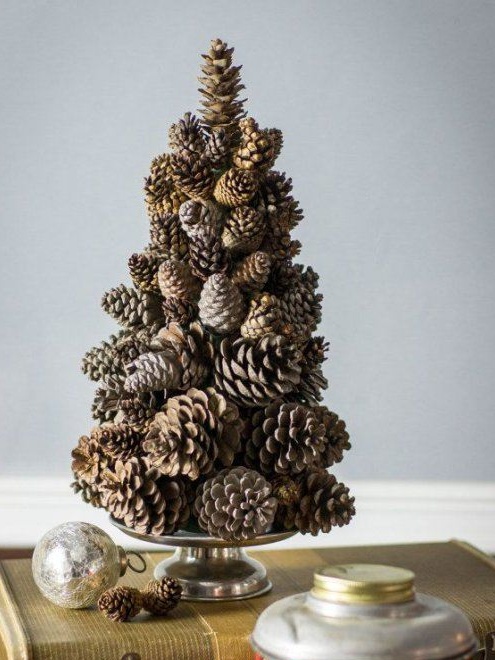
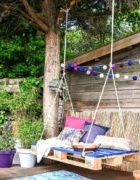
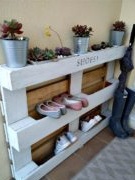
DIY home ideas. Simple and functional home ideas
There were several free hours, and you do not know what to do with yourself? It's time to try to make interesting and functional home items with your own hands. To do this, you will not need too expensive materials. Moreover, you can even use what is already in your house. We have prepared great examples and not complicated master classes that everyone can bring to life.
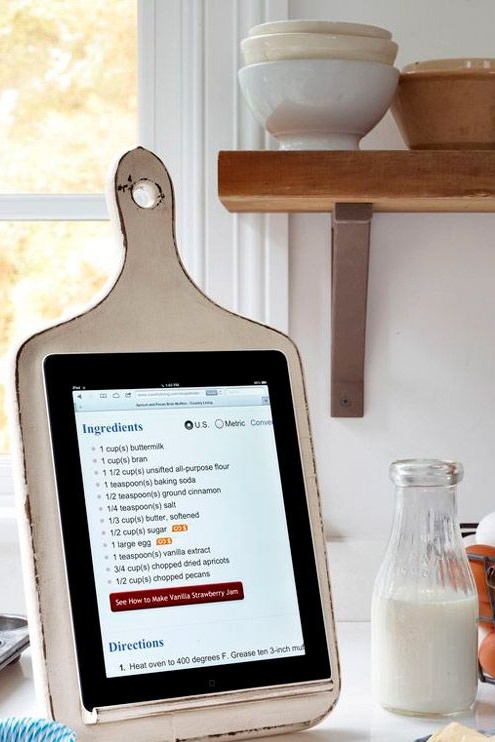
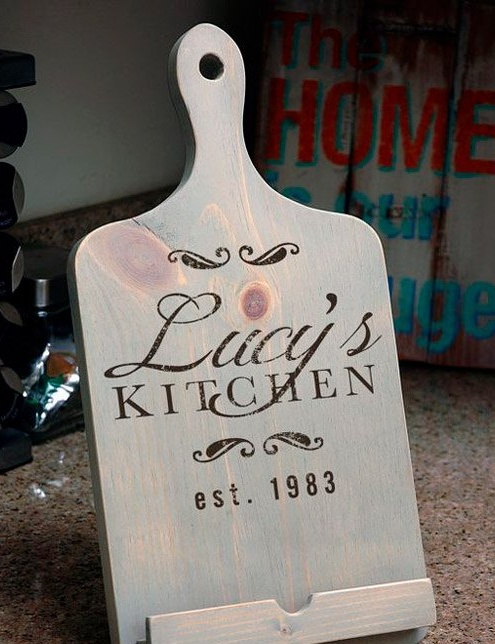
Tablet stand
Those who like to cook and invent new dishes just can not do without a stand for the tablet. After all, every now and then you need to check the ingredients of the recipe on the Internet or turn on yourself some fun music to cheer you up. If the classic coasters are very simple and boring, then we propose to make a more original option for the kitchen.
To work, you will need the following:
- cutting board;
- wooden plank;
- wooden block;
- saw;
- paint suitable color;
- brush;
- wood glue;
- sandpaper.
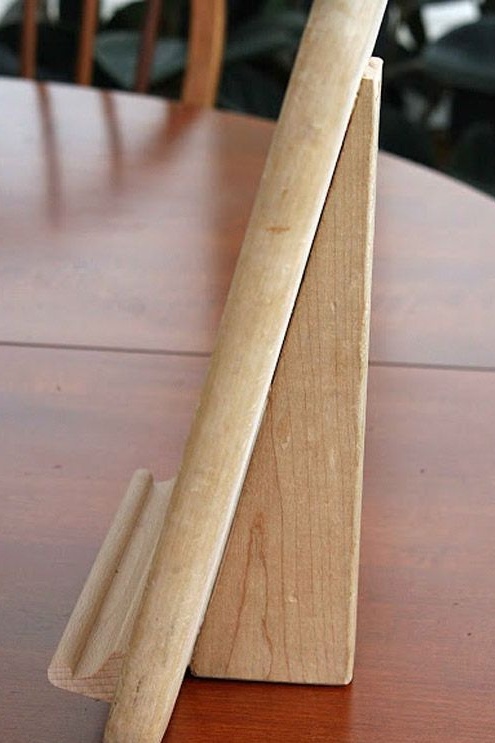
We shorten the bar to the desired size with a saw. We process the entire surface with sandpaper. This will help to remove the hooks and make the workpiece smoother.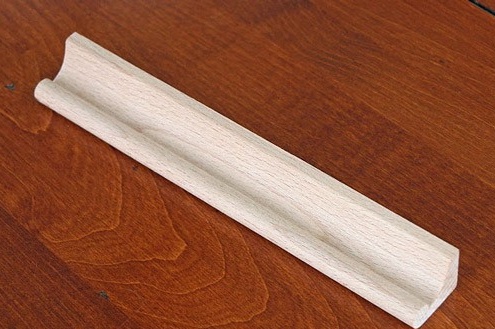
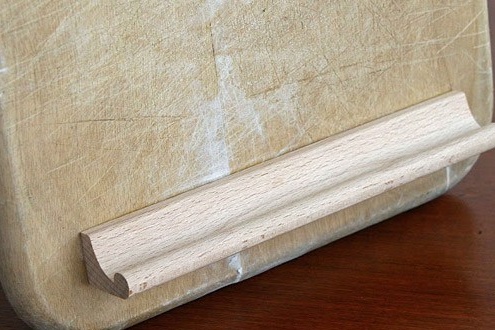
Glue the prepared bar to the cutting board.
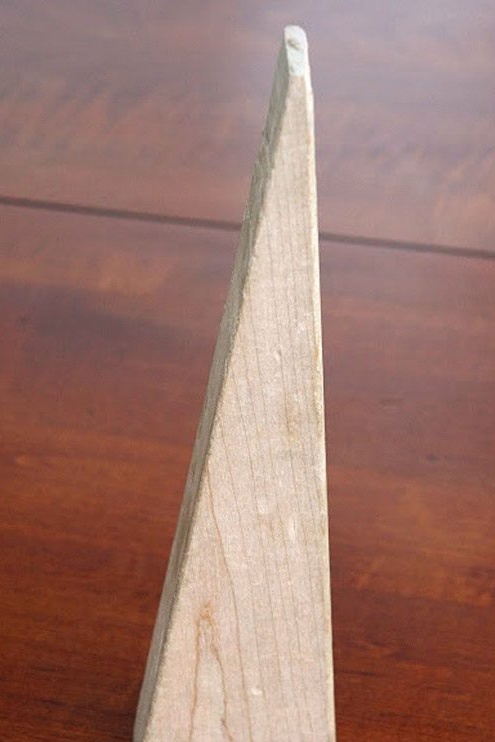
From the bar, cut out a triangle, as shown in the photo. It is he who will be the support for the stand. Glue the blank to the board.
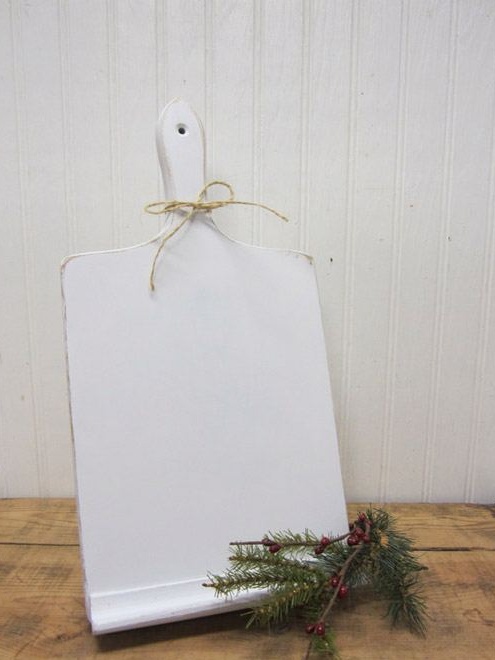
We paint the entire surface of the stand with a paint of a suitable color style and leave it to dry completely.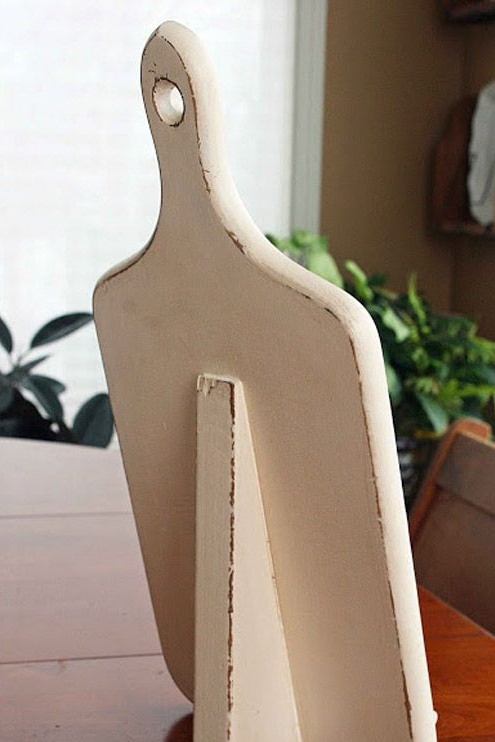
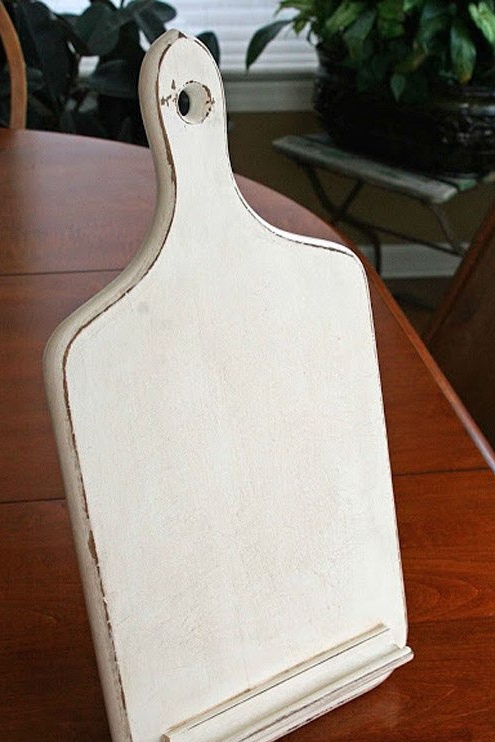
If desired, you can decorate the handle of the stand with twine or apply a thematic pattern. It all depends on your imagination.
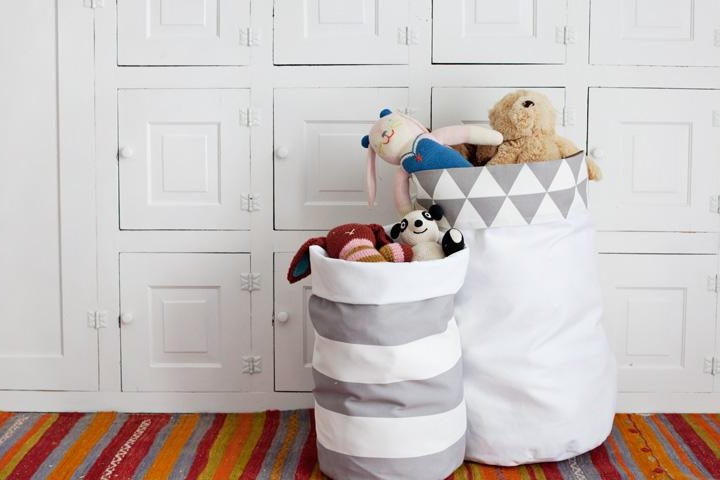
Toy basket
Those who have children understand that the house must have special containers for storing toys. Therefore, we offer to sew original baskets with your own hands.
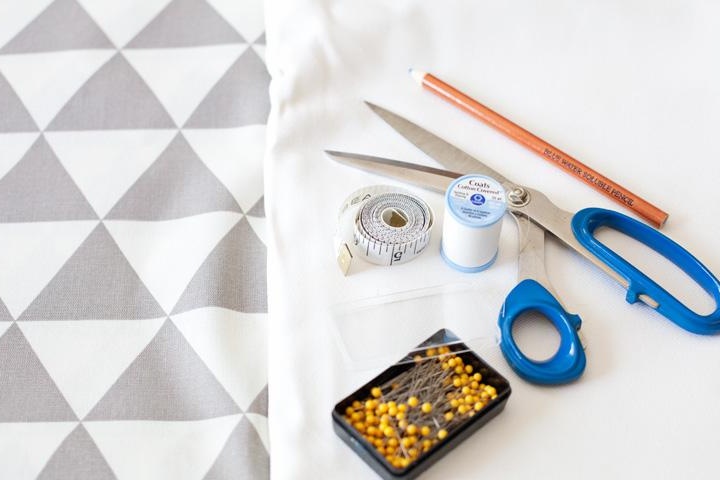
We will need:
- dense fabric;
- scissors;
- centimeter;
- a thread;
- sewing machine;
- needle;
- pins
- iron;
- large plate or lid;
- pencil.
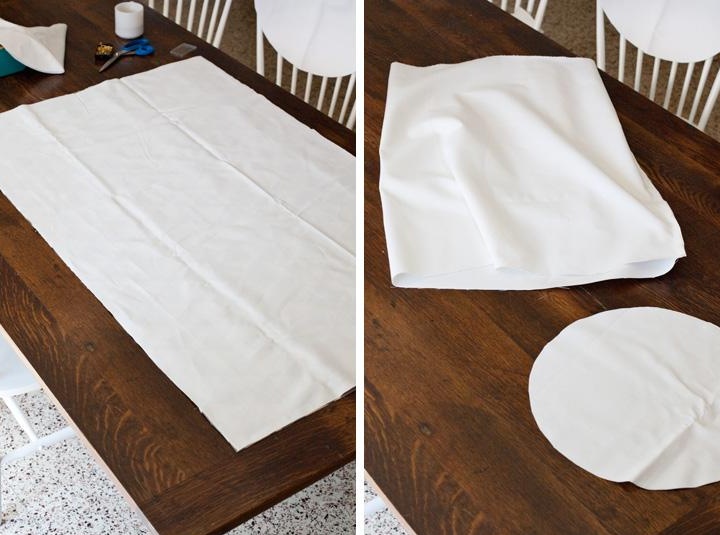
On the working surface we put the fabric with the wrong side up. Place a plate or a lid on top. Circle it with a pencil and cut it out according to the markup.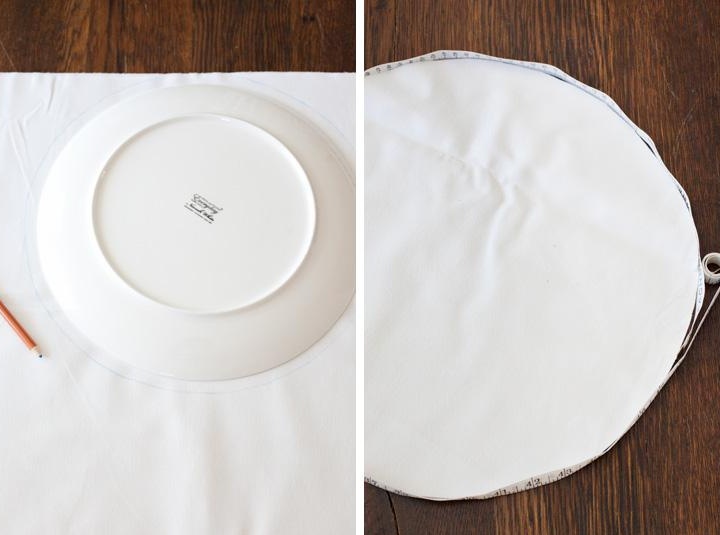
On the surface we put a piece of fabric folded in half. The edges are interconnected with pins.
We attach the bottom of the basket to the workpiece using pins.
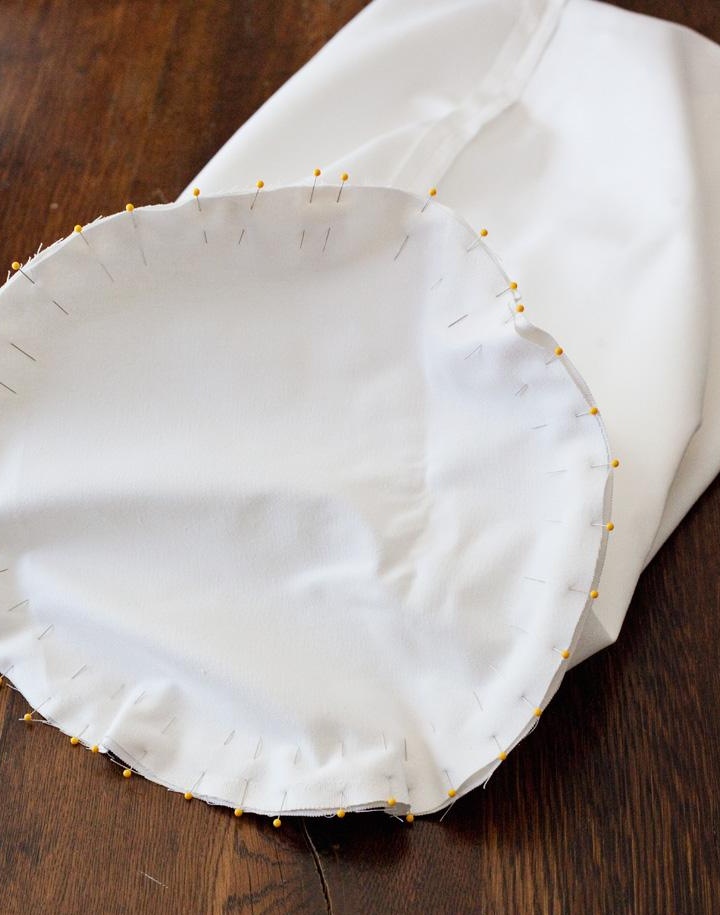
Sew the edge around the entire circumference. To make the basket a little denser, we recommend making another cover according to the same principle.
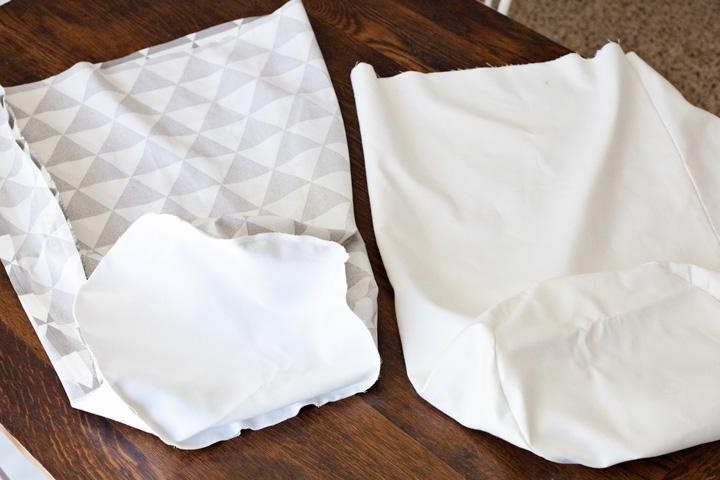
We turn the outer cover outward, and the inner inside. We insert them into each other and fix the edges with pins. At this stage, it is better to iron the workpiece so that the fabric does not bristle.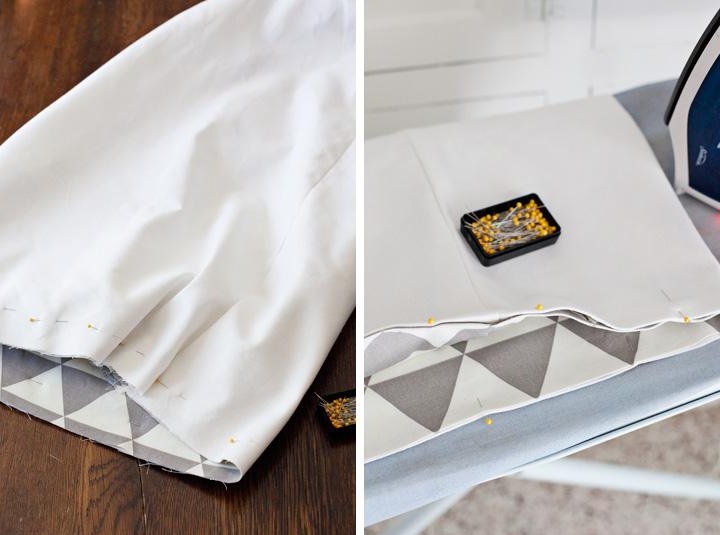
Sew the edge and slightly wrap the edge, as shown in the photo.
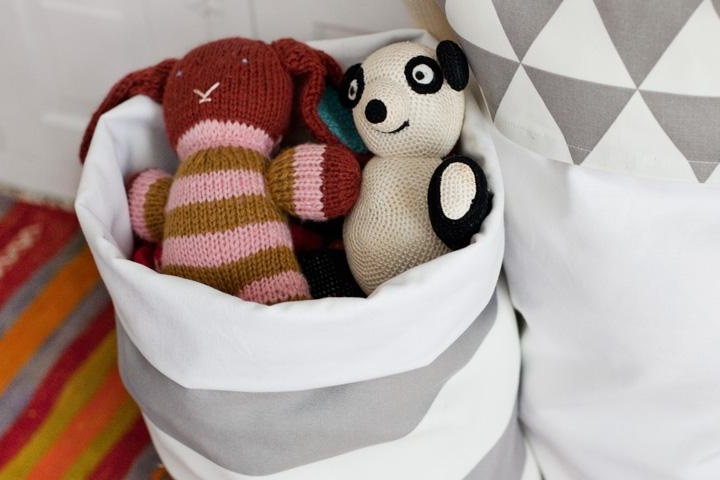
Such products by themselves look quite attractive, so they can be placed in a children's room, like decorative objects.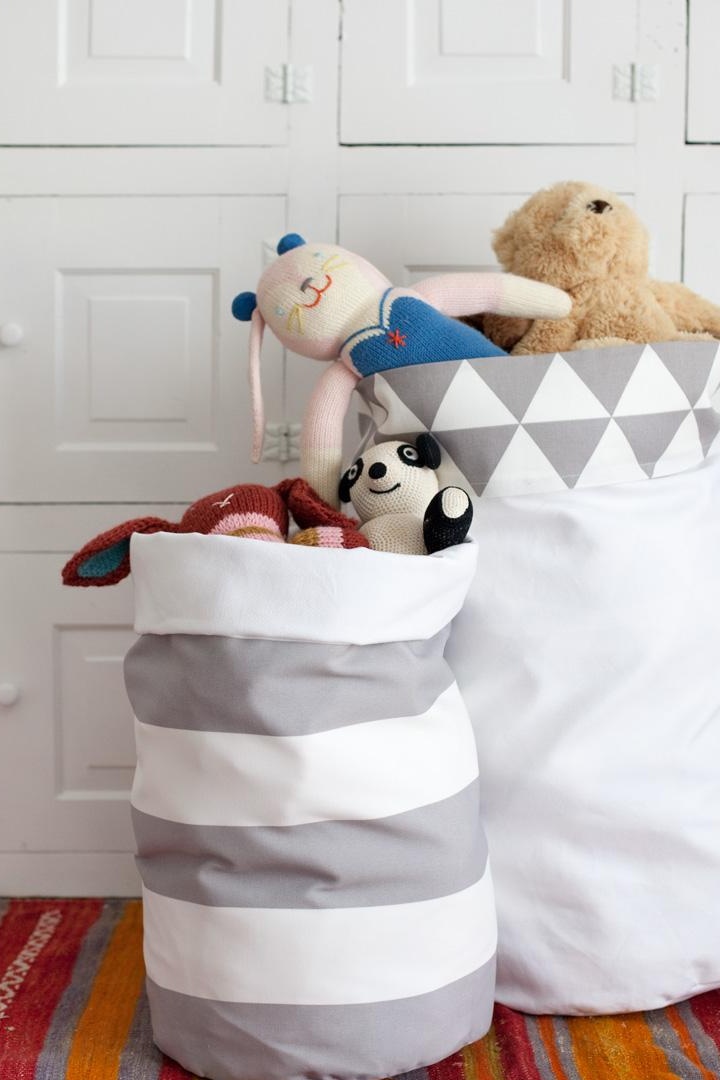
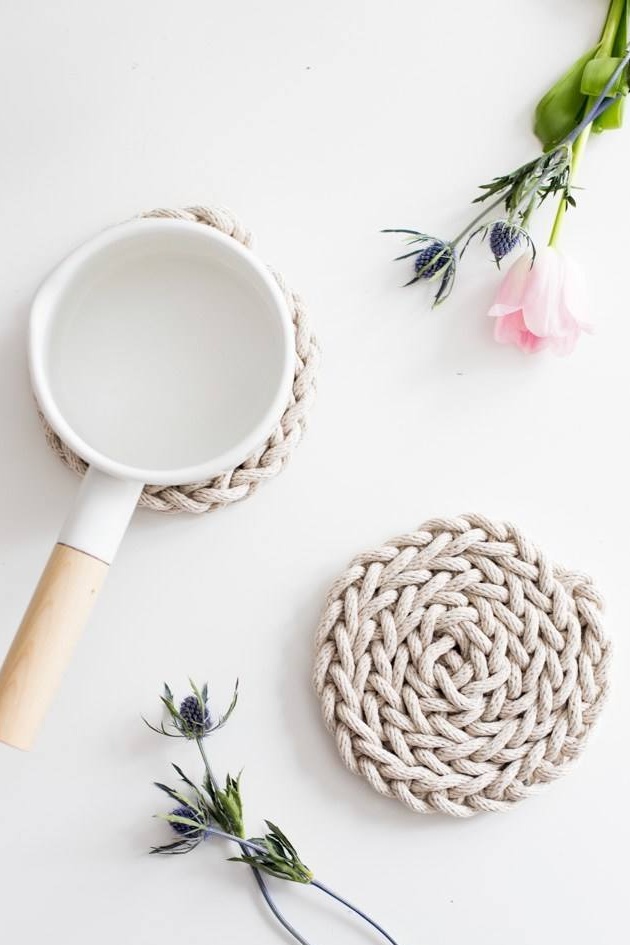
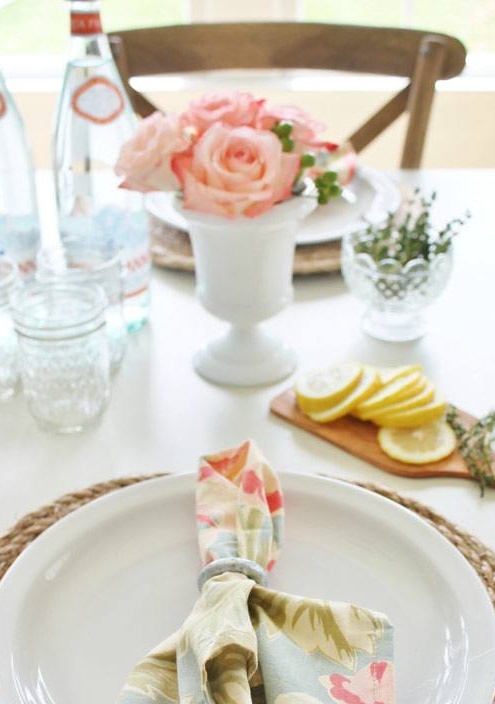
Dish Stands
Various kitchen coasters are always needed. And it doesn’t matter at all what style of decoration you adhere to. In just a few hours, you can make such products with your own hands for the whole family.
In this case, you just need a rope, a glue gun and scissors. Just fold the rope in a circle and periodically fix it with glue. When the product is the right size, cut the end of the rope and glue it.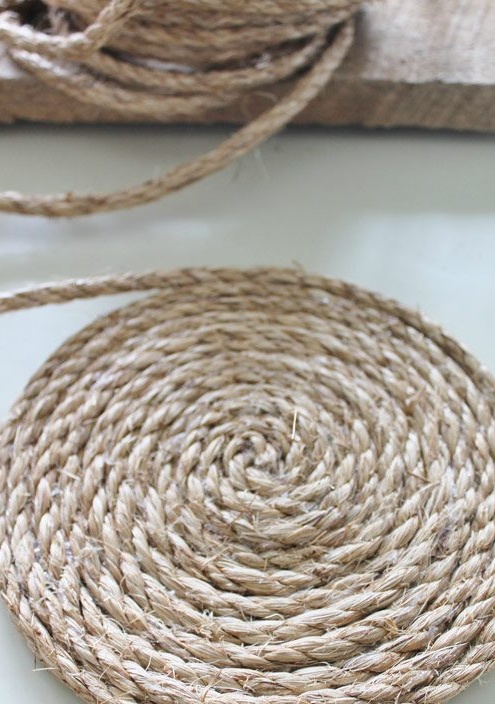
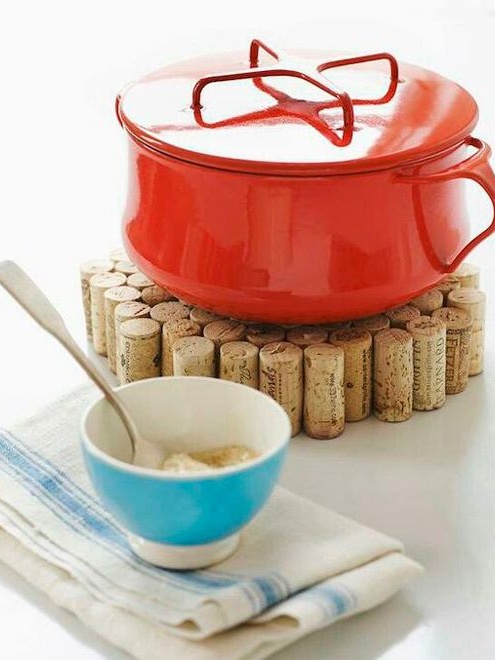
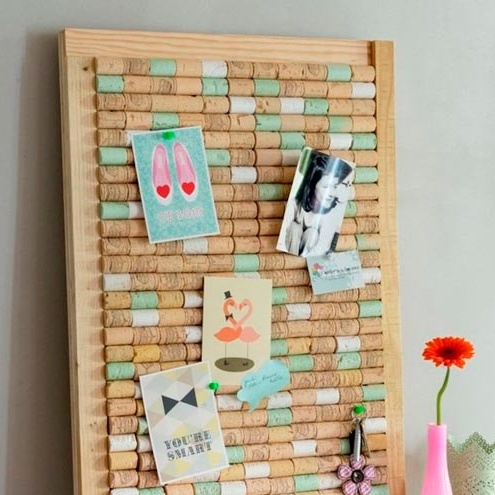
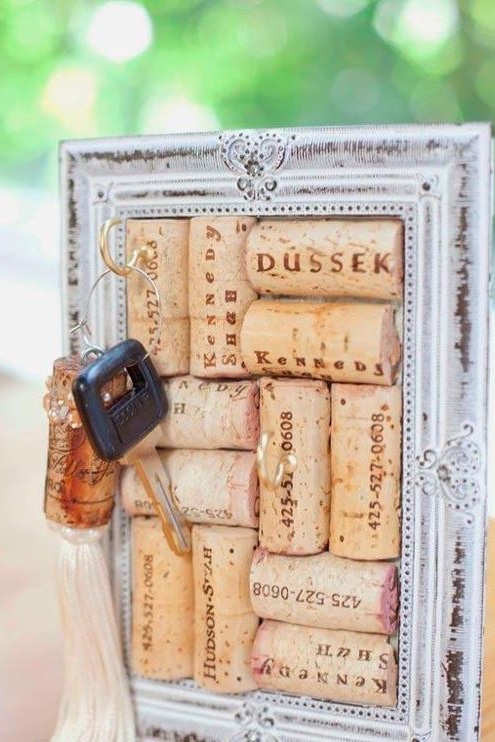
Slightly more difficult option - coasters for glasses and glasses. However, it can only be done if you collect wine corks.
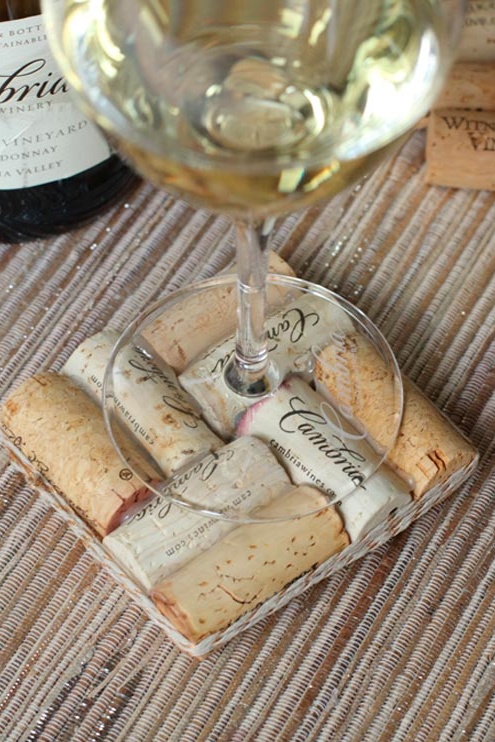
Necessary materials for one stand;
- wine corks - 8 pcs.;
- glue gun;
- rug or cork board;
- scissors;
- twine.
To begin with, we lay the plugs on the working surface in the way they should be connected to the stand. Alternately we fix them among themselves.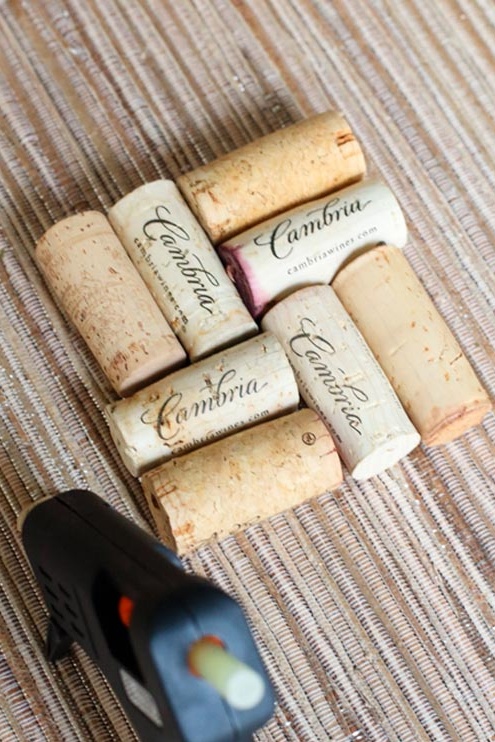
From the cork board or rug, cut out a square that matches the size of the stand. We apply glue on it and apply a blank of corks from above.Press for a few seconds for better fixing.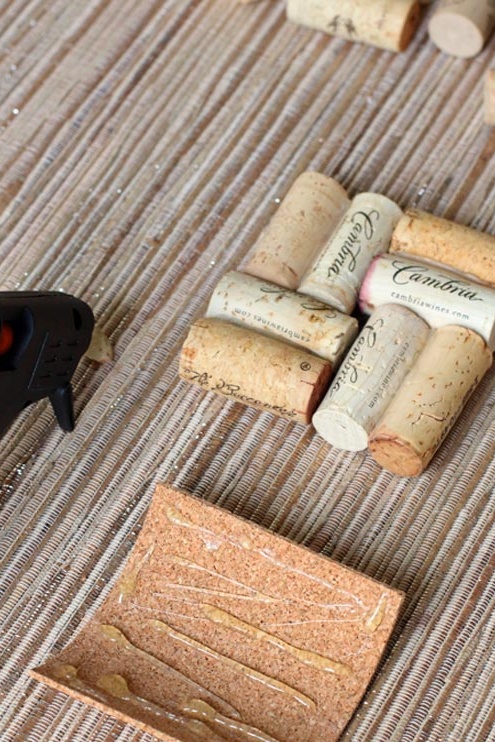
We fill the space between the corks with glue and leave for a few minutes. We wrap the stand with twine, as shown in the photo and tie a strong knot.
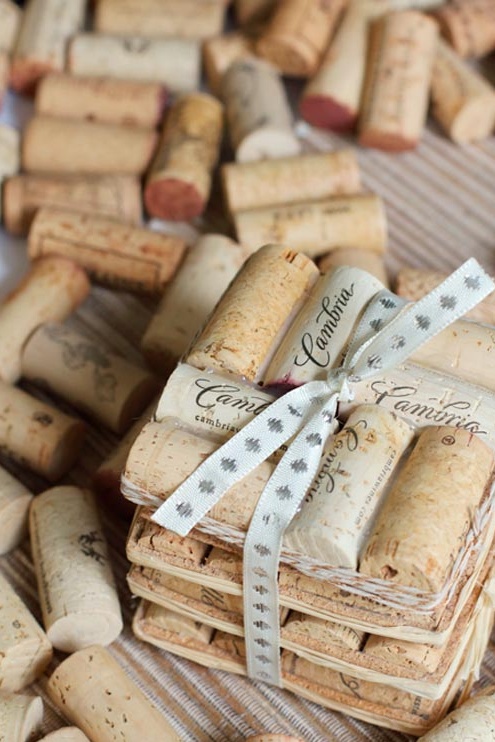
Such coasters can be of completely different sizes and shapes. It all depends on your desire.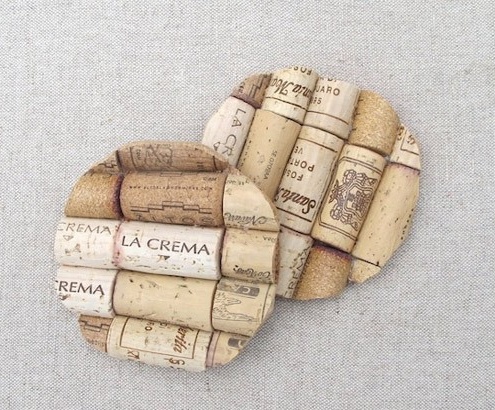
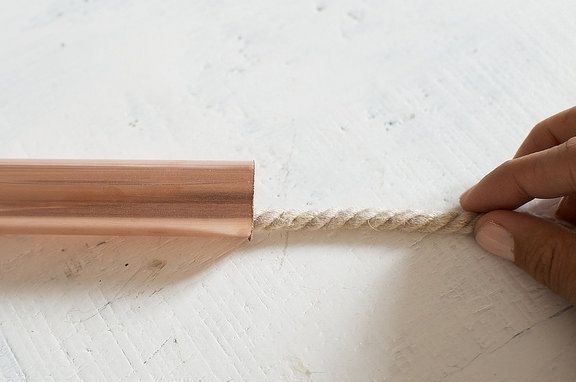
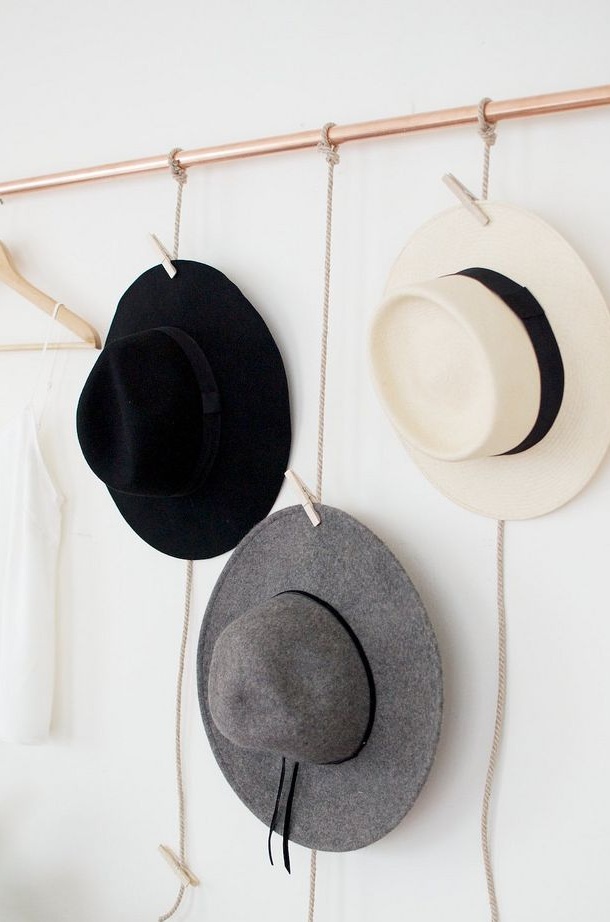
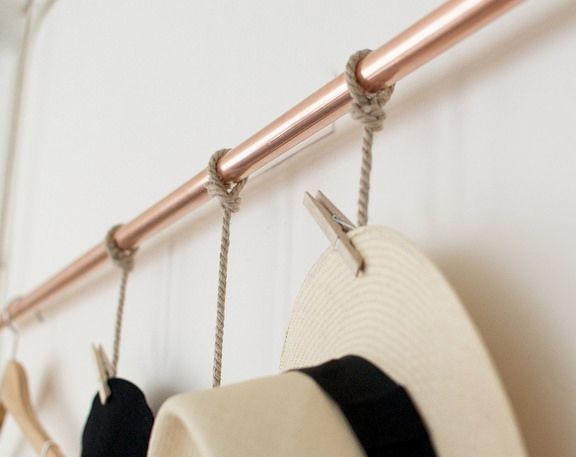
Hanger for caps and hats
Fans of hats simply can not do without a beautiful, but at the same time, an unusual hanger.
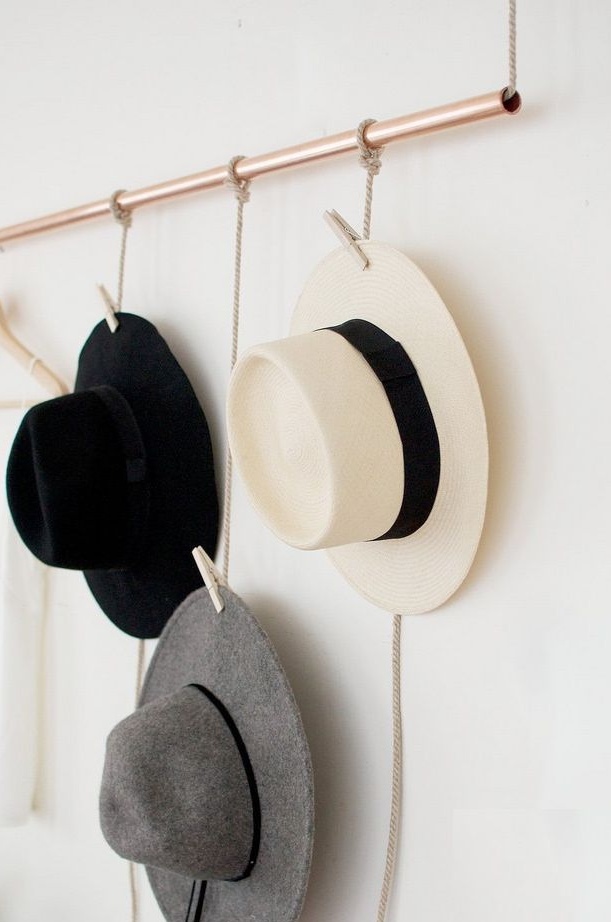
To make it, we will prepare the following materials:
- pipe made of plastic, steel or copper;
- clothes pegs;
- rope or twine;
- scissors.
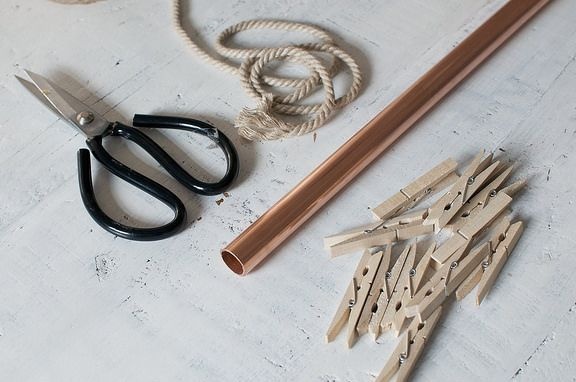
It is very important to determine the place where you plan to attach such a hanger. It depends on how long the pipe can be. After that we thread the rope or twine into the pipe and cut the required length.
Cut several pieces of rope of the same size. We tie them to the pipe, as shown in the photo.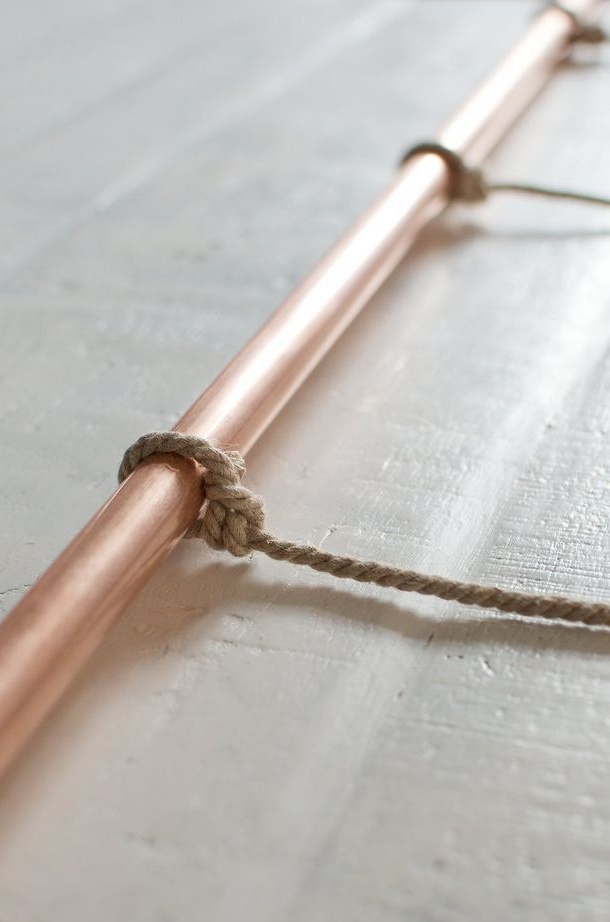
We attach the hanger to the wall, and hang clothespins on the ropes.
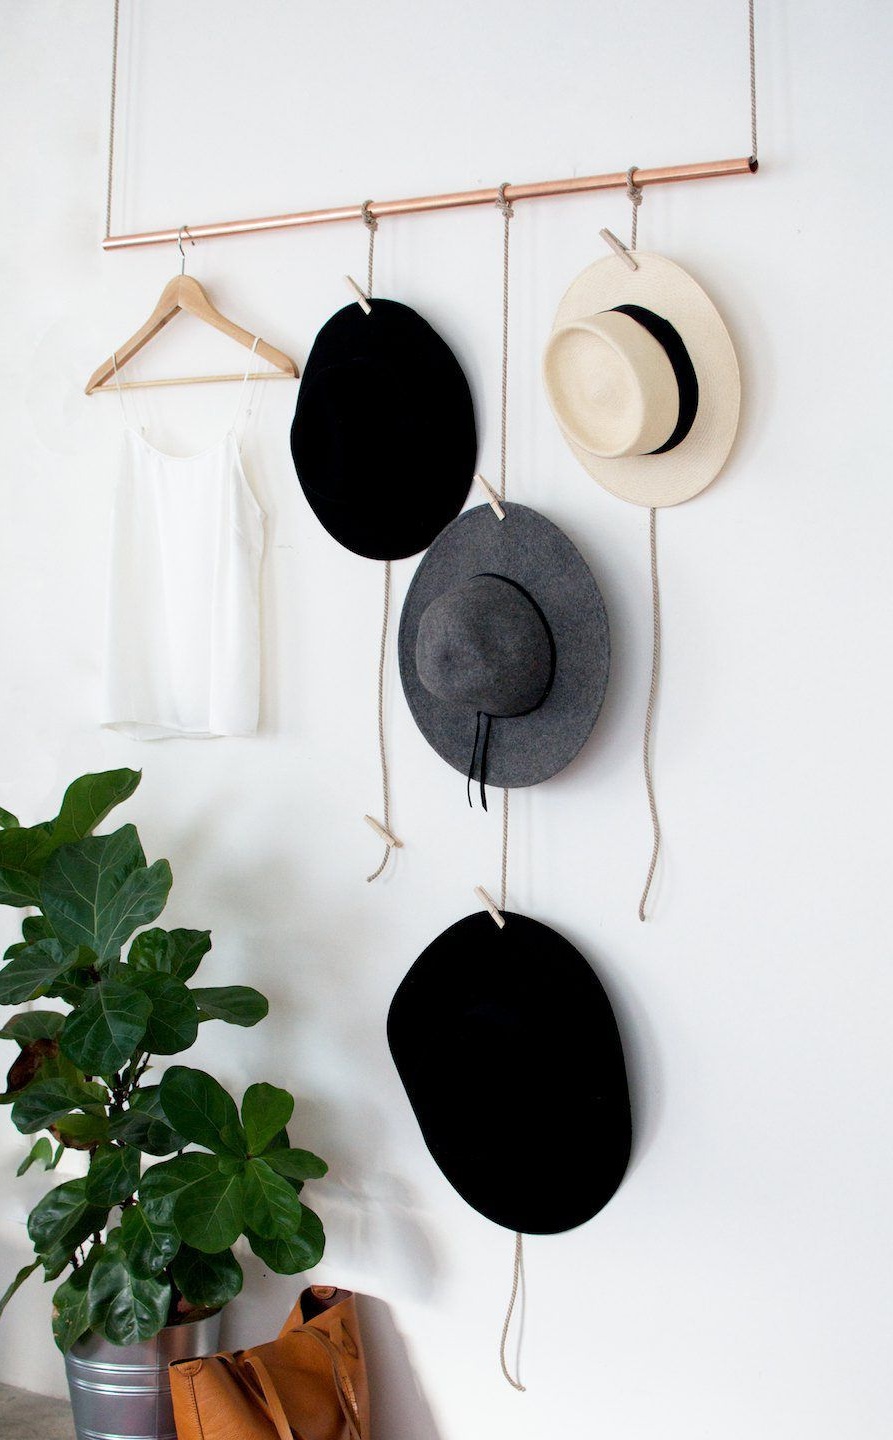
If desired, even scarves or hangers with light clothes can be hung on such a hanger.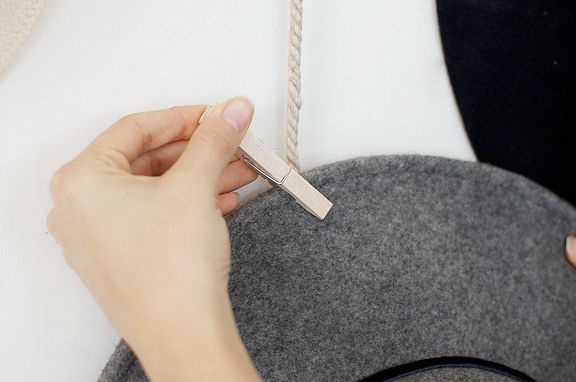
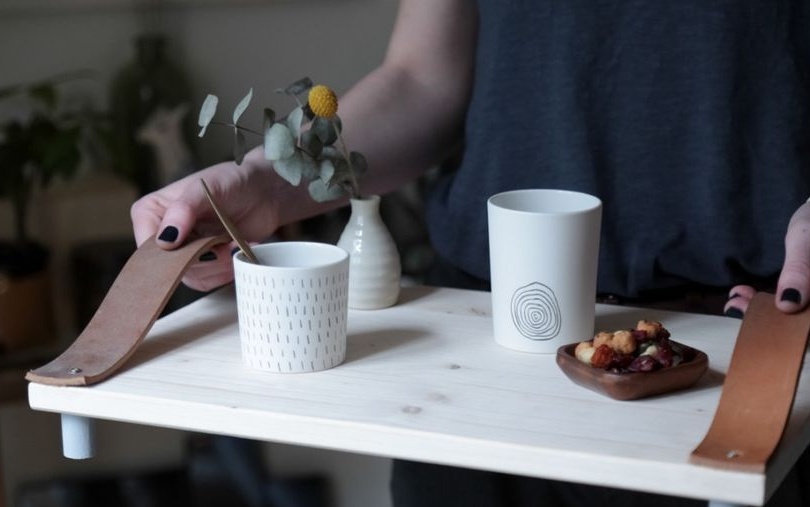
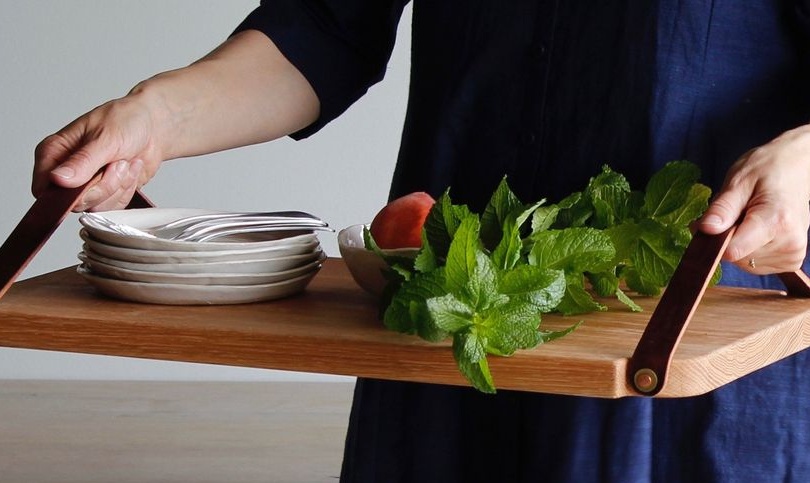
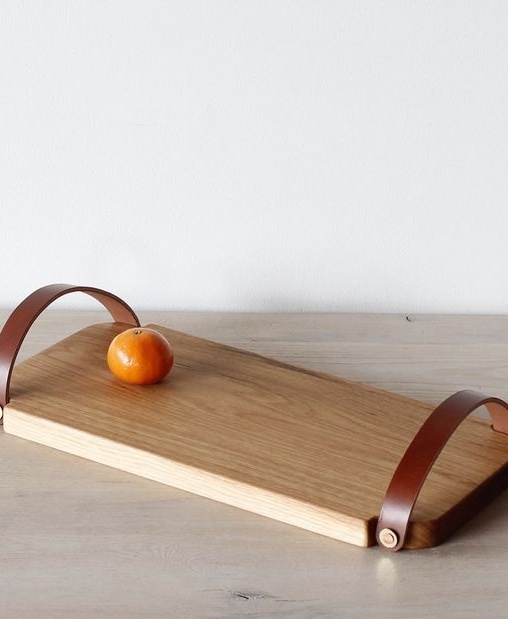
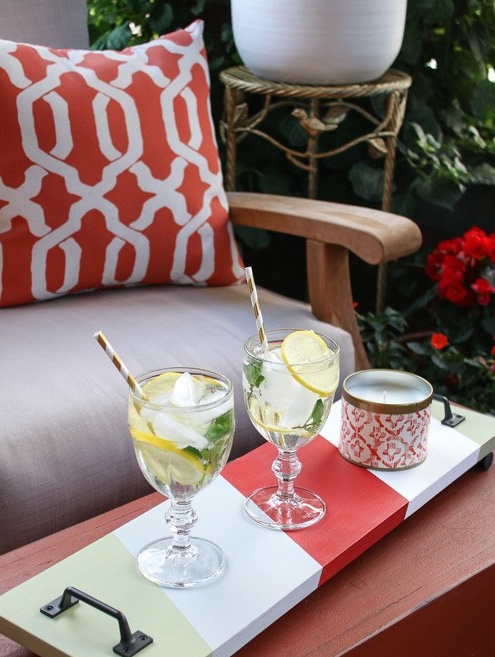
DIY wooden tray
A beautiful, but at the same time laconic breakfast tray is a must-have for every home. Such products look especially beautiful, so we offer to make an original version with leather handles with your own hands.
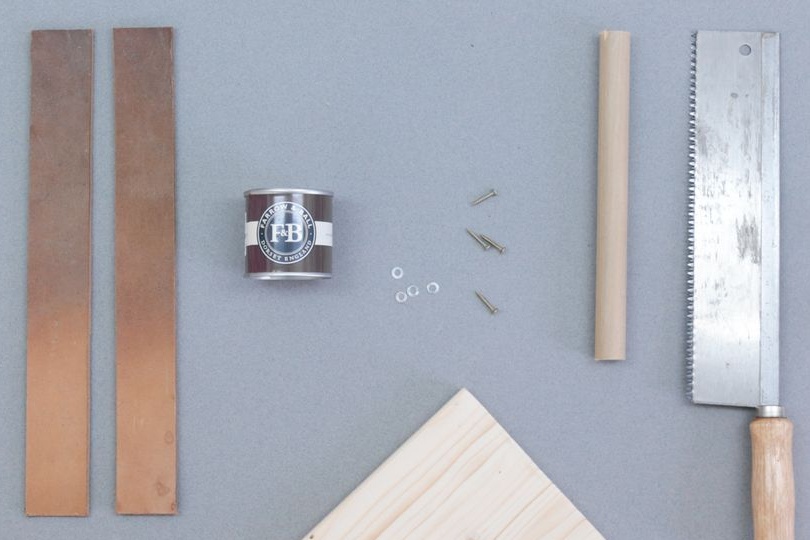
Necessary materials:
- wooden plank;
- screws and washers;
- scissors;
- paint;
- saw;
- brush;
- two strips of genuine leather;
- screwdriver;
- PVC pipe;
- glue;
- ruler;
- sandpaper.
If necessary, we process a wooden board with sandpaper. After that, apply the paint in several layers and leave it to dry. Four pieces of the same size are cut from a plastic pipe. Glue them on the back of the board in the corners.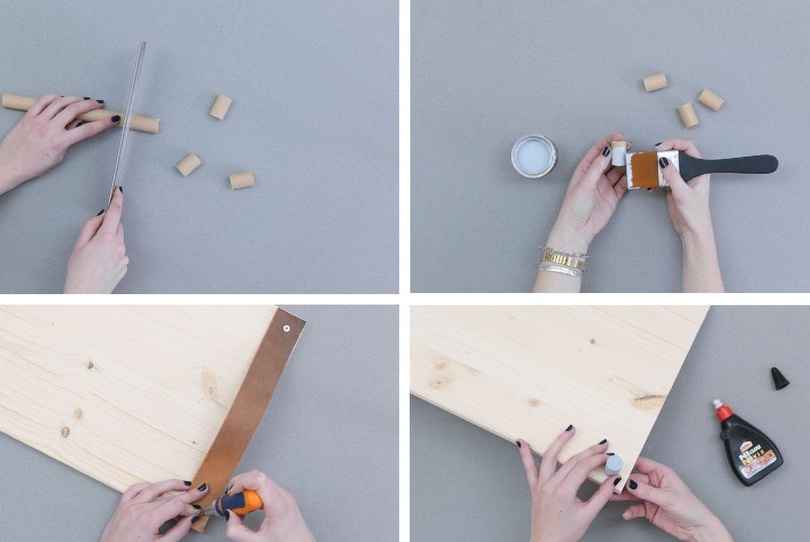
We attach two leather strips on the sides with the help of screws. They look great as tray handles.
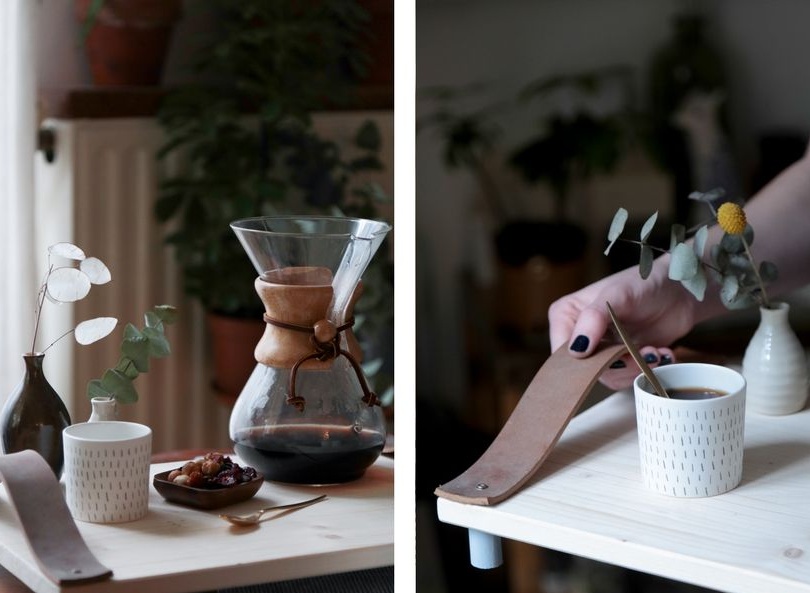
In fact, the tray can have any shape and appearance. It all depends on what materials you have for its manufacture.
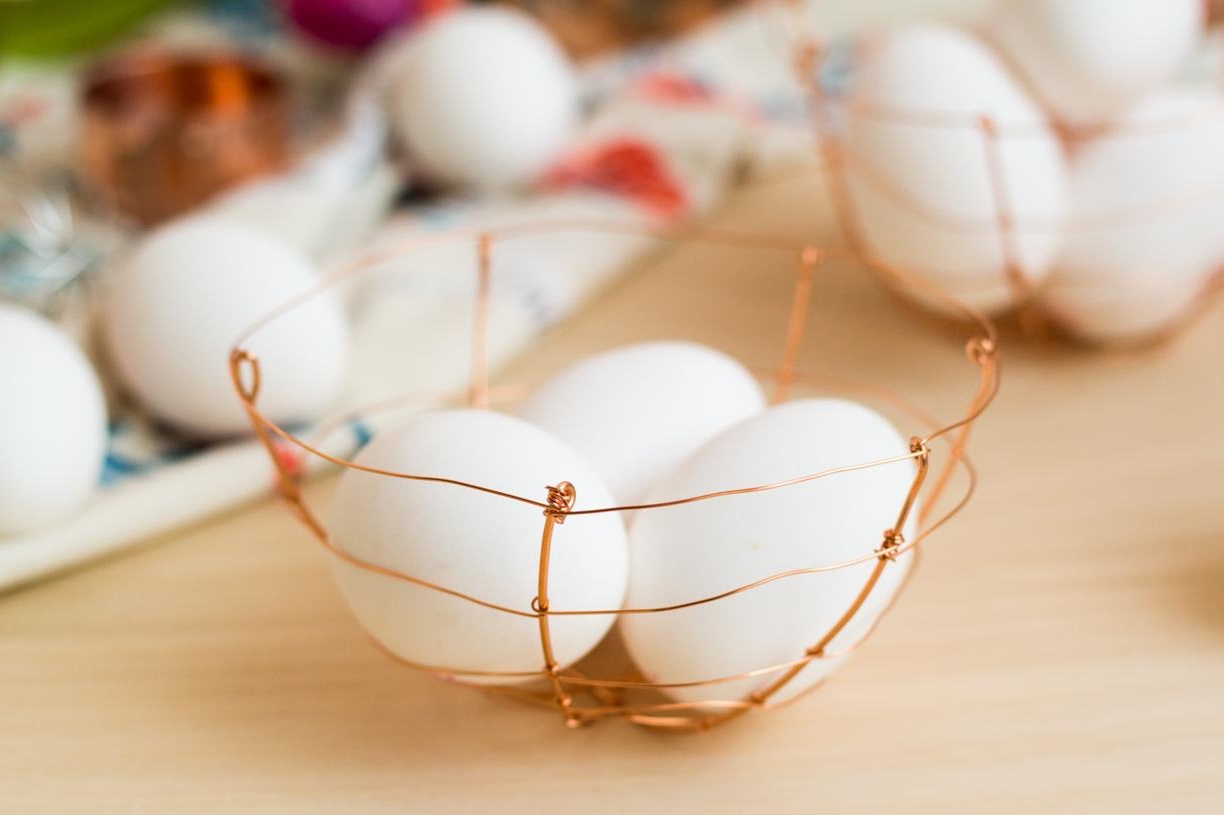
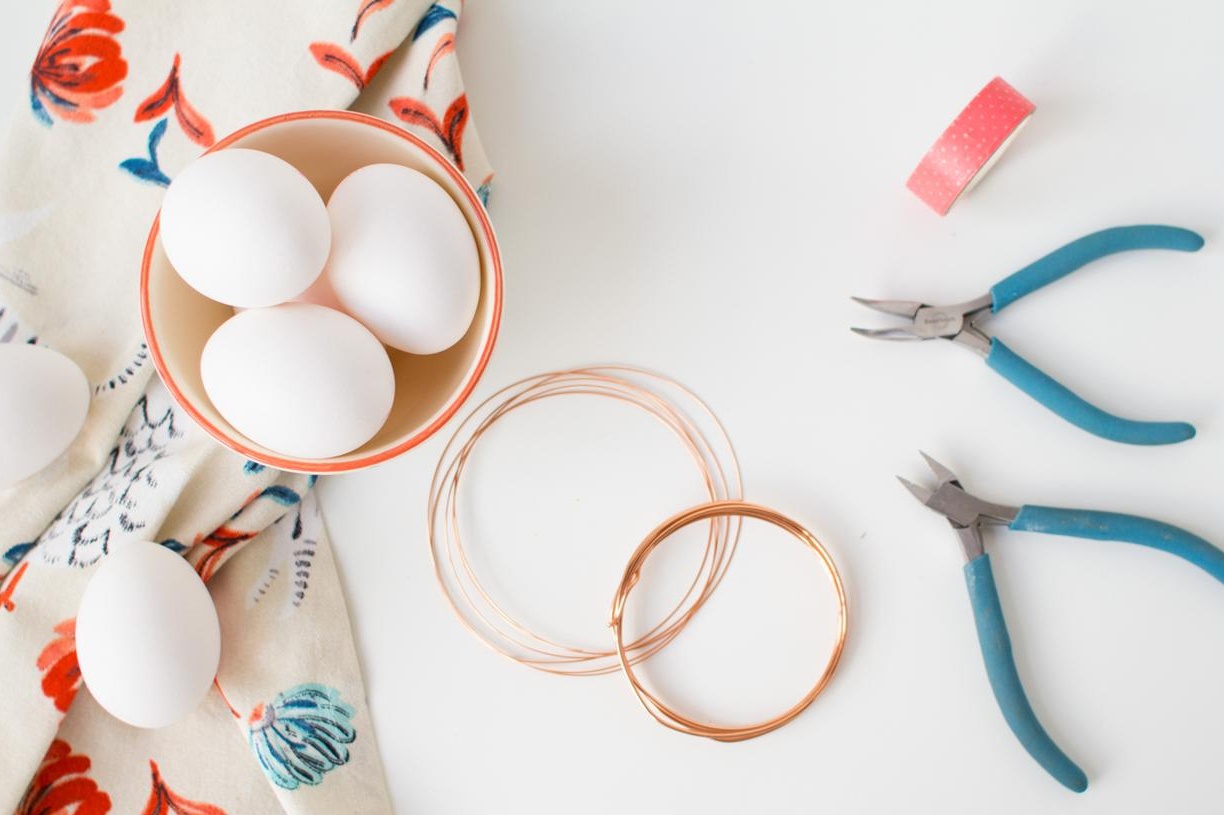
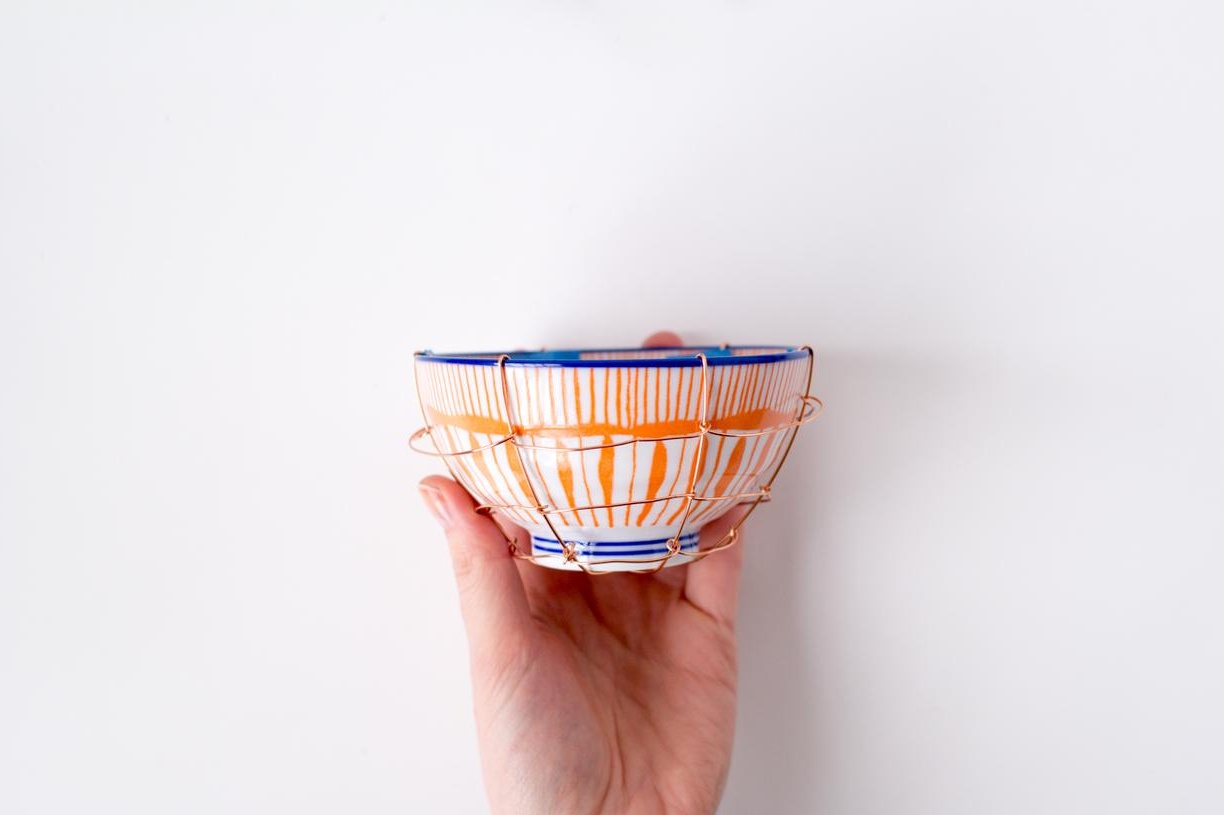
Egg basket
Such a cute basket is useful not only for Easter eggs, but also in everyday life. It is very convenient to store them in it or put it on the table for dinner.
Necessary materials:
- deep plate;
- copper wire;
- masking tape;
- nippers;
- pliers.
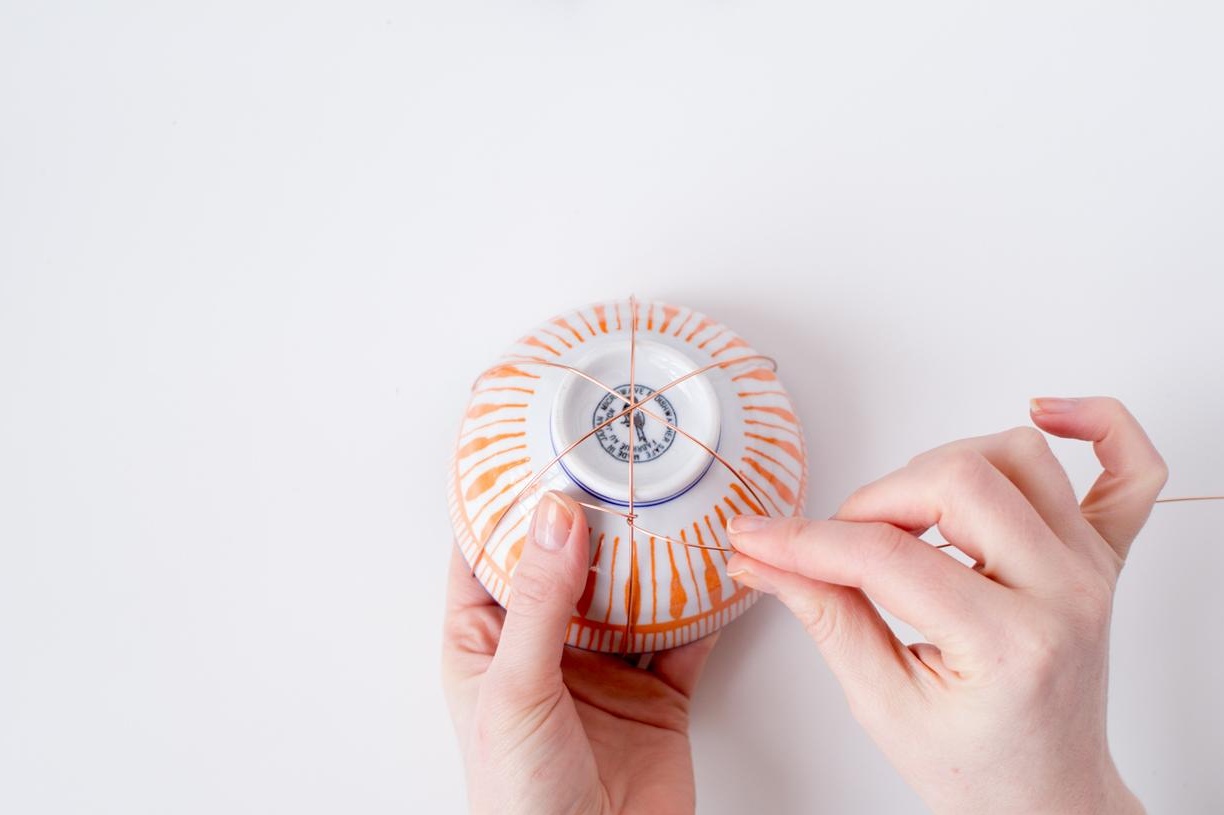
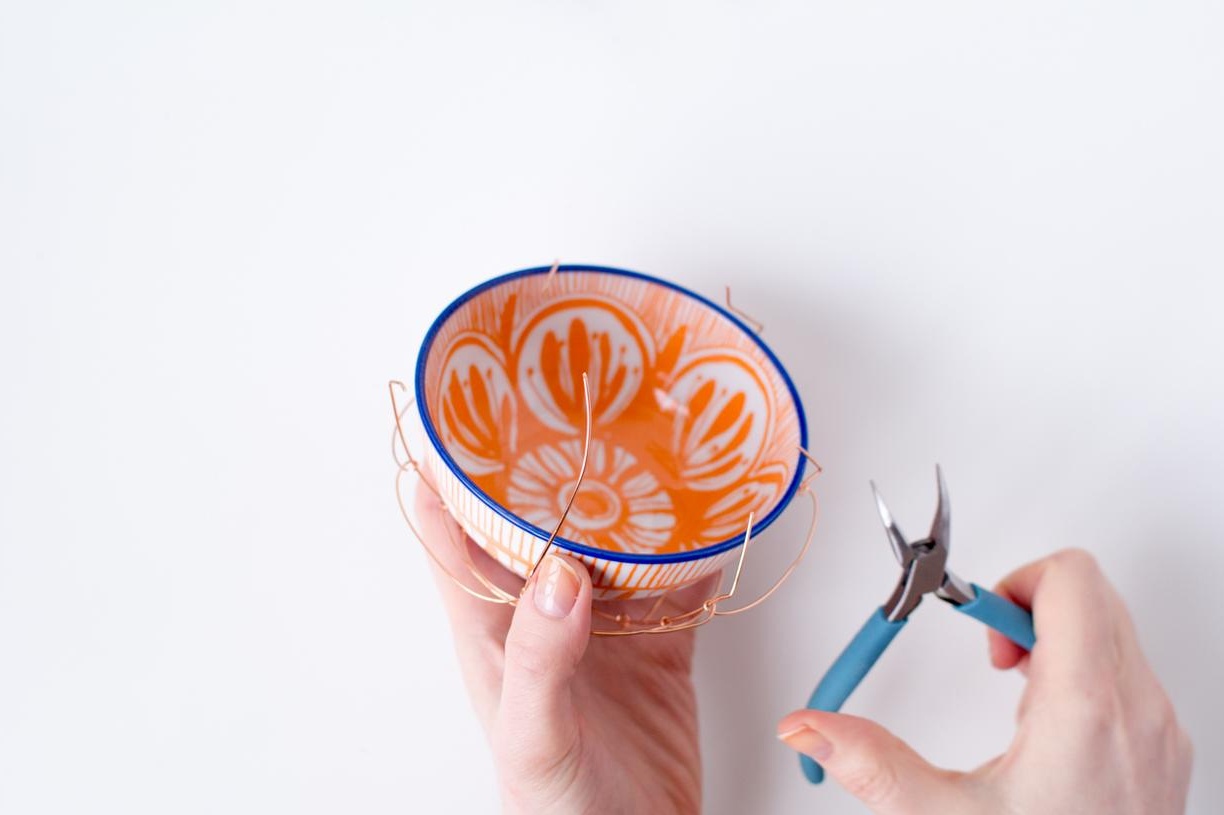
Turn the deep plate upside down. We wrap it diagonally with a small piece of wire. We bend the edges of the wire inside the plate.
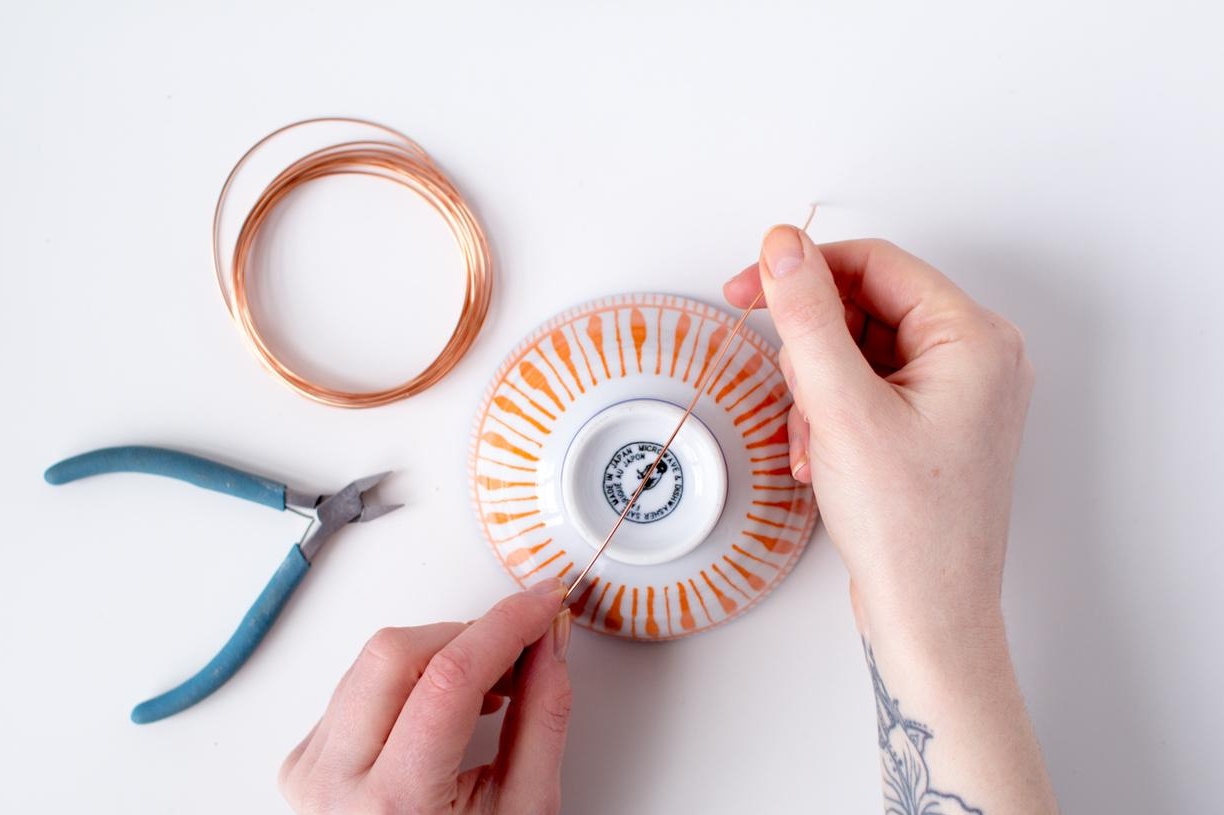
We take two more segments of the same length and place them as in the photo. 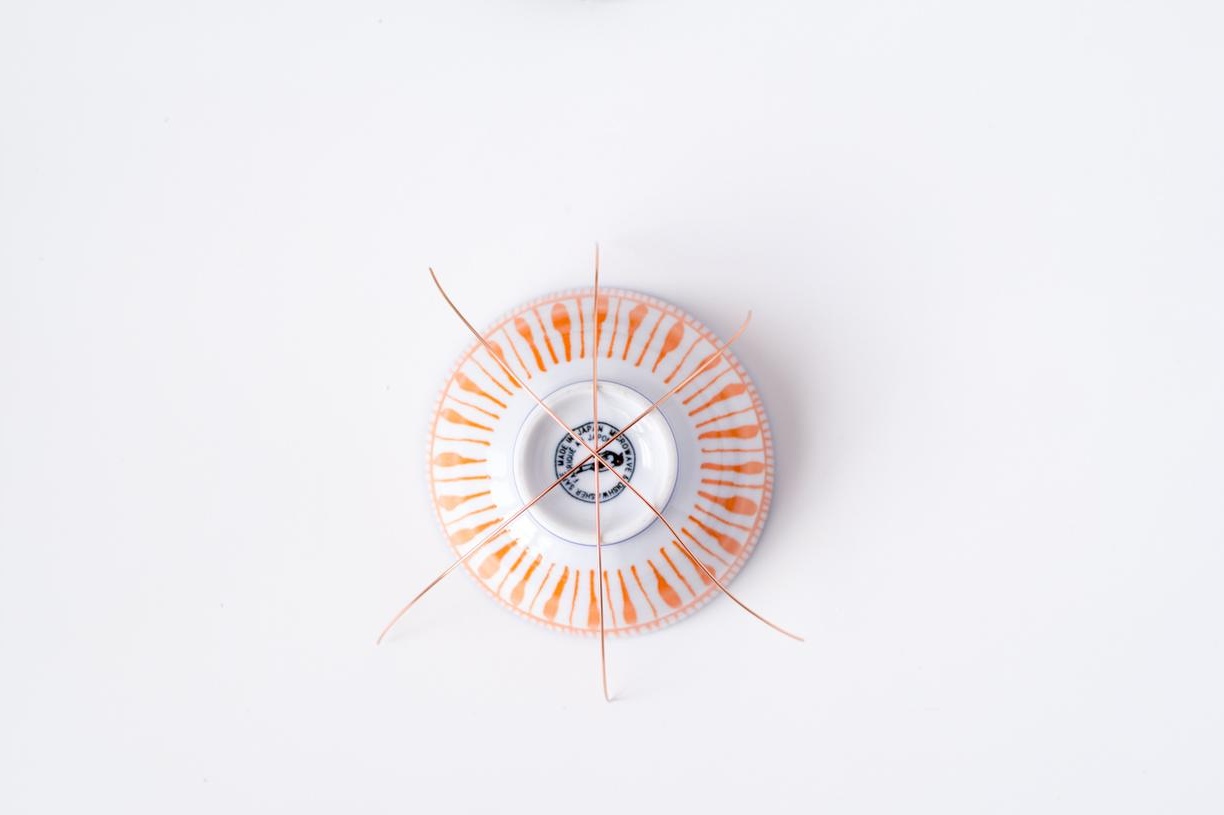
Wrap the ends inside the plate.
We fix the edges with masking tape so that the frame does not move during operation.
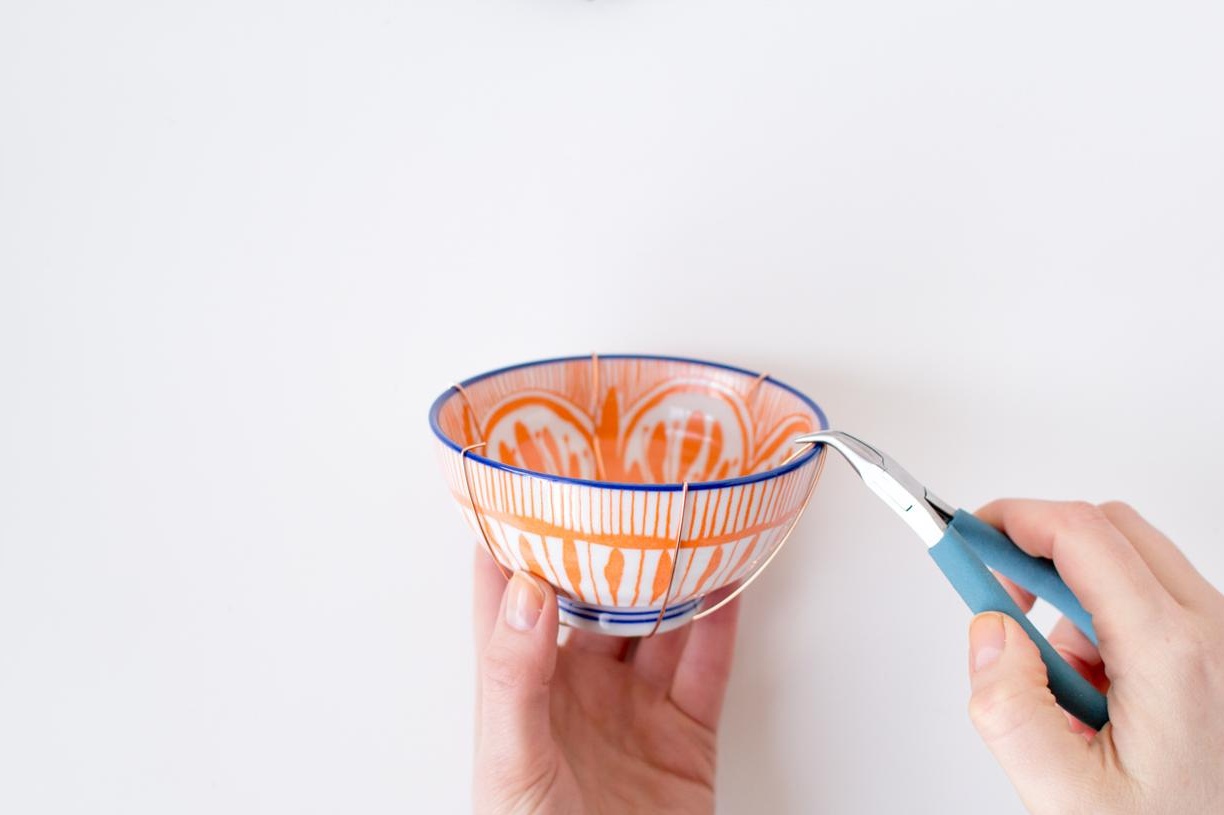
Wrap the bowl with wire, as shown in the photo. Leave a small margin and cut it.

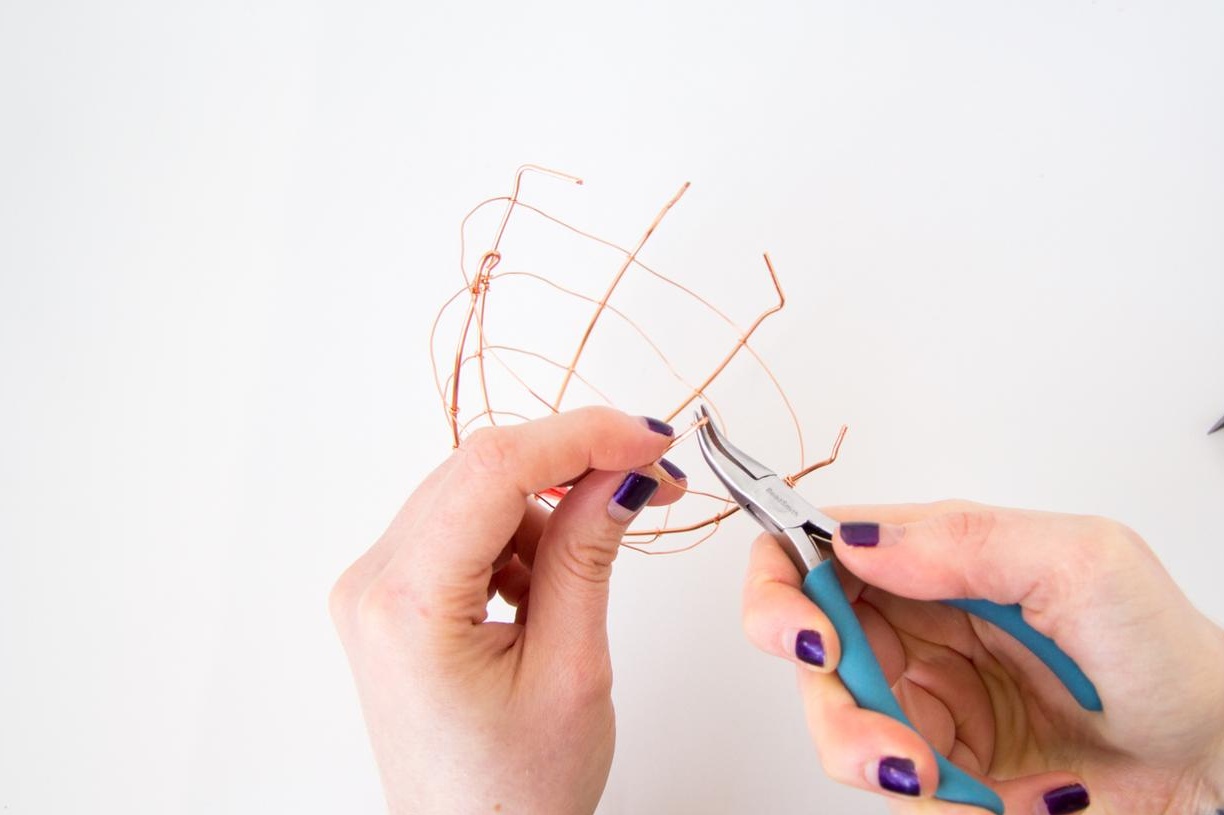
We wrap each of the main parts of the frame with wire.
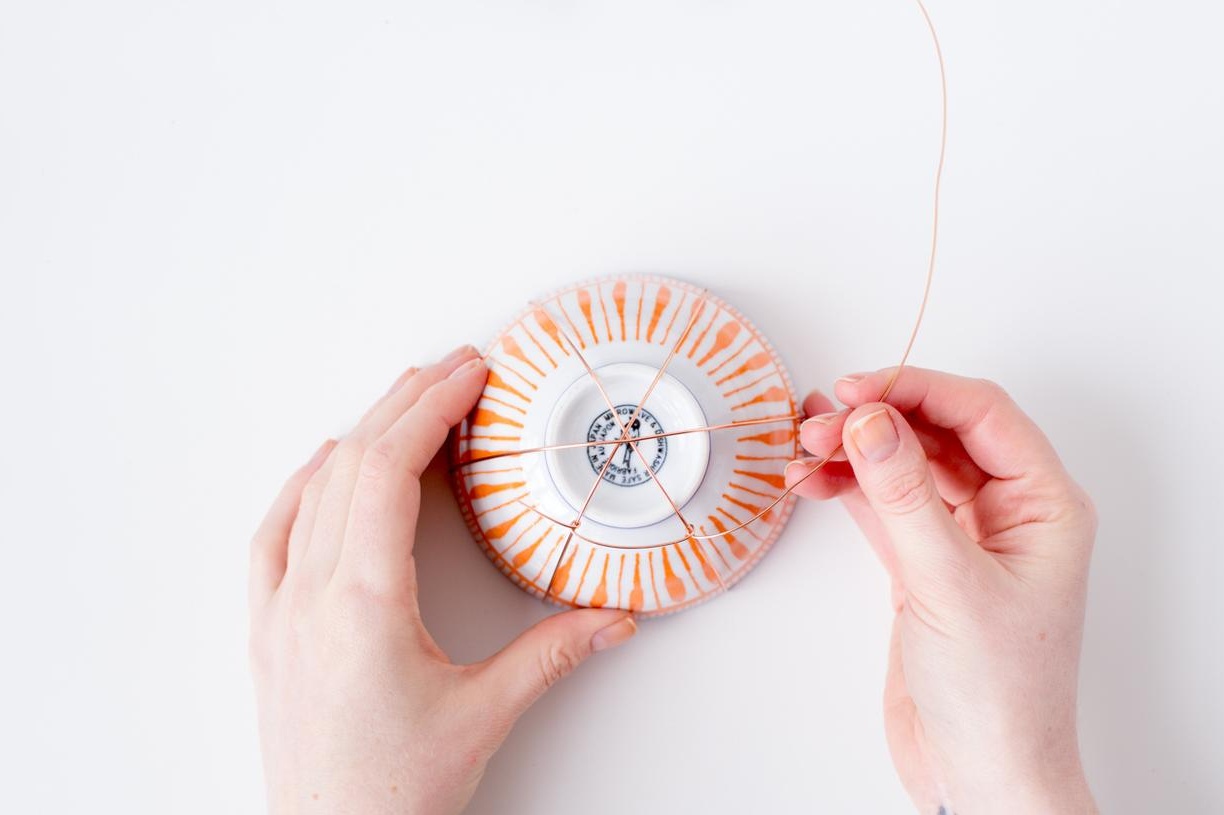
Trim the ends and repeat the steps two more times. The result is a kind of basket.
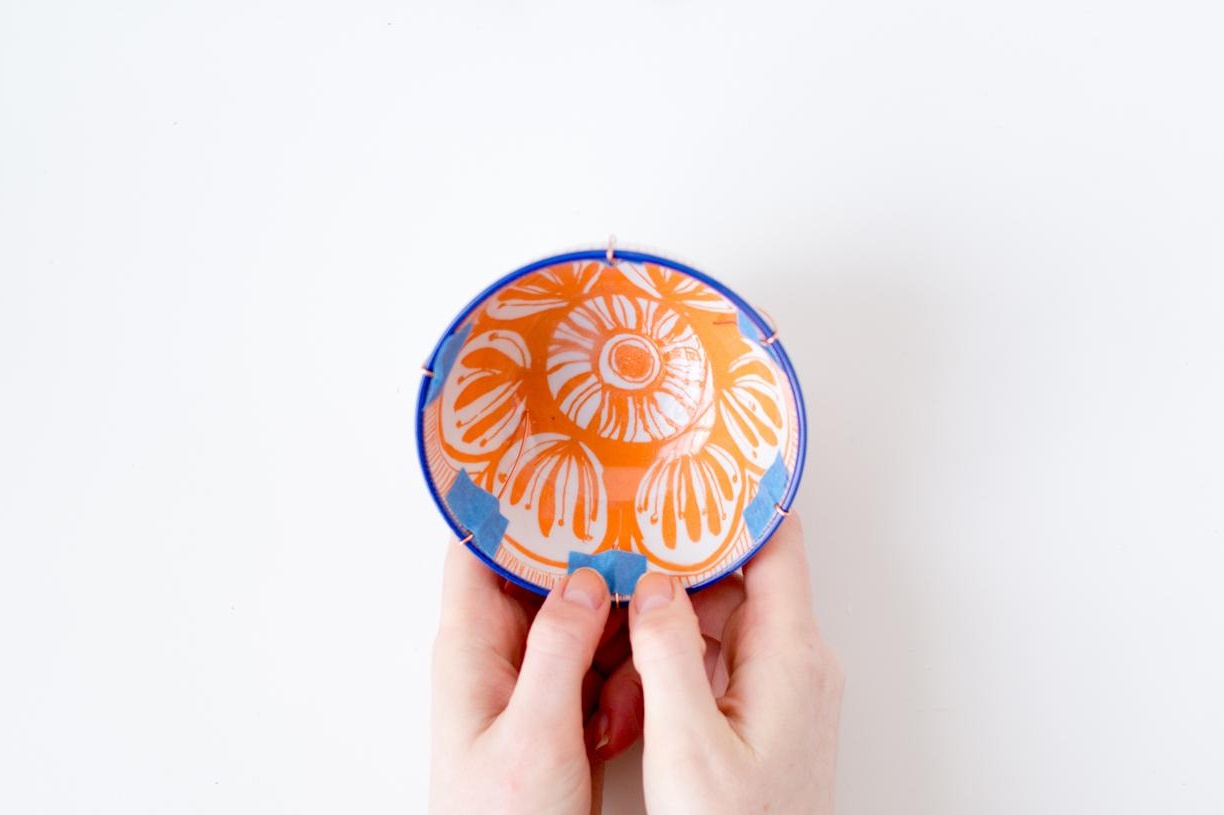
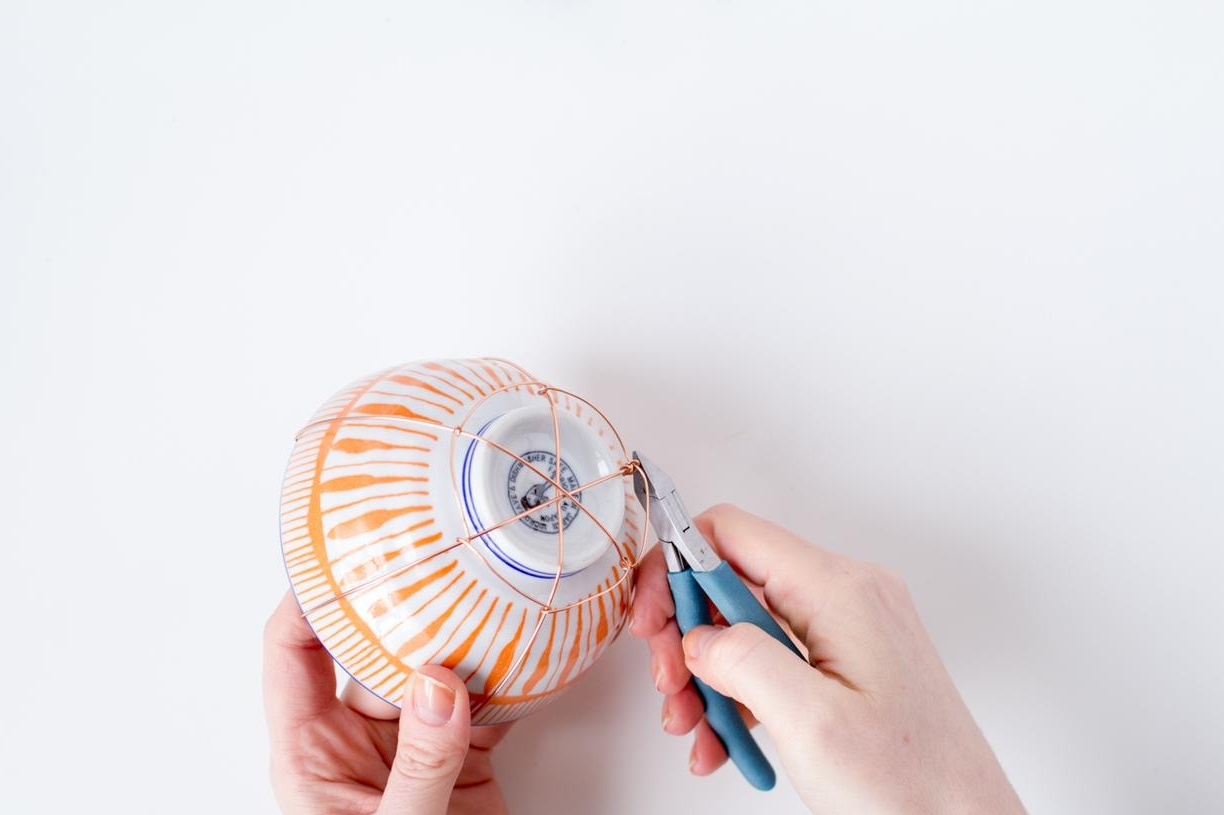
We remove the tape from the workpiece, unbend the ends and take out the plate.
We bend the ends of the wire to get rings.
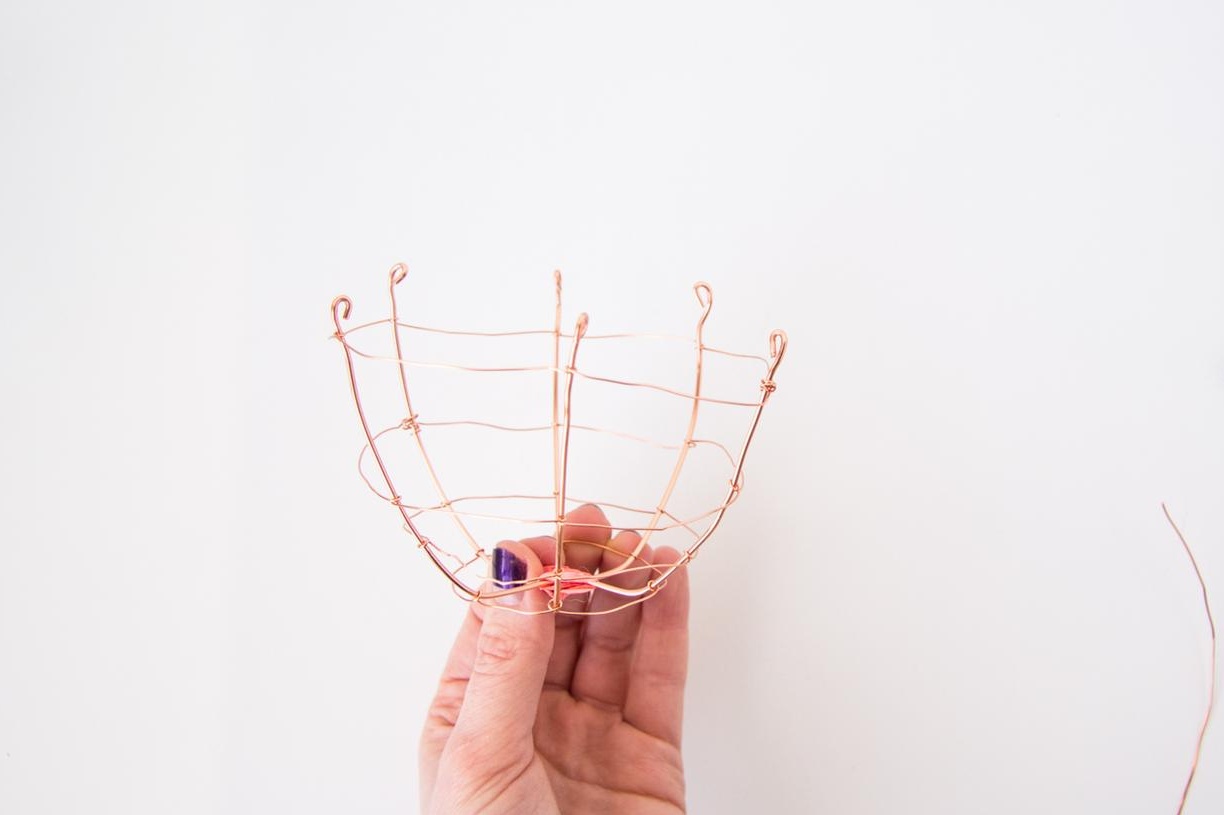
We take another piece of wire and pass it through the rings.
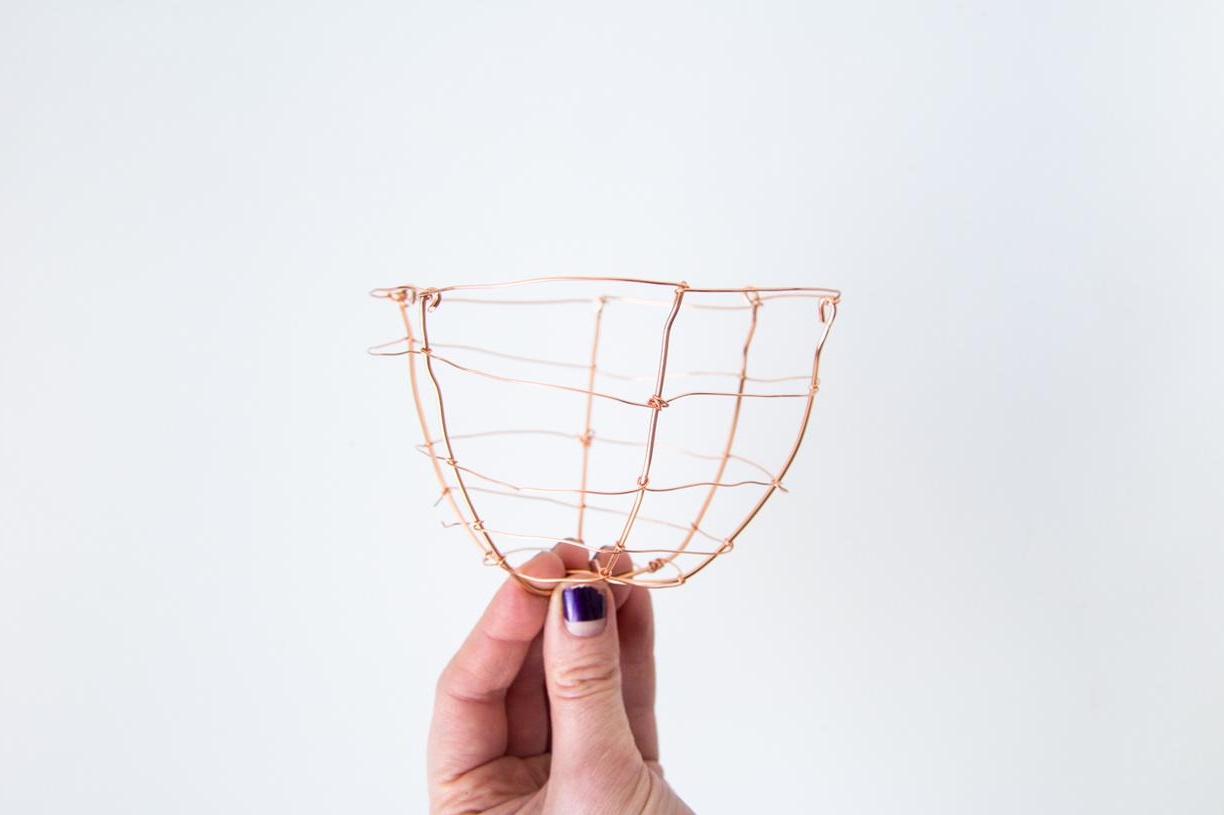
The result is an original and unusual egg basket.

The presented ideas and master classes are a real find for those who want to slightly transform the familiar interior. After all, they are as simple as possible and do not require special skills. But at the same time, the result is really worthwhile.


