I want to make a repair! Bathroom: reliable and comfortable floor (part 2)
The bathroom is prepared for repair. It is empty, clean and somehow unusually spacious. Dismantled, garbage removed. Can start repair work. Today we’ll talk about how to repair the floor in a prepared room. What technologies should be applied so that the floor is reliable, beautiful and easy to use.
Screed - the basis of the floor
Why do I need a floor screed? She has several tasks. First of all, with the help of a cement screed, the floor is leveled, smoothed and turned into a base for front decoration. A monolithic concrete or cement layer on the floor increases the level of sound insulation. This is especially true in apartment buildings, in an apartment located above the first floor.
And on the ground floor and in a private house, the screed is one of the methods of insulation. Another screed is a way to equip the Warm Floor system. It protects heat elements, makes it possible to carry out finishing work efficiently, accumulates and evenly transfers heat.
Under the screed you need waterproofing
Waterproofing the floor in the bathroom is required. In some cases, it is done under the screed, and in some - on top. If you plan to install any system "Warm floor", waterproofing is done under it. If the floor is not heated, then the waterproofing made on the screed will protect the concrete from excess moisture.
Waterproofing is different. For example, rolled materials are rolled out over the entire area of the bathroom, overlapping seams are welded together. Rolled waterproofing agents include roofing material, roofing, various films. And the coating agents for waterproofing include various mastics (bituminous and synthetic), epoxy resins.
In a room where water can spill onto the floor, it is advisable to combine waterproofing methods with each other. So on a layer of bitumen mastic, you can lay a layer of rolled material, and on top process another 1-2 layers of mastic. Waterproofing materials need to process the angle of abutment of the walls to the floor and the lower part of the wall.
DIY floor screed
You need to start, as always, with planning and layout. The level of the new floor is marked on the walls. It is better to do it with a slight slope of 1.5-2 degrees. This bias is not visible either visually or when walking. But he will do good work to the owners. If water accidentally spills onto the floor, it will not flow into hard-to-reach places.
What height will the new screed be? If ceramic tiles are planned, 10-15 mm should be subtracted from the floor level. This is the thickness of the tile itself and the layer of adhesive mixture used to lay it. The Heat-insulated floor system, if necessary, must be under the floor screed or inside it. It depends on the thickness of the concrete layer. The total thickness of the screed should not be less than 3 cm. What should I do if I decide not to equip a warm floor? The base for a new cement (concrete) screed must be primed with a finished deep penetration primer. Then, beacons are installed at a distance of 70-80 cm from each other. Using the building level, the horizontalness of the floor and the uniformity of the slight inclination are checked. All beacons should be in the same plane.
For screed, use concrete (if the total thickness of the layer is 5 cm or more) or a cement-sand mixture (for a thinner screed). Concrete consists of cement, sand and gravel. To get a high-quality mixture, you need to carefully mix the components in a ratio of 1: 2.5: 3.5-4. That is, 2.5 buckets of sand and 3.5-4 buckets of gravel are taken on a bucket of cement. The cement-sand mixture is sold in bags. The necessary proportions in the finished mixture are observed by the manufacturer. You can do it yourself. For one bucket of cement you need to take three buckets of sand.
The prepared mixture fills the space between the two beacons and is leveled by the rule. So gradually fill the entire floor area. After half an hour or an hour, the surface of the dried screed must be wiped. It is better to pull out the beacons from the frozen, but not yet fully strengthened screed, and fill the formed cavities with cement mortar. This is especially important if the floor will not be tiled. For example, if the owners want to make a newfangled polymer flooring. For several days, it is better to leave the finished floor covered with plastic wrap. If the screed is not allowed to dry, then cracks will not appear on it.
Underfloor heating in the bathroom
If you remember that on the floor in the bathroom we often stand with bare feet, it becomes clear that the warm floor is very nice. Having once assembled the Warm Floor system, the owner will improve the microclimate in this room for many years. The heated floor will always be dry and the air not too humid.
Which of the three types of "Warm floor" system to choose for the bathroom? All of them are good, but each has its own drawbacks. To make a choice, you need to learn about all three.
- water heated floor;
- electric underfloor heating;
- film heat-insulated floor.
Water floor heating
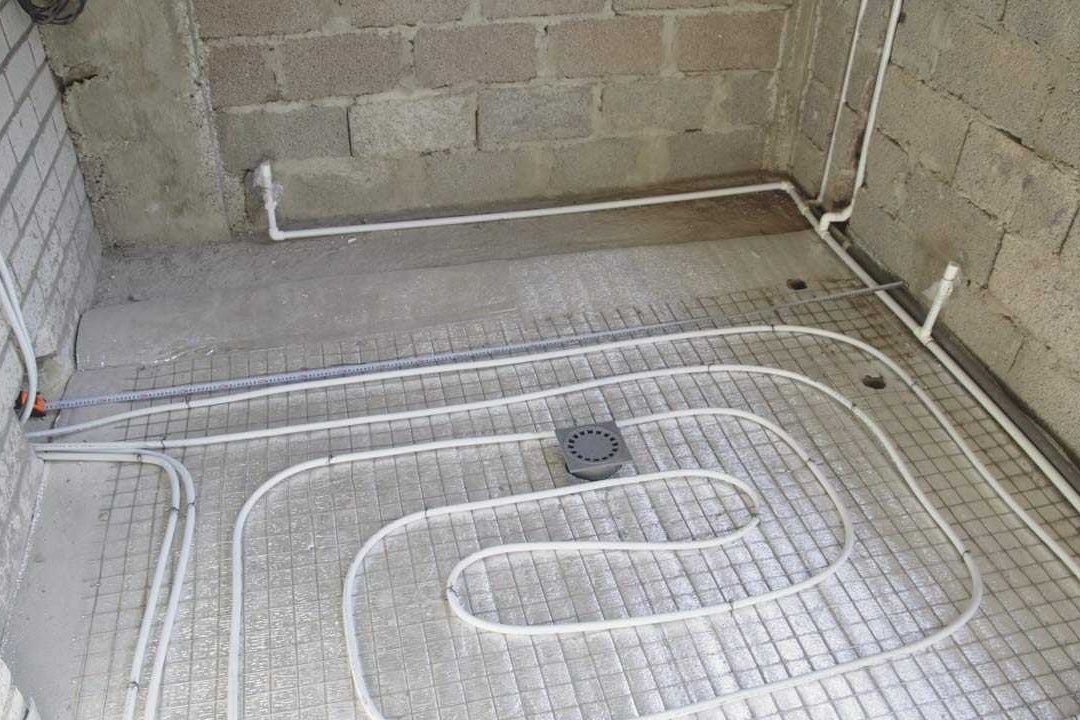
The system is a structure of metal or plastic pipes through which water passes from the heating system. The pipes are closed with a screed, and then with any finishing material. The thermostat allows you to control the degree of heating.
Not too expensive system. It does not require additional costs during operation. It is absolutely safe.
How to install? Under this option, the underfloor heating screed do not. It is necessary to trim the concrete slab and make high-quality waterproofing. After that, the floor is insulated with polystyrene plates or other dense insulation. A heat-reflecting screen should be placed on top of the insulation. It is needed in order for thermal energy to heat our floor, and not a floor slab. A reinforcing mesh is laid on the screen - the basis of the future screed. The mesh must be small. No more than 50 mm.
Special pipes for warm water floors are laid evenly, in increments of 100-150 mm. They are fixed on a reinforcing mesh. No need to lay pipes at the installation sites of the washing machine or furniture. The beginning and end of the pipe should exit the floor at the place where the heating pipe is located. You can connect the laid pipe directly to the heating pipes. The new floor will work. But the owners will not be able to manage it. In order for a person to be able to influence his work, the pipe joins special equipment. It includes a distribution comb, a temperature regulator and special taps.
After laying the pipe and checking the operation of the system, the beacons are carefully set and a screed is made. The main task is not to damage the floor structure.
Electric underfloor heating
The system heats the floor with electric heating elements. It is mounted under a cement screed or directly under a tile. The temperature can be adjusted.
Very easy to mount. Takes up less space. This is important if high volume screeding is not possible.
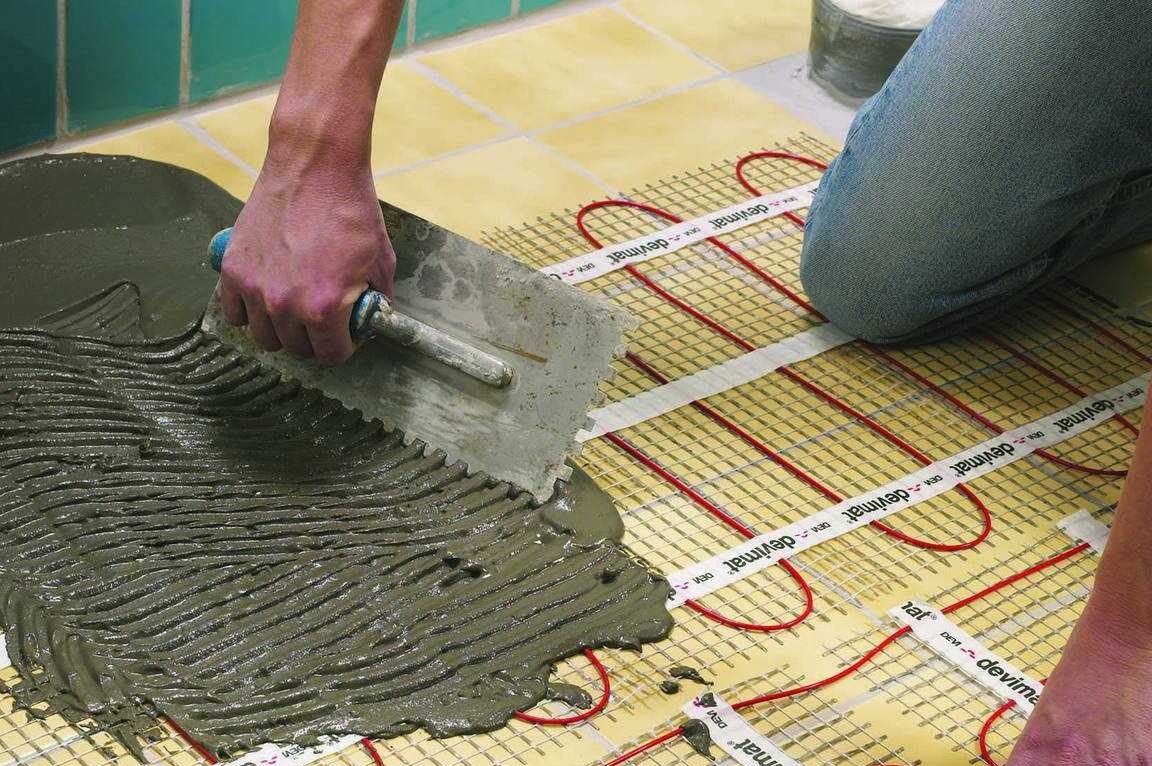
How to install? It is necessary to install an electric heat-insulated floor on the same warmed and reinforced basis, as when installing water. You can use a special heating cable and lay it on the floor yourself, following the instructions. And you can buy ready-made heating mats, where the cable is already laid out by a snake and fixed. Installation of mats is much easier.
Thermostat for electric underfloor heating is installed on the wall.The connection wires are led out to the heating zone and there they are connected to the electrical system. After checking, you need to turn off the electricity, and carefully make the screed.
Film (infrared) floor heating
The system consists of a heating film, which is electrically connected. The kit includes insulators, a temperature sensor, a temperature regulator.
Easy to assemble. Very thin material, does not require a large volume of screed. Very quickly, in just a few minutes, heats the tile. It consumes one third less electricity than an electric underfloor heating.
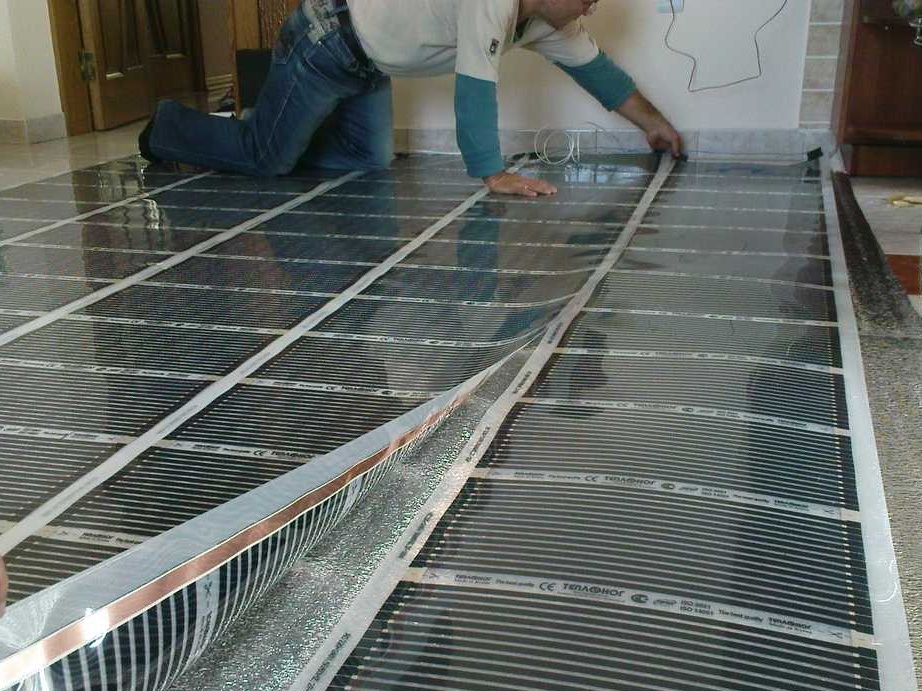
How to install? It is installed under the tile on an already finished screed. Do not forget about thermal insulation under the "Infrared underfloor heating" system. Special insulation, which is included in the delivery, is spread directly under the film. The film is cut into strips of a given length along special lines. The film is laid out so that the copper strip is at the bottom, and the contacts are directed to the wall with a thermostat.
We attach contact clamps to a copper strip. Mounting wires are connected to them. The connection points of the wires and the cut of the film must be insulated. Then the temperature sensor is connected and also carefully insulated. It should be noted that the Infrared Underfloor Heating system is accompanied by detailed instructions. Following her, even a teenager will install.
How to lay a tile on a film floor? A screed is not necessary here. A thin reinforcing mesh with a small mesh (10-20 mm) is neatly laid on the film. Tile is placed on the grid on a thin solution. The base of our bathroom is ready. The floor is prepared for front decoration. How to tile the floor, and what other options for the front finish of the floor in the bathroom are worthy of attention? This will be discussed in one of the following articles of the series “I want to make repairs!” Bathroom".

