Decoupage in the bathroom
Translated from French, decoupage means "cut", but this decor technique appeared in China, it was used to make furniture paintings. Today, decoupage is becoming increasingly popular, although this technique is practically a variant of collages. Decoupage is the gluing of cut-out drawings, ornaments from three-layer napkins to objects and any other surfaces that you would like to update or give them an exclusive look.
Bathroom update


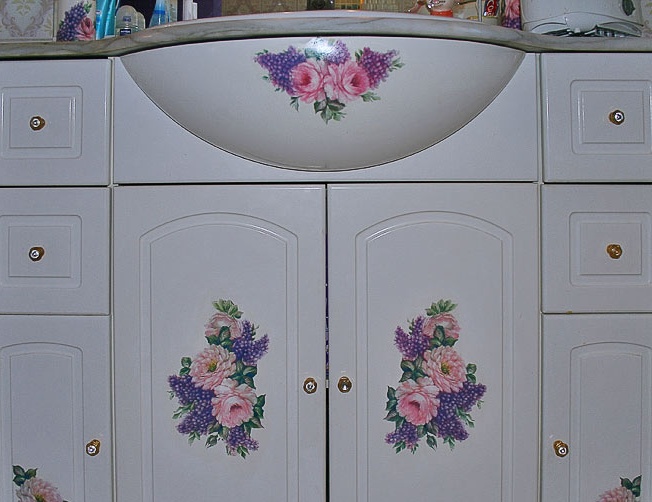
The bathroom in the morning should instill vigor and major in us, and in the evening relax and give a comfortable feeling of relaxation. It is very important that the decor of the bathroom is not annoying and, if this happens, the tile is "to blame": the picture is tired or it's just old. And if repairs are not planned yet, then decoupage will be the best solution. In just a few hours you can turn the bath into a work of art, a real paradise island in the apartment. Of particular interest are the floral arrangements in the form of panels.
Preparatory work for tile decoupage
First of all, you need to choose a decoupage motif. It should match or contrast with the color of the tile and fit compositionally. It is advisable to draw a sketch on paper. For decoration, three-layer napkins are suitable, which can be bought at a regular supermarket, usually there are 50 of them in a pack. You need decoupage glue and decoupage lacquer; they are sold in specialized stores and are expensive. An excellent replacement for these materials will be PVA glue and acrylic varnish, which are cheaper and can be found in any hardware store. In addition, you need sharp scissors, you can manicure, brushes and decoupage contour. At a cost it will be approximately 150 hryvnias (400-450 rubles).
Application technology
First, prepare the surface: degrease with alcohol or a window cleaner and dry. Next, cut out the pattern on a napkin and remove the bottom two layers, it is easier to cut out until the napkin is divided. Then glue the picture. There are two options:
- You can apply glue to the tile, then stick it;
- and you can apply glue to the back of the picture.
Then we put glue on the front side and distribute it on a fragment surface in a circular motion. This is the most thorough part of the job, as the cloth becomes wet and may break. To prevent this from happening, you can sprinkle it with hair spray before work. After complete drying, apply acrylic varnish in two layers. If you want to give the picture a natural yellowness, use a varnish for yachts. Each layer must dry, otherwise the varnish will crack. Decoupage contour connect the pattern to the surface.
How to merge a napkin with a background?
Consider the detailed instructions on the example of a soap dish


In this way, you can decorate the cabinets in the bathroom, shelves and even the "place of the thinker." Decoupage technique is just beginning to become fashionable, so you need to manage to make the interior in your apartment unusual in order to impress all your friends.