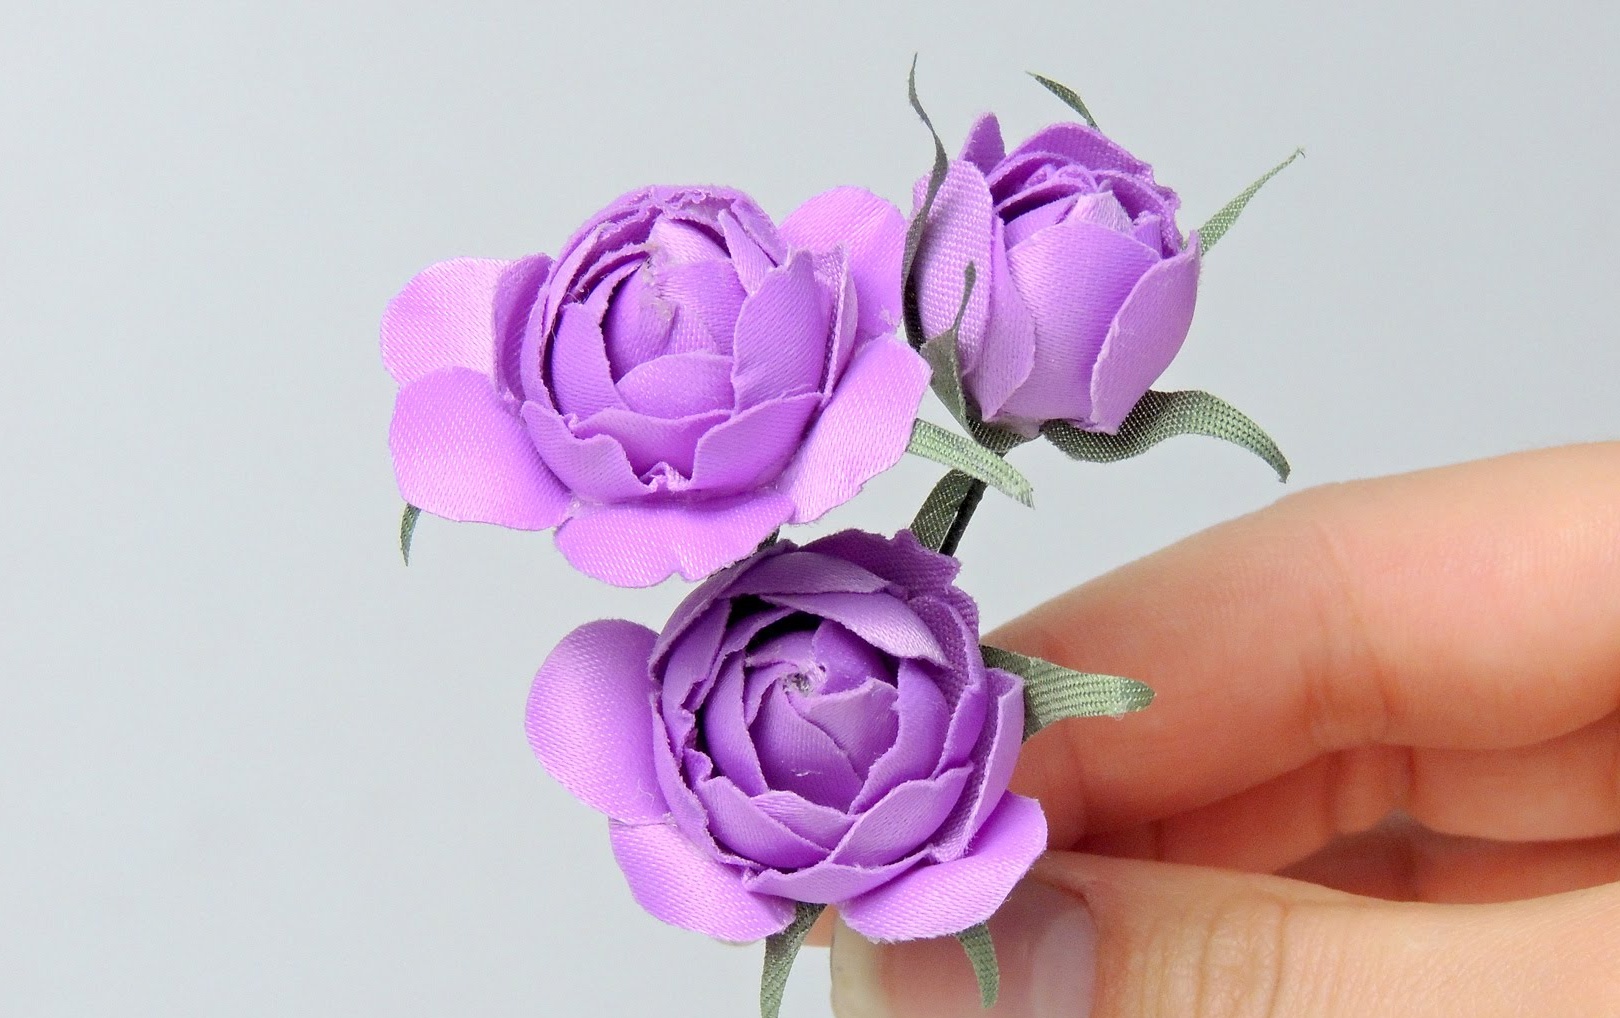

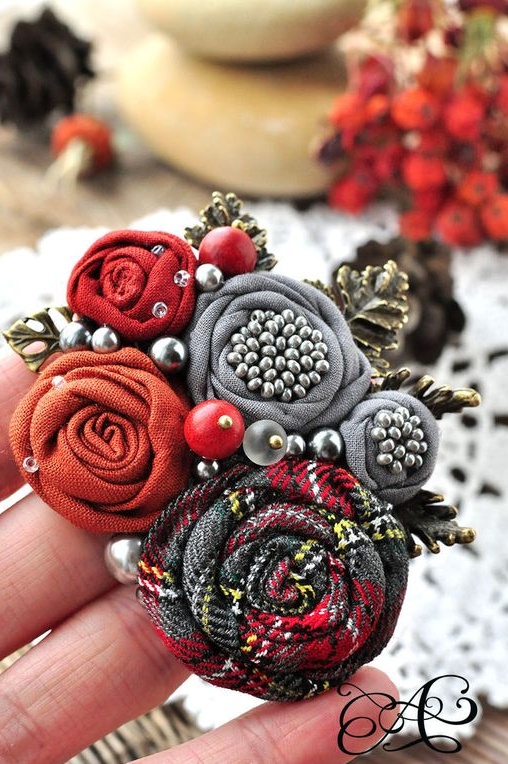
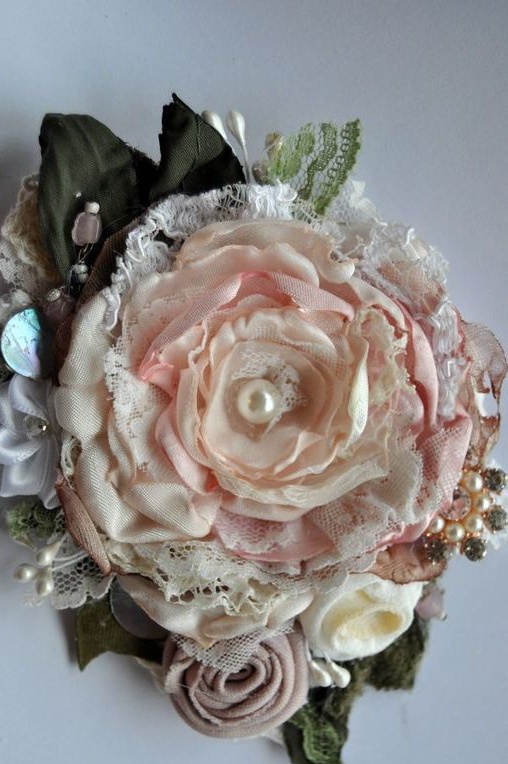
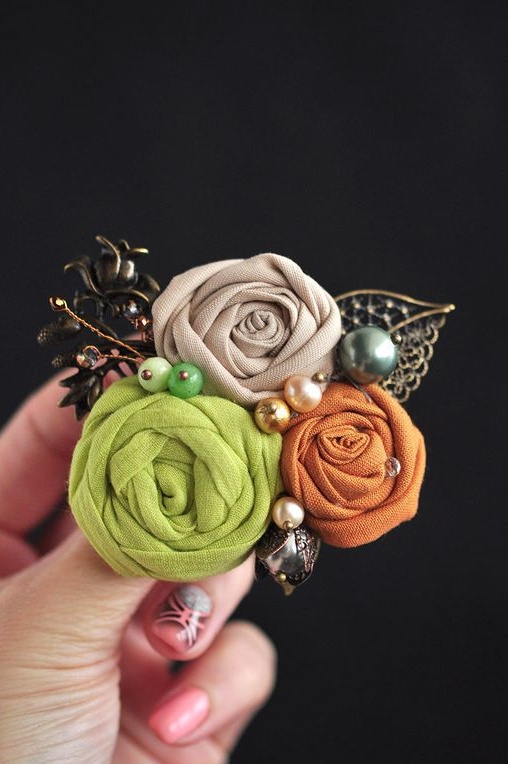
Fabric flowers: 5 DIY workshops for beginners
Handicrafts always attract special attention. And it doesn’t matter at all where exactly they will be used. For example, a flower made of fabric can be turned into an elegant brooch, a decorative accessory, or even attached instead of a bow on a gift. It all depends entirely on your imagination and preferences.

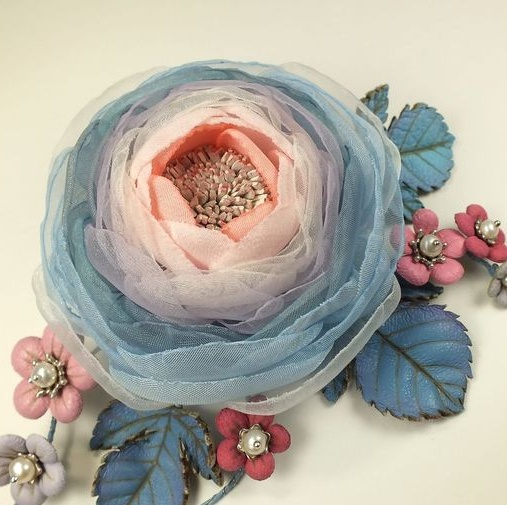
How to make organza flower?
Perhaps the most popular material for making flowers is organza. The thing is that it is quite easy to process, so even a novice will be able to repeat the master class presented later.
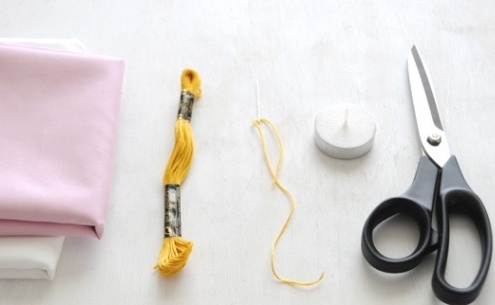
To work, you will need the following:
- organza or chiffon, white or pink silk;
- yellow mouline thread;
- scissors;
- needle;
- candle;
- matches.
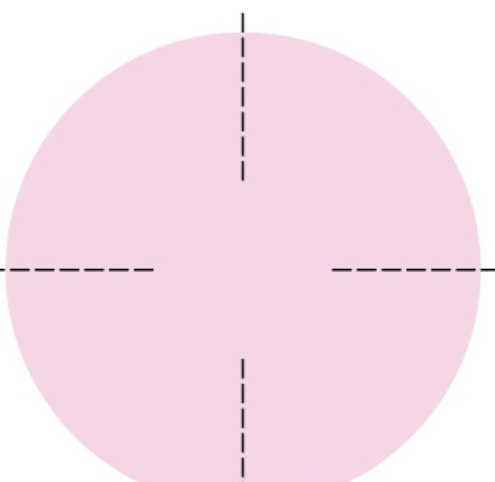
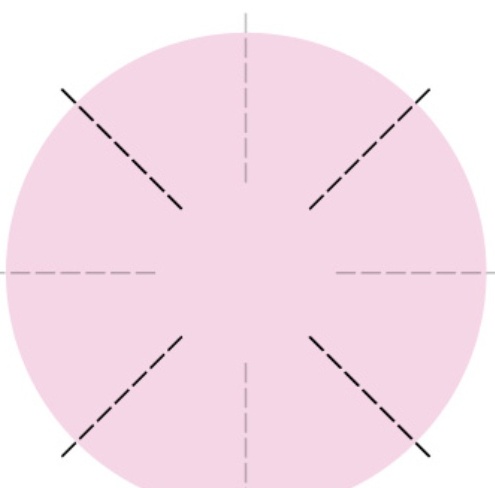
Five circles are carefully cut out of the fabric. Four of them should be about 10 cm in diameter and one should be 8 cm in size. Dimensions may vary depending on which flower you want to make.
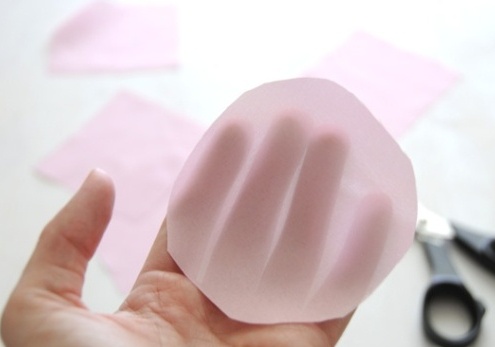
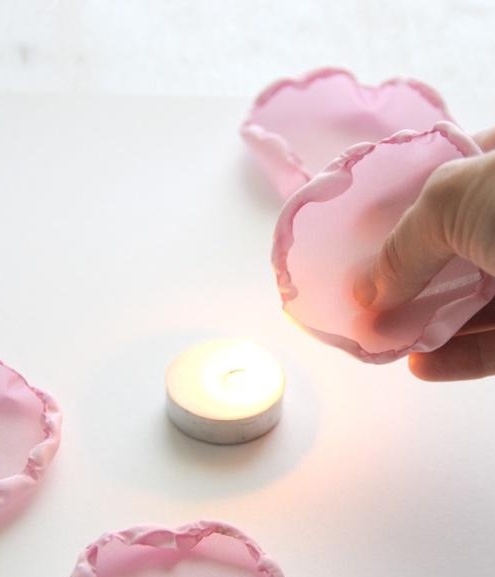
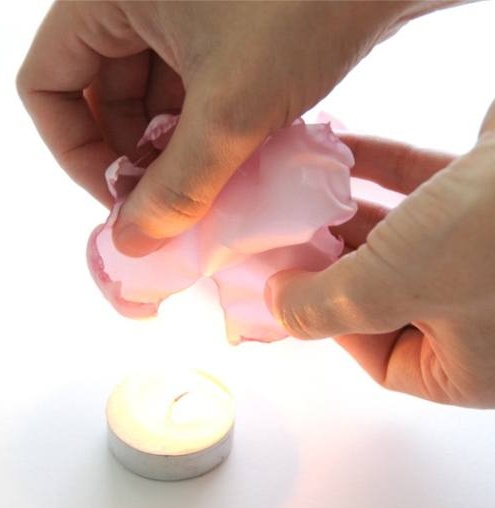
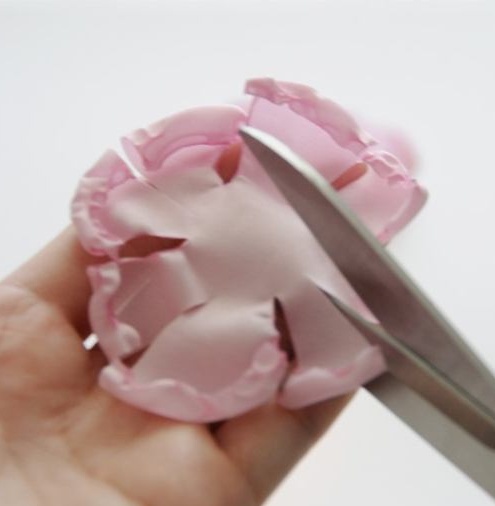
Gently light the candle and proceed to the processing of the material. We bring the edge quite close to the fire and gradually turn until the edges are melted. This must be done carefully so that they do not turn black. Repeat the same with the rest of the blanks.
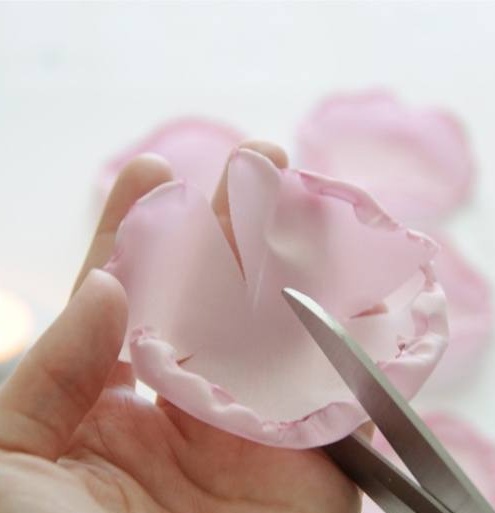
On each blank we make incisions, as shown in the photo.
Carefully process the cuts of the workpieces with fire.
We postpone two pieces of the same size and one small one. On the two remaining, we make cuts, as shown in the diagram.
We process the edges as in the previous steps.
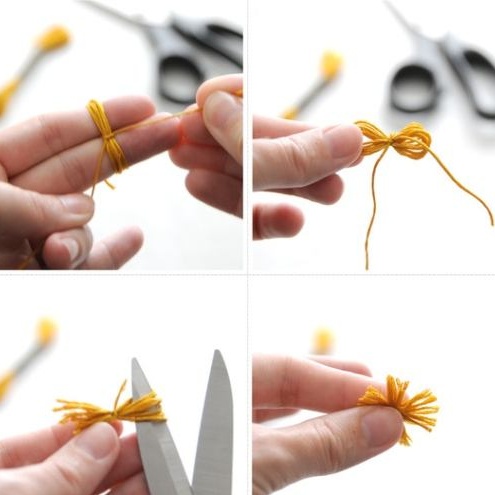
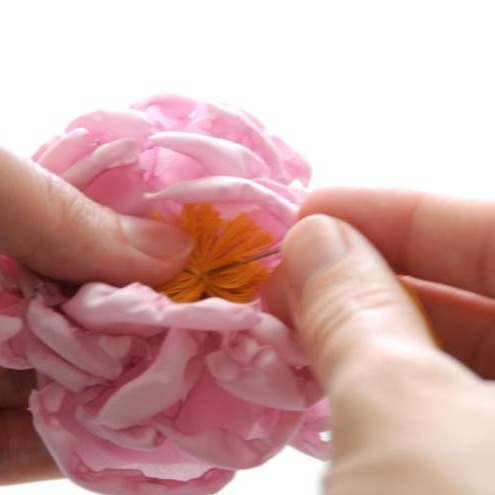
We proceed to the creation of stamens. We wind the floss on two fingers, folded together, about eight to ten times. We tie the middle between the fingers with the ends of the thread. Cut the loops and straighten the threads.
Fold two large blanks, which have four petals. On top of them we apply two more large blanks. Place a small one on top.
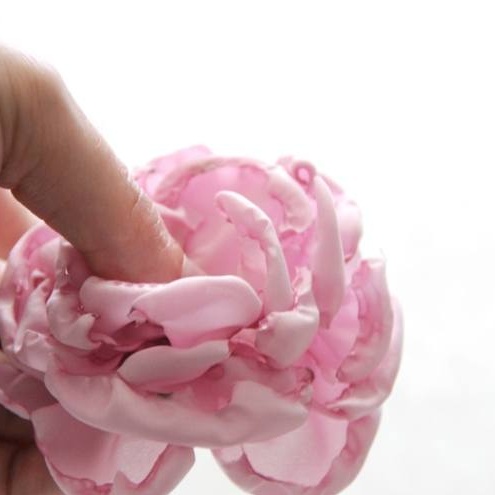
We apply stamens on top of the workpiece and sew all the parts together.
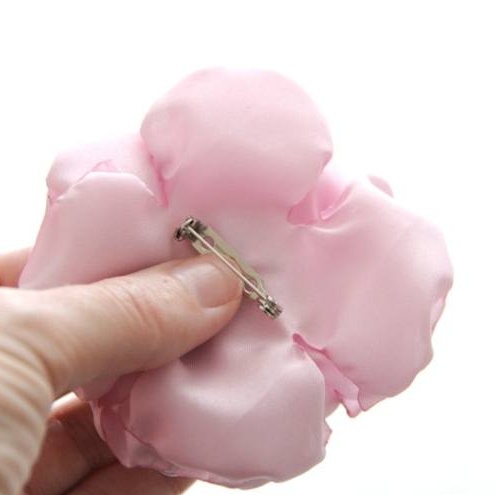
If desired, such a flower can be used as a brooch, if a pin or any other accessories are sewn to it.
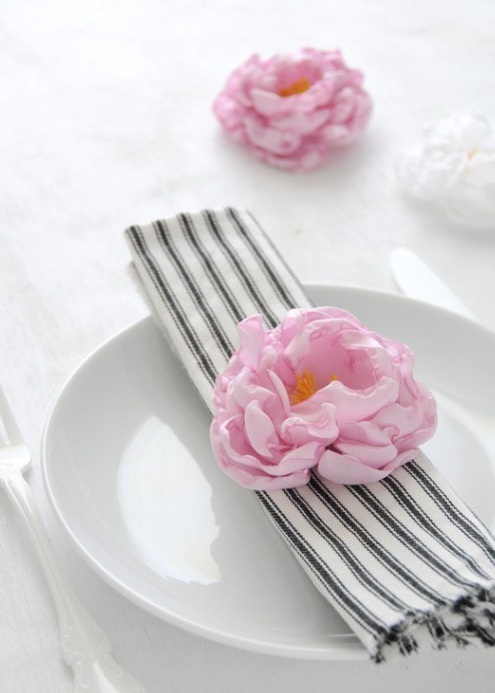
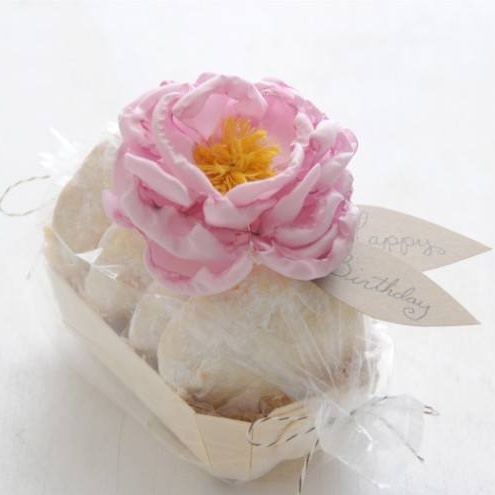
Such a flower looks no less attractive as a holder for napkins or instead of a bow on a gift.
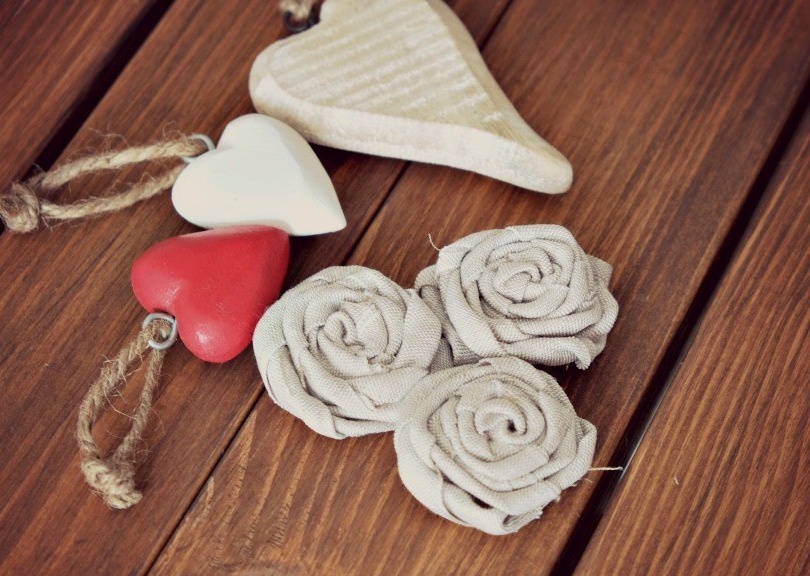
DIY fabric flowers
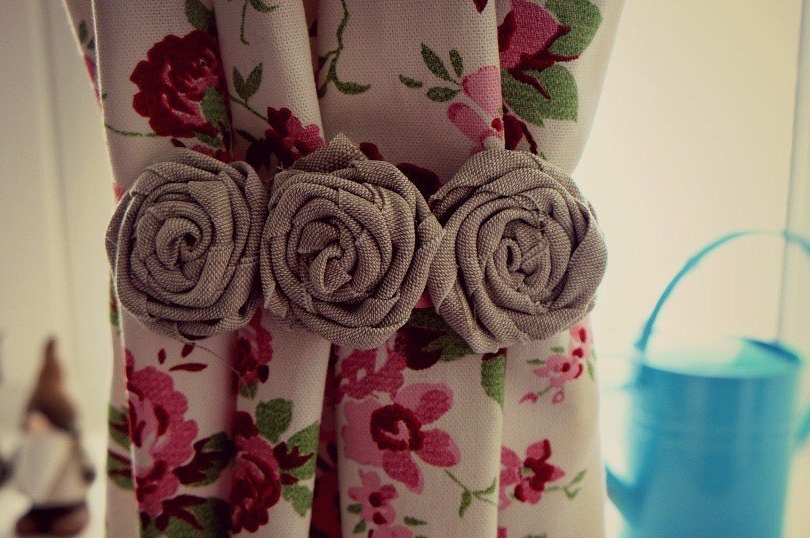
Perhaps the fastest way to make flowers is to use lion or burlap for this. Such products are great for decorating curtains, wicker baskets or serving.
We will need:
- strip of flax or burlap;
- glue gun;
- scissors;
- lace ribbon.
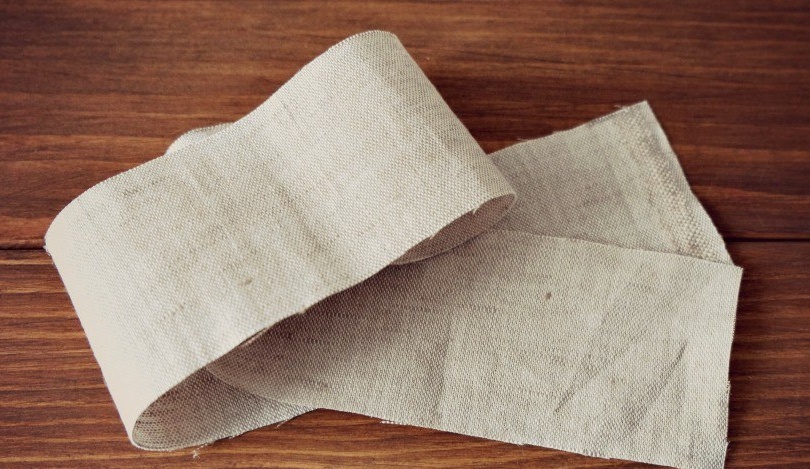
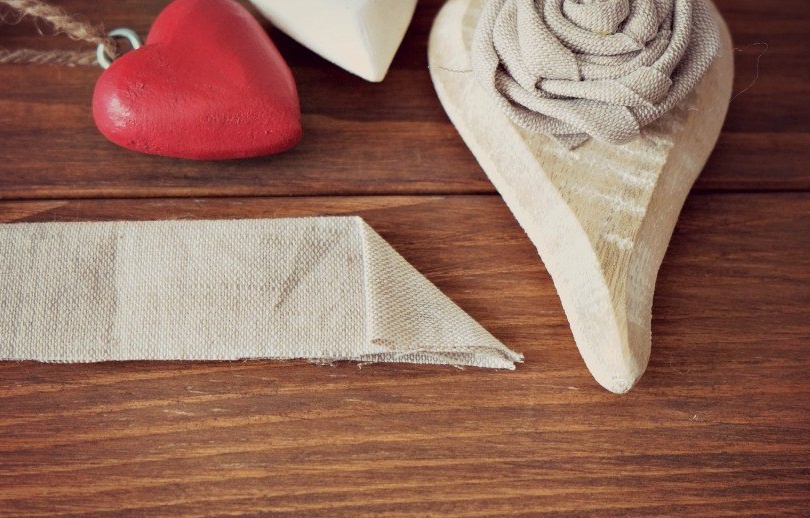
Cut off a strip of flax or burlap of the required size.
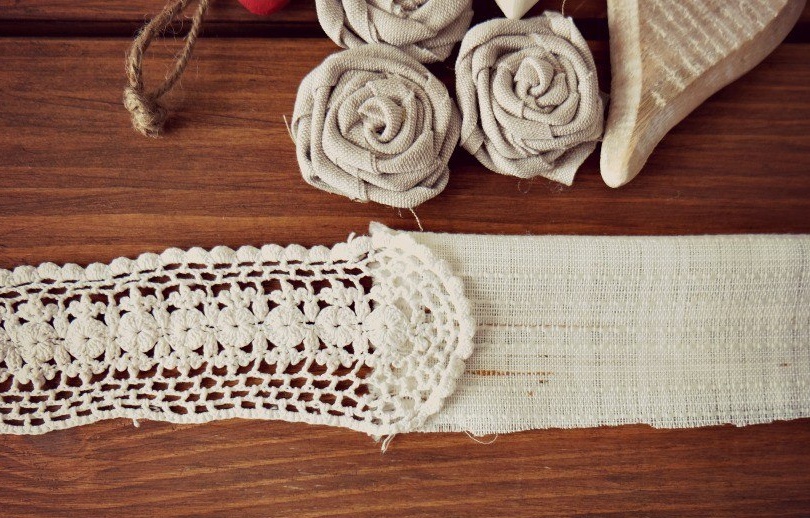
If desired, lace tape can be glued to the fabric. In this case, the flower will be in the Provence style.
Fold the fabric in half with the wrong side inward.
We bend one corner, as shown in the photo.
Turn the bent corner of the fabric a little.
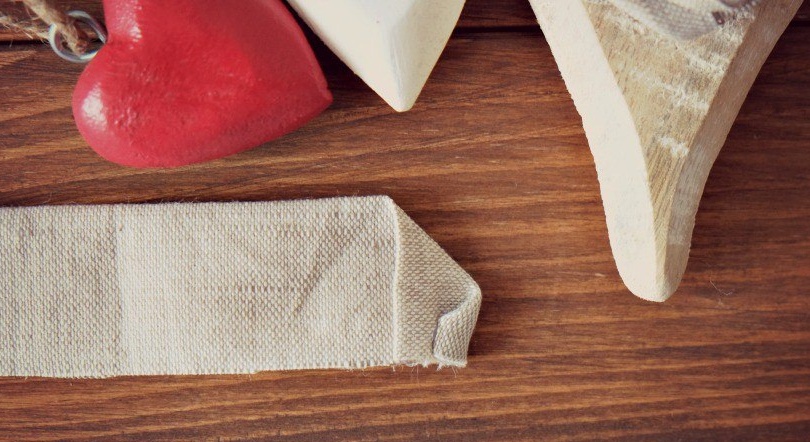
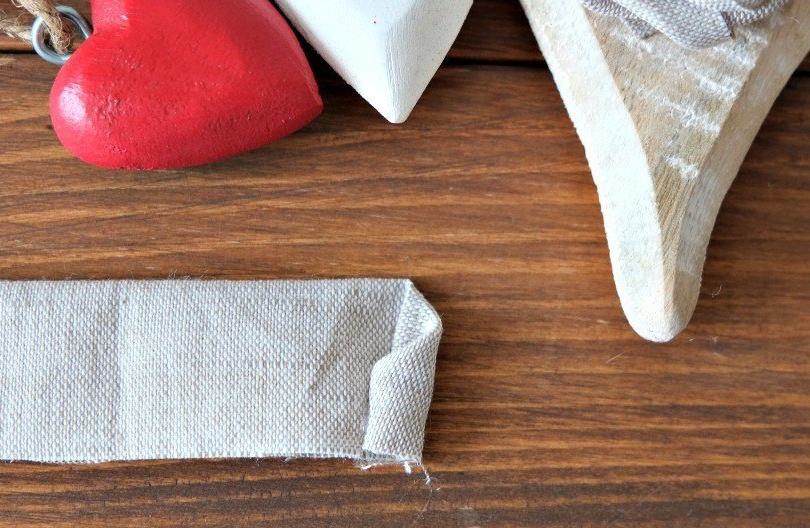
Gently twist the fabric so that the raw edge is either from below or from above.

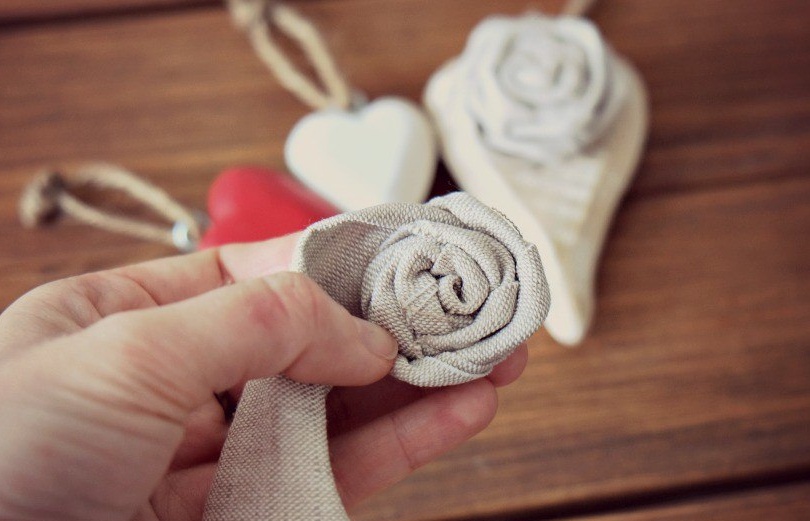
Please note that the rosette is more convenient to twist if held with two fingers.
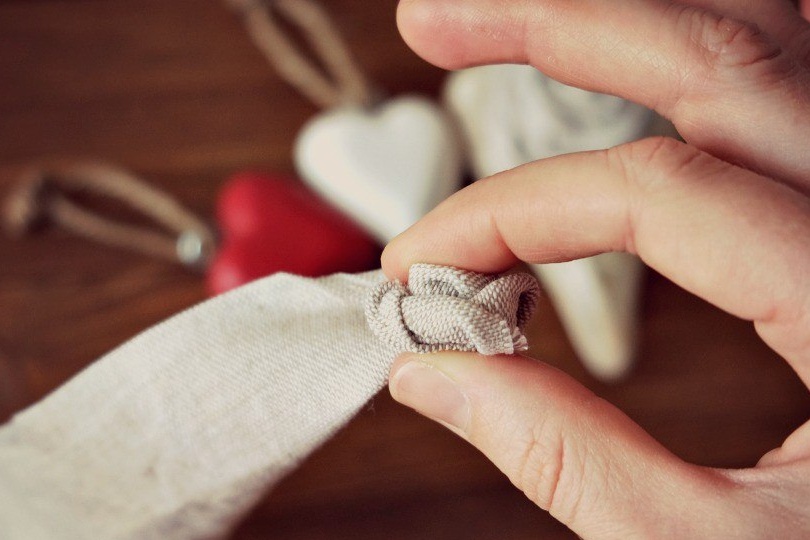
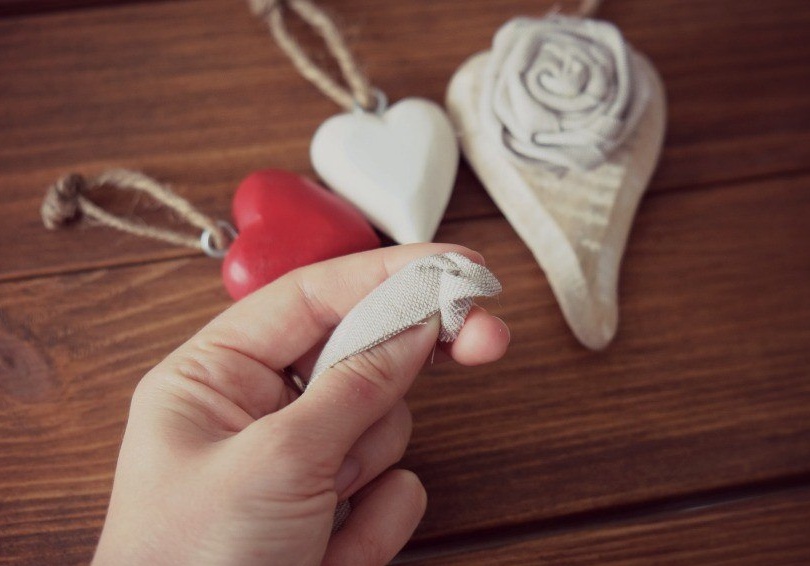
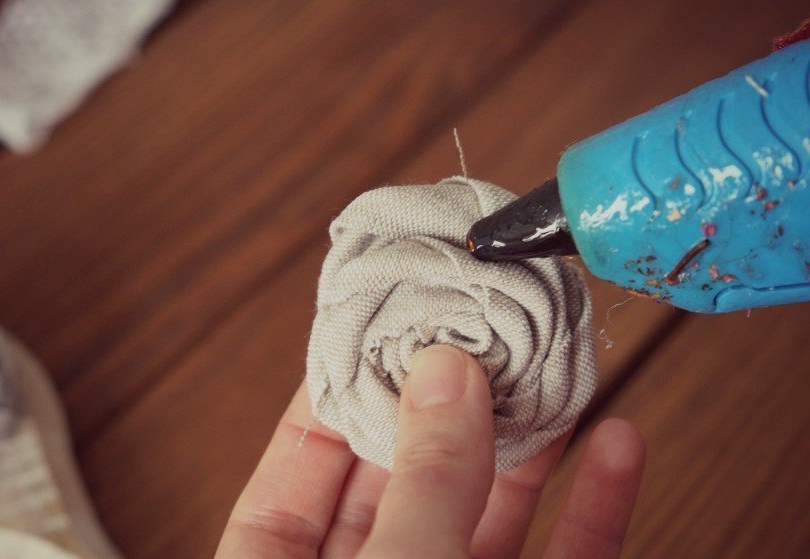
We wrap the tip of the strip in the back of the flower and fix it with glue.
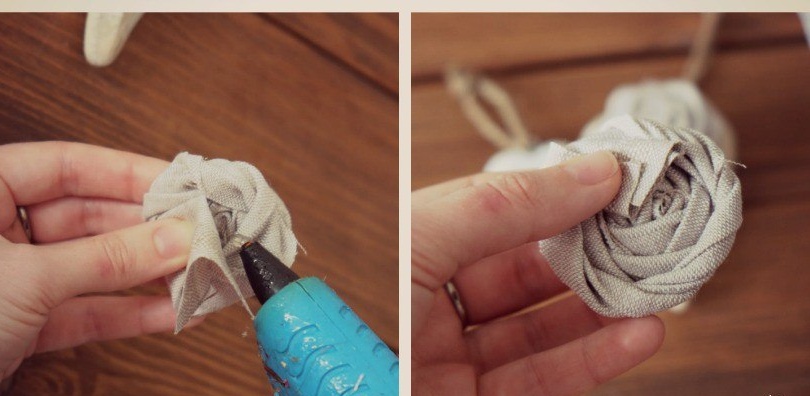
If desired, you can fix those places where the fabric does not hold well.
As a result, fabric roses look very nice.
Floral arrangement of felt
We will prepare such materials:
- felt of various shades;
- scissors;
- Printed template
- pencil;
- thick cardboard;
- glue;
- kraft paper;
- floristic wire;
- basket for composition;
- pliers;
- twine;
- moss.
Cut out a pre-printed flower template.
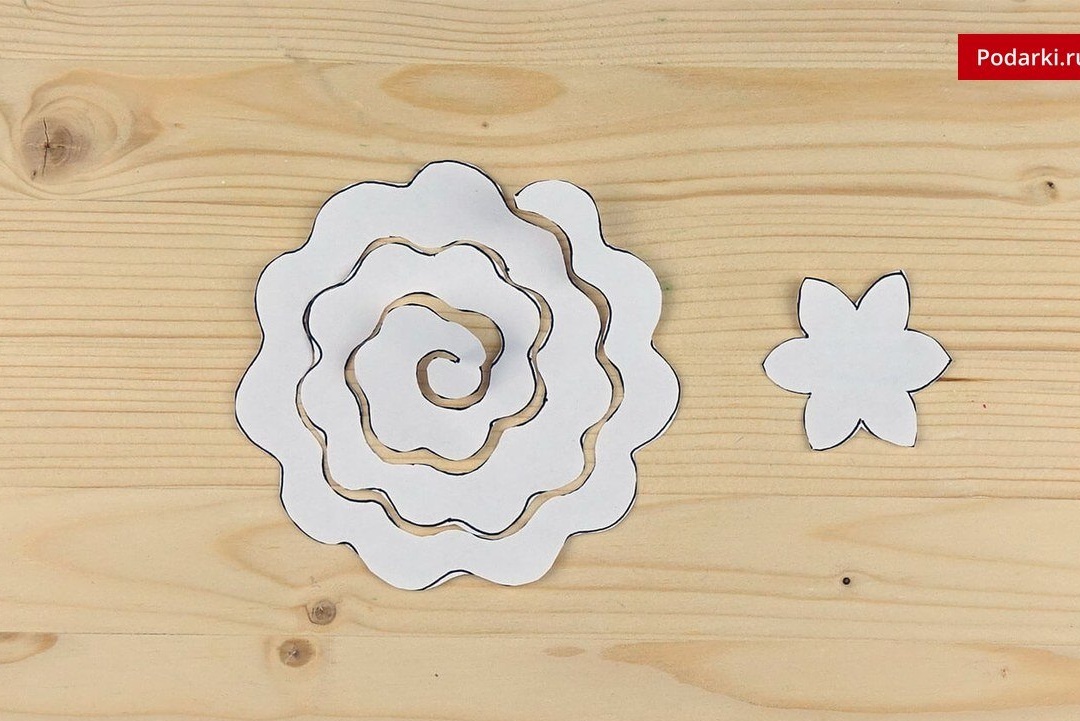
Transfer the flower pattern to felt in pink. If desired, you can choose any other shade.
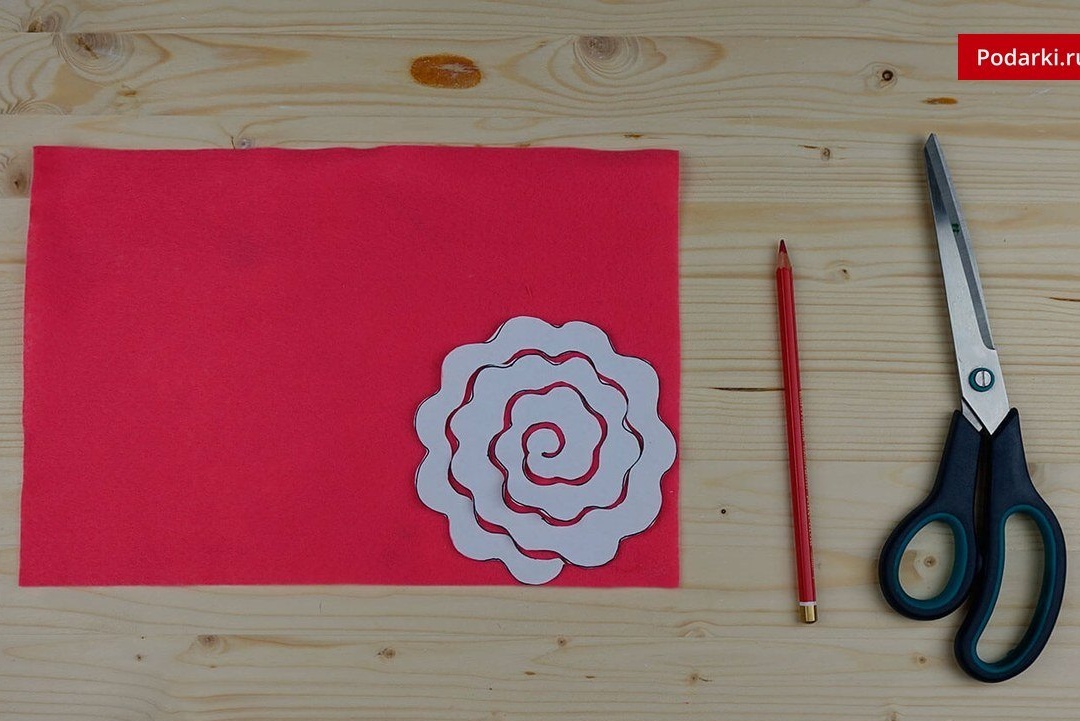
Cut the blank from felt.
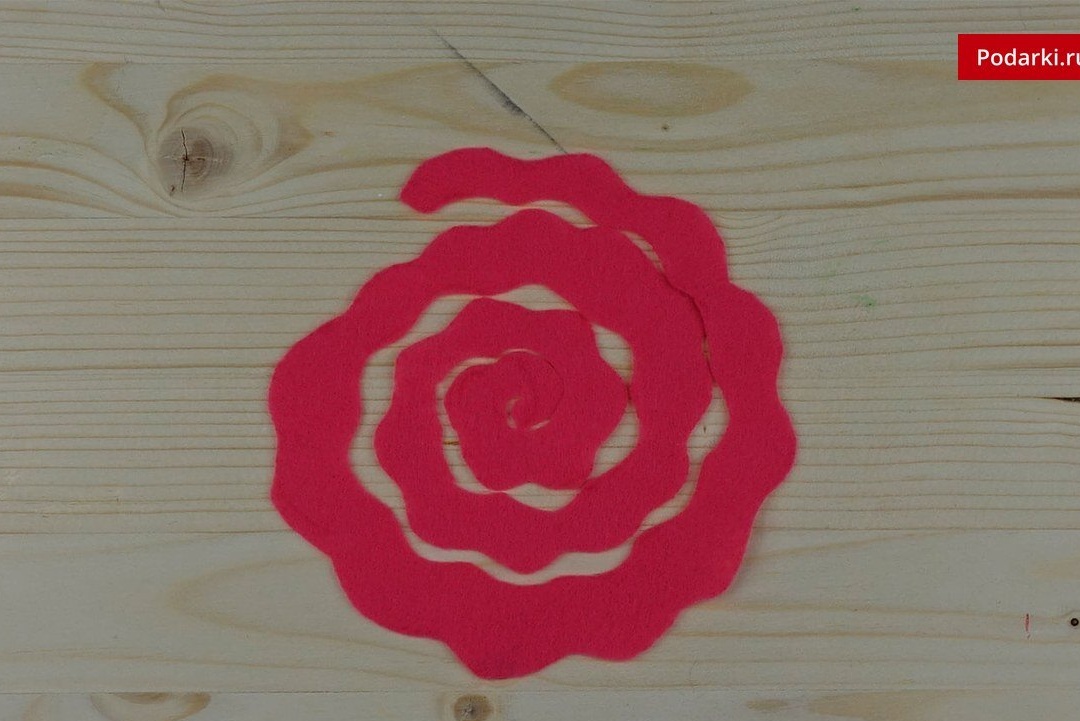
Cut a thin strip of felt of a different shade.
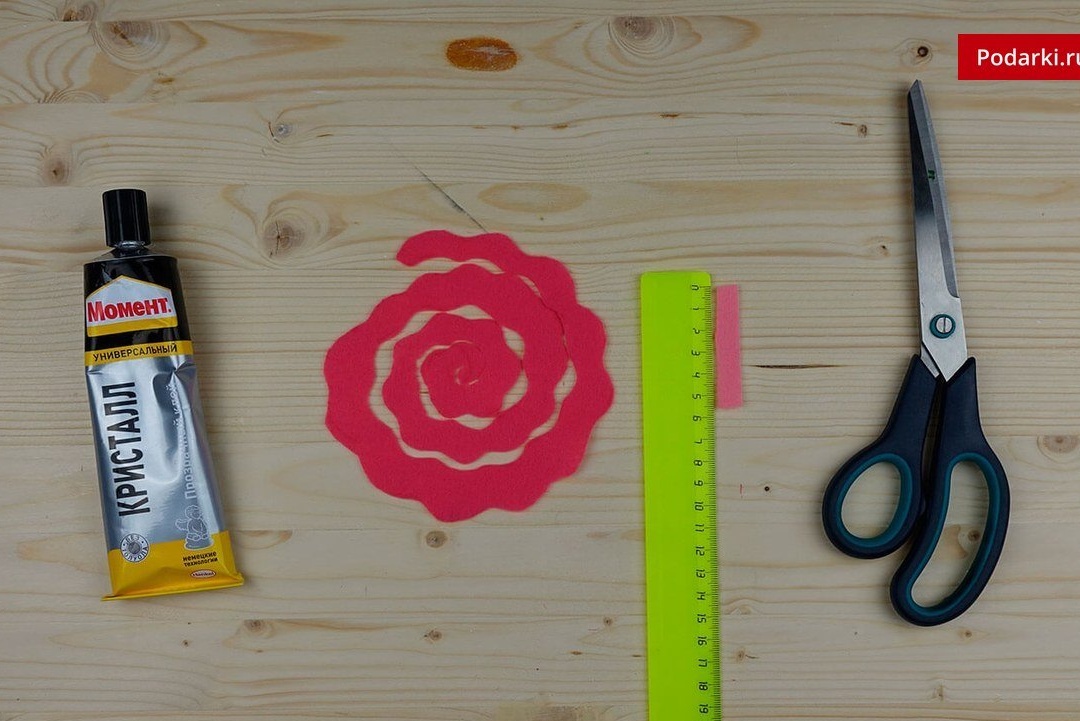
We make incisions on the strip. Glue it over the edge to the middle of the bright workpiece.
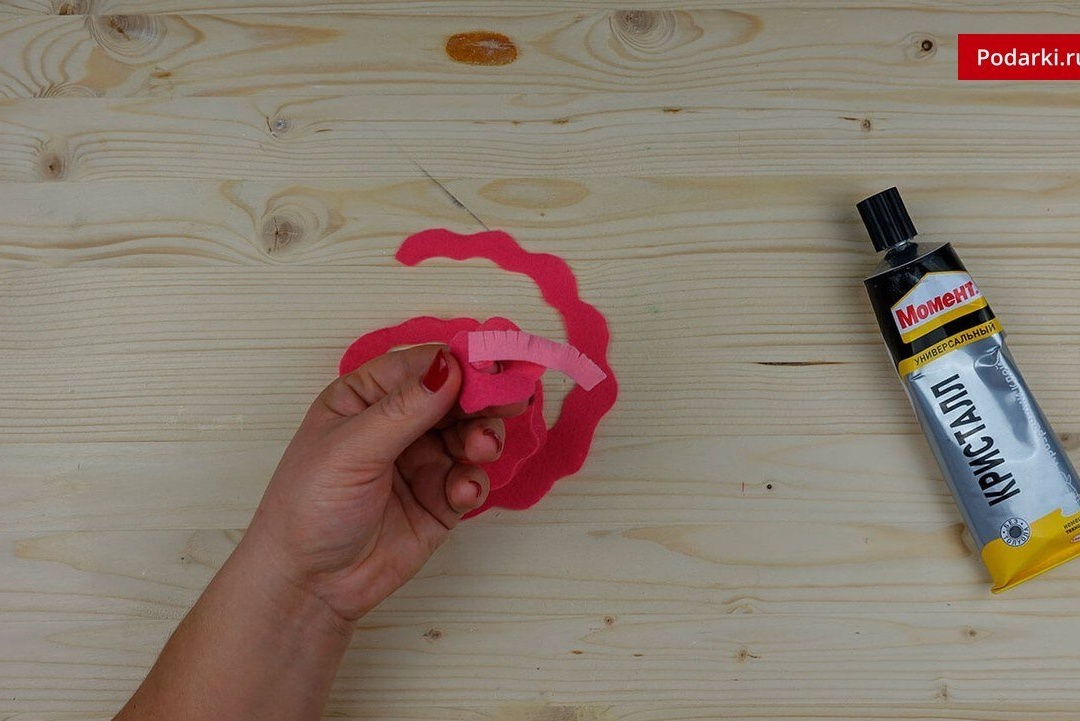
Apply glue to the strip and wrap in such a way as to form stamens.
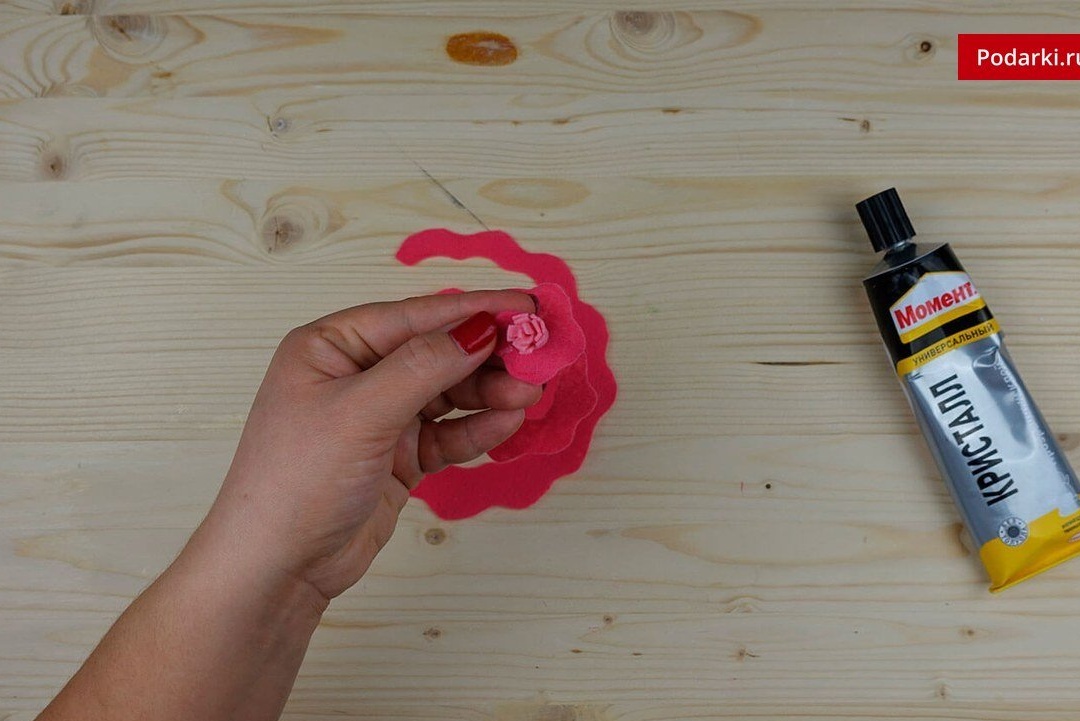
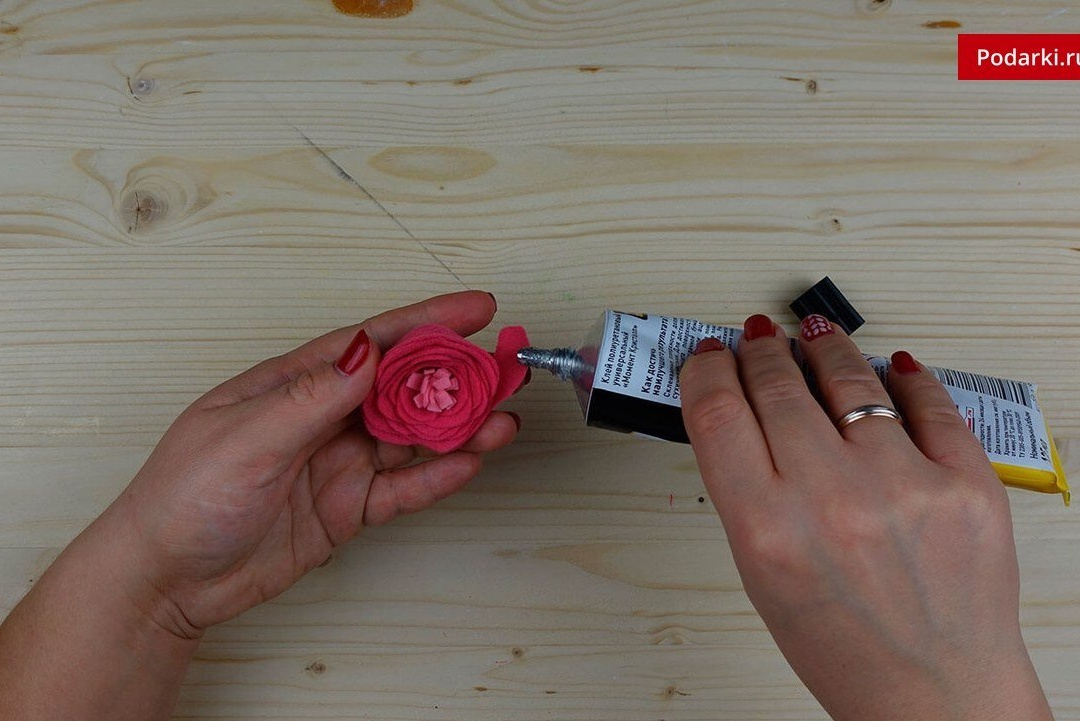
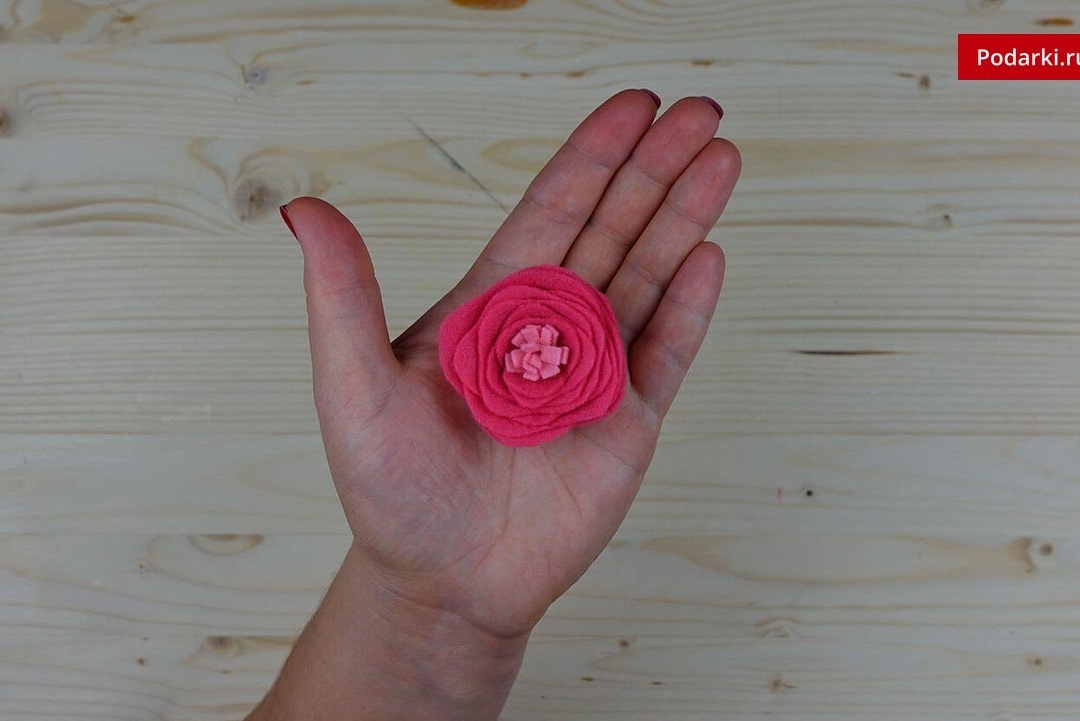
We put glue on the workpiece and turn it so that it turns out a rose.
We transfer the second part of the template to green felt.

Cut out the part, which will be a sepal.
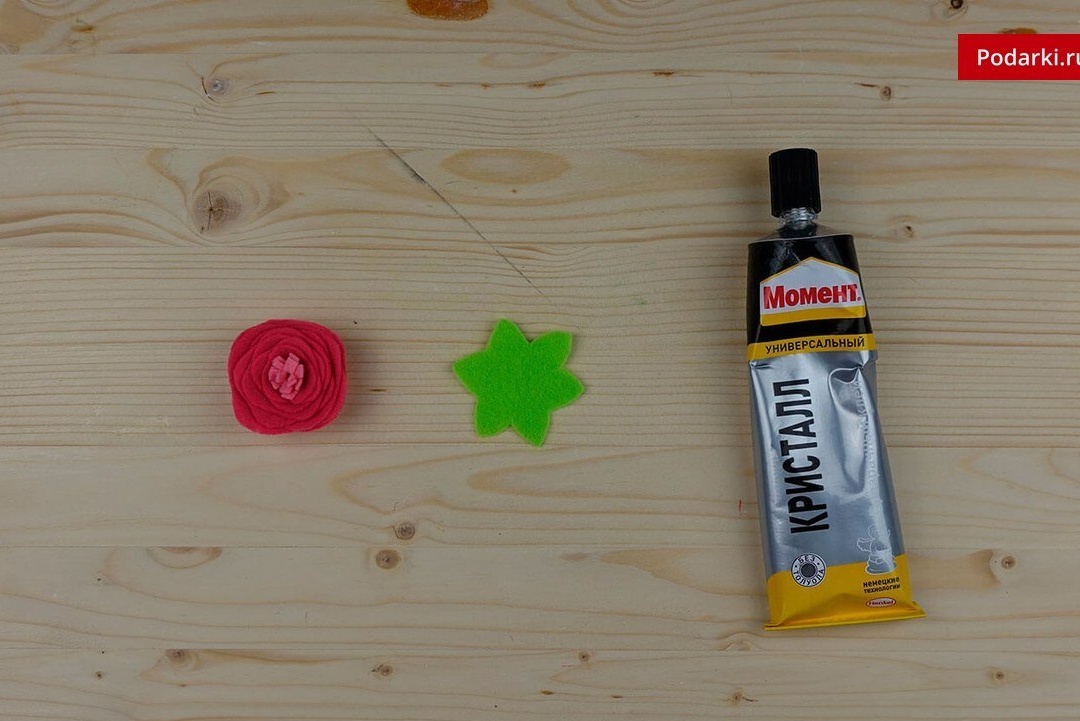
We pierce it with a floral wire in the center.
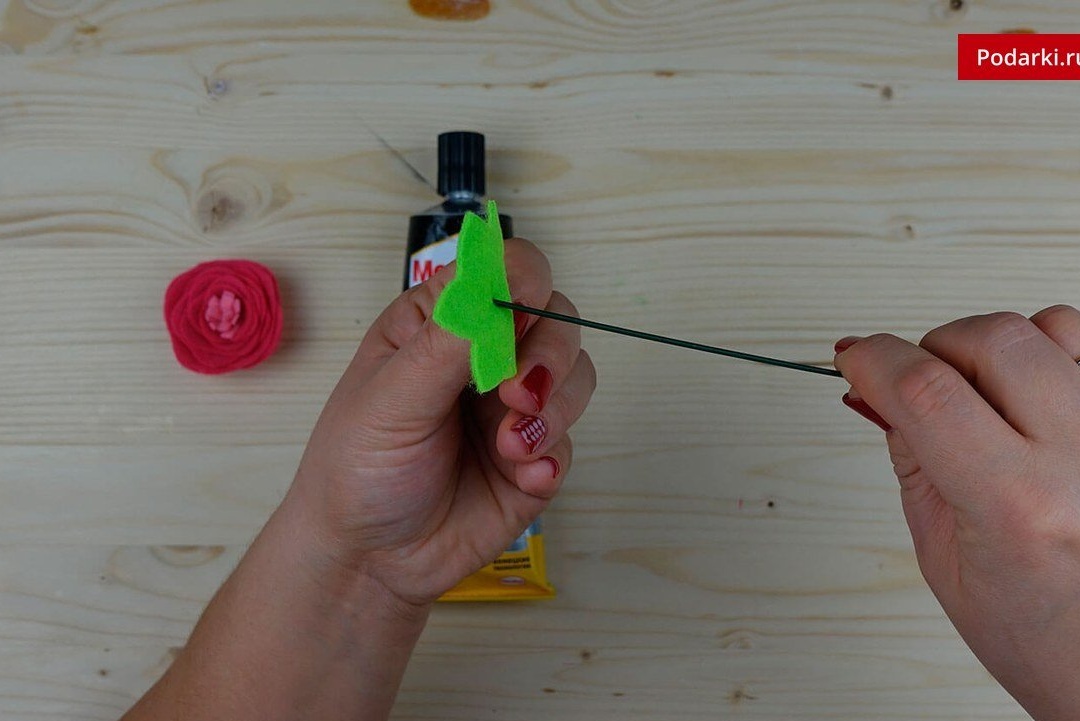
Apply glue to the sepal wire and gently glue the flower.
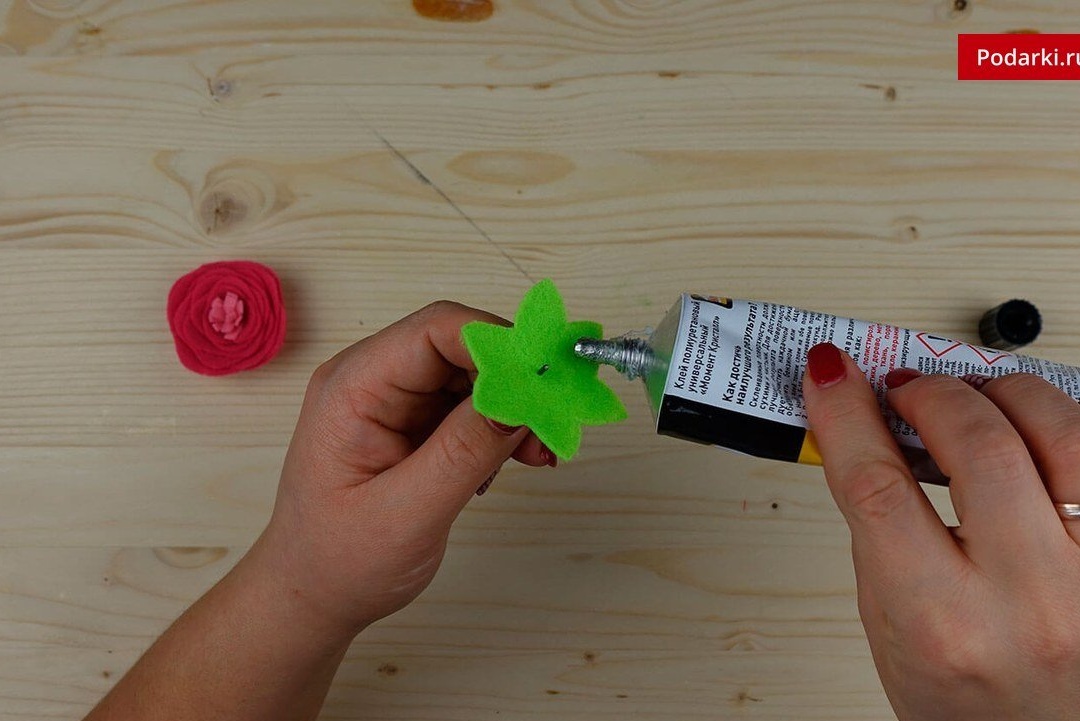
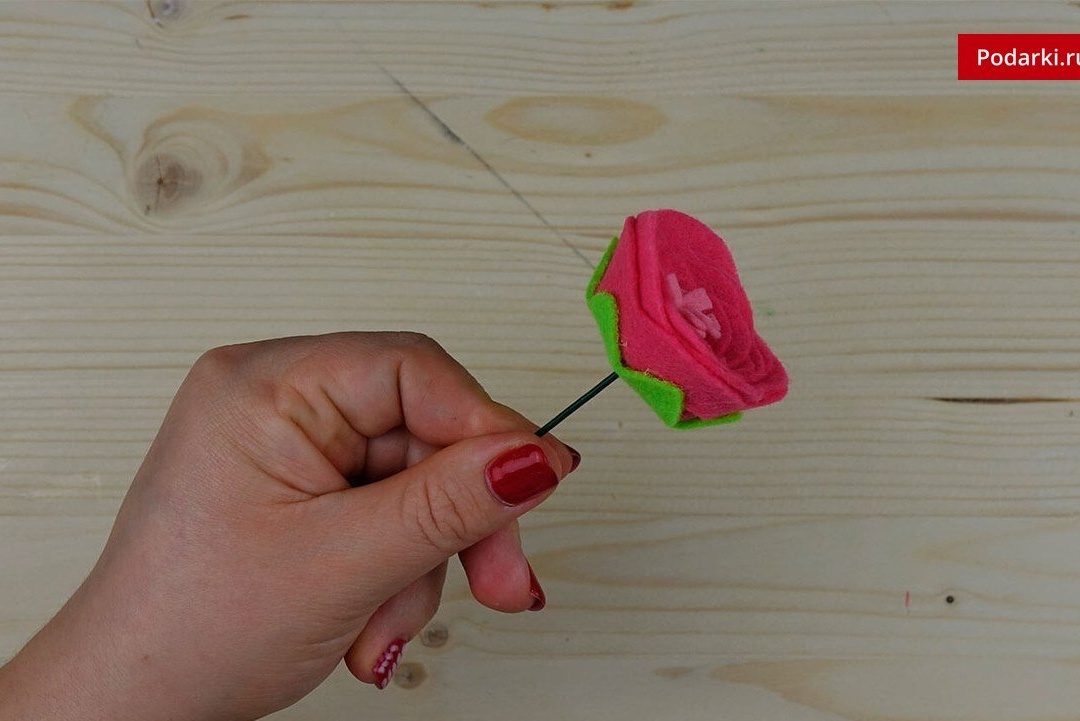
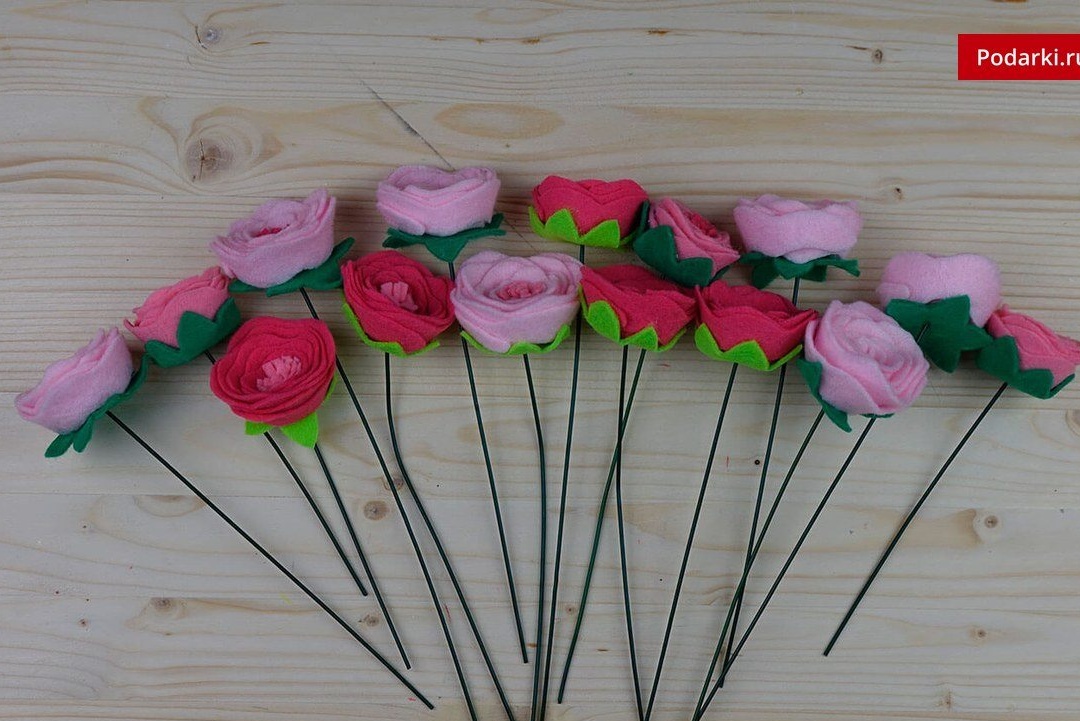
We make a few more of the same flowers in different shades.
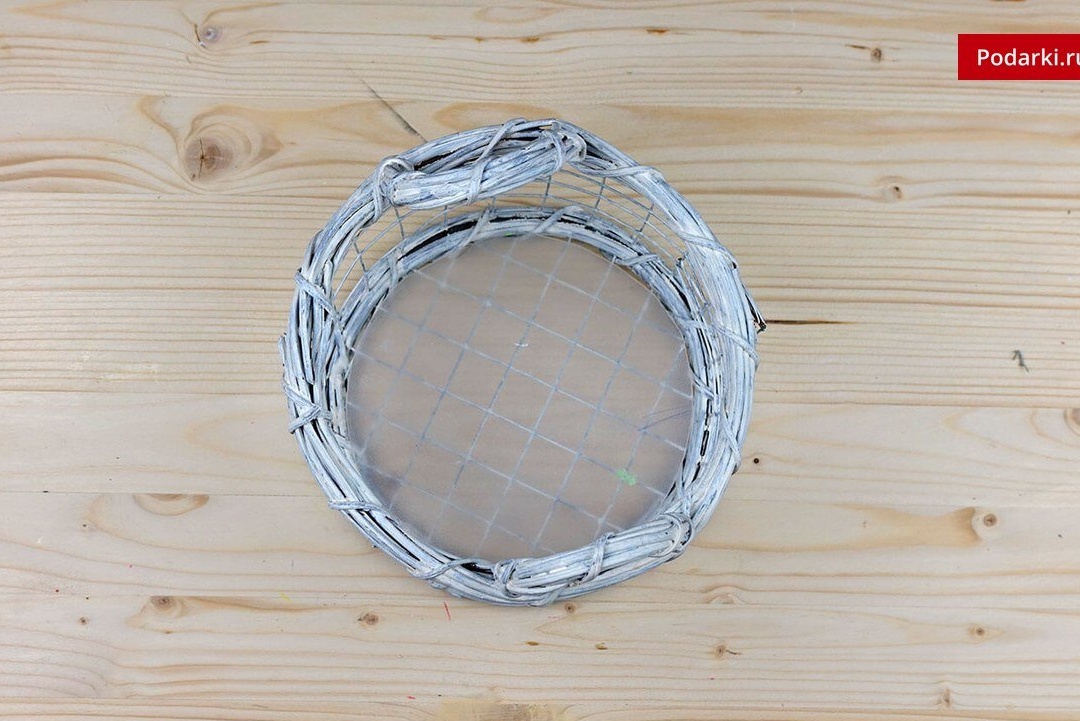
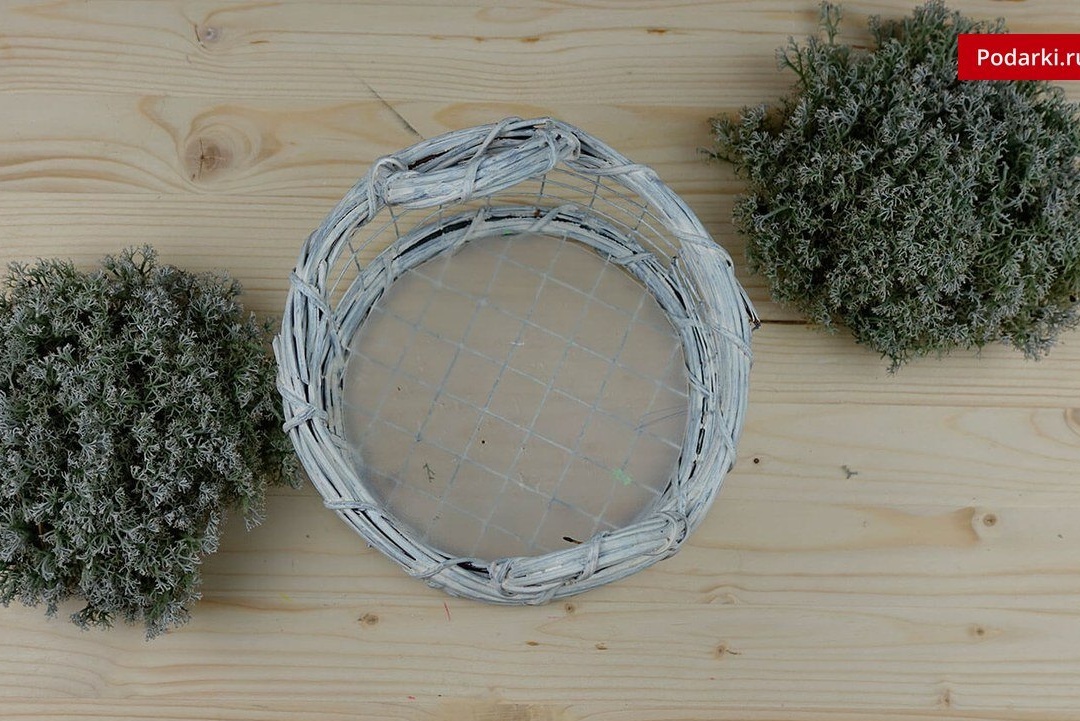
Take a basket to create a composition. If the bottom has too large holes, then we put thick cardboard on it.

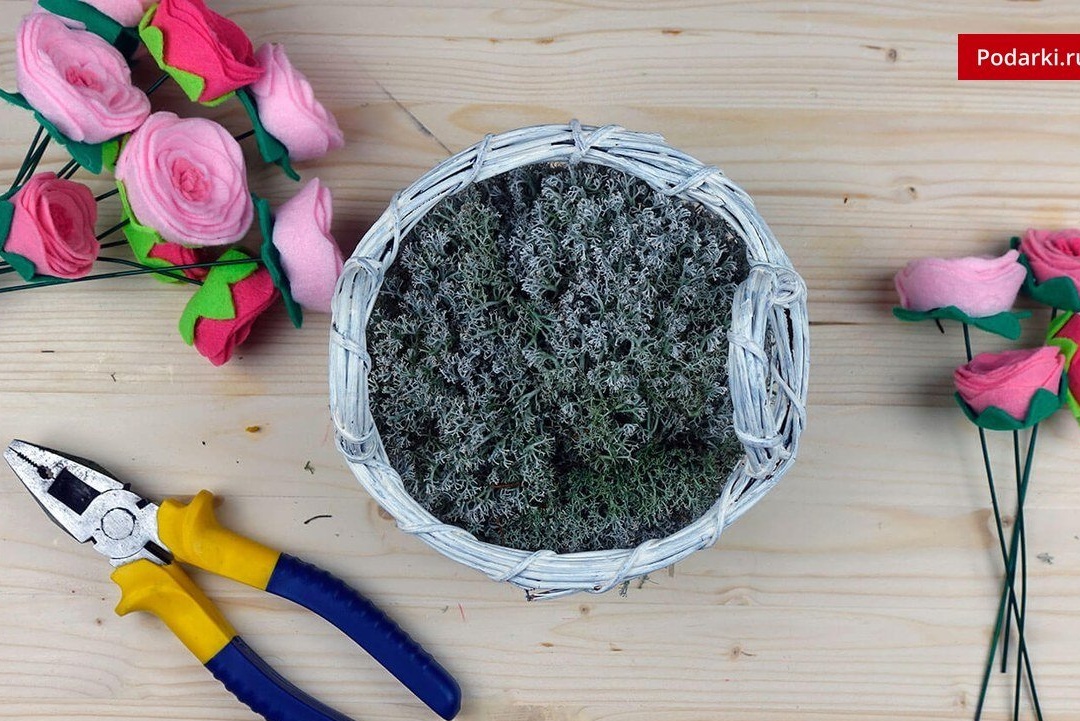
Set the moss in the basket. You can also use a floral sponge. In this case, it fits no less.
Alternately set the flowers in the basket. This should be done as carefully as possible so that all parts are evenly distributed.
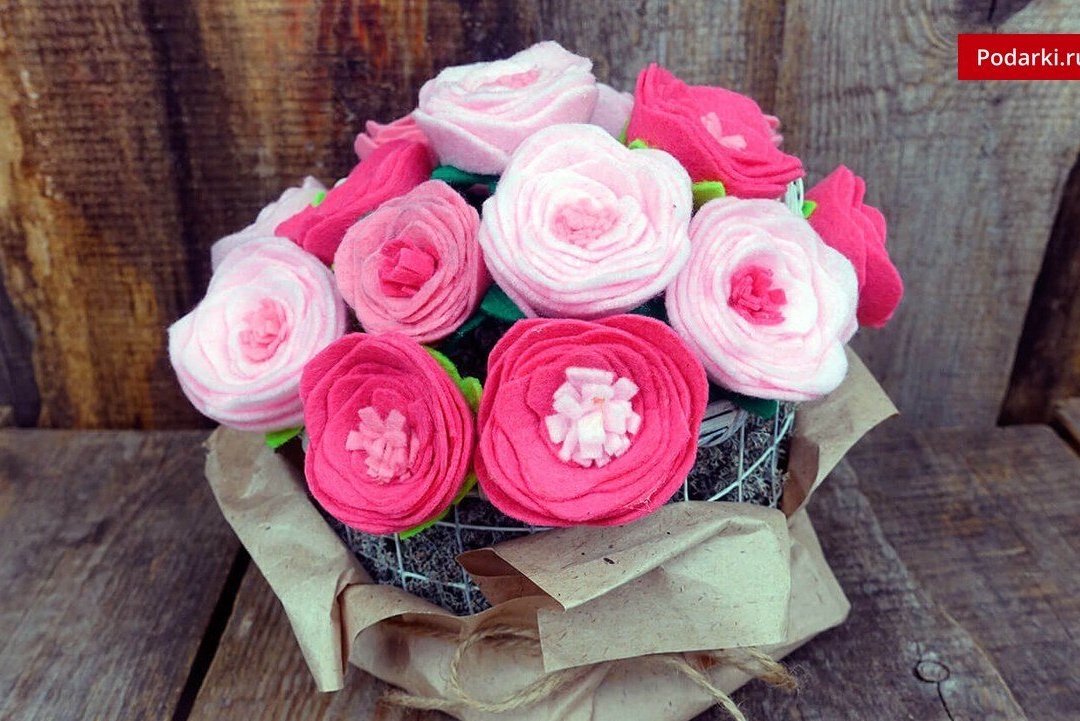
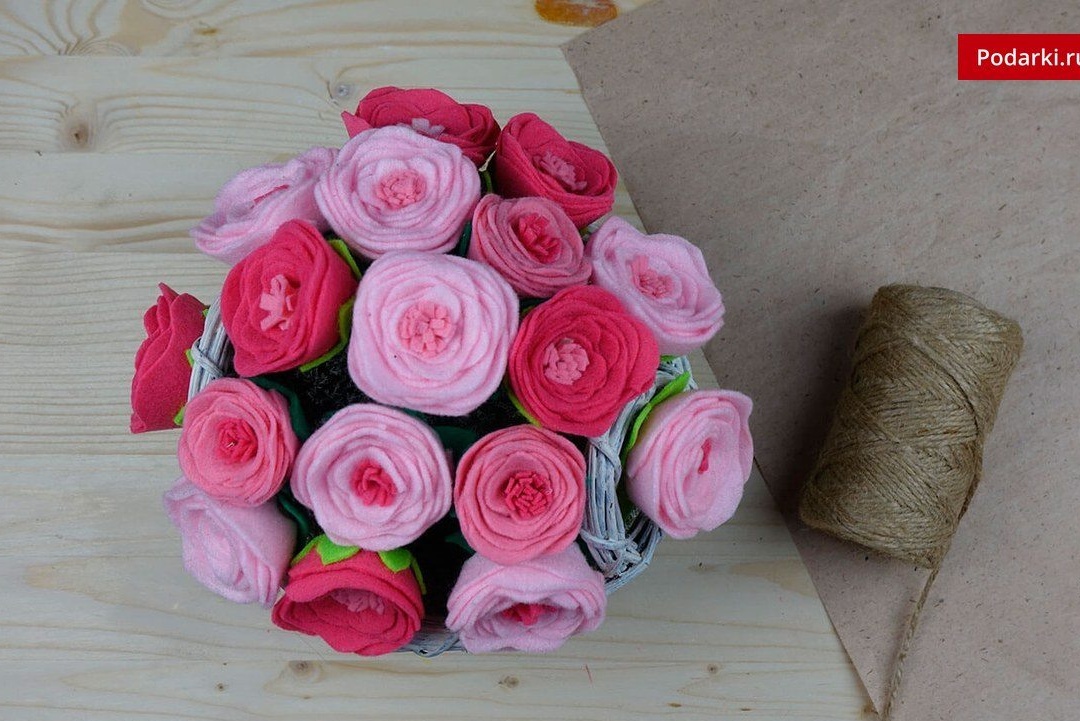
As a result, the composition of roses looks like in the photo.

To make it complete, we use kraft paper and twine for decoration.
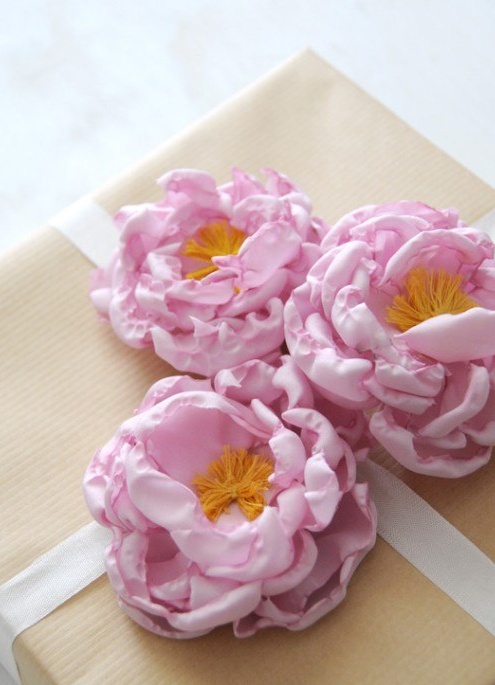
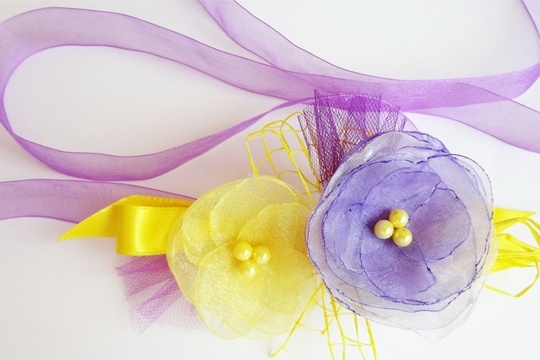
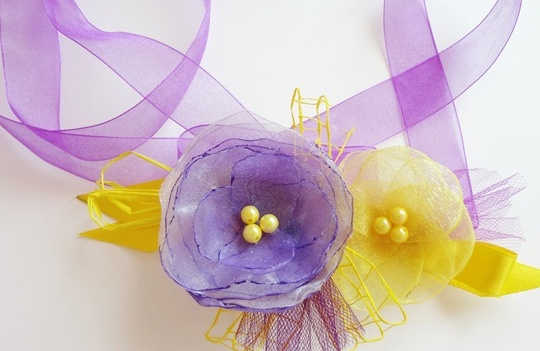
DIY organza flowers
Organza is an excellent material from which you can make light, airy flowers for decoration. You can use them as a brooch, an emphasis on a handbag, dress or make a stylish belt.
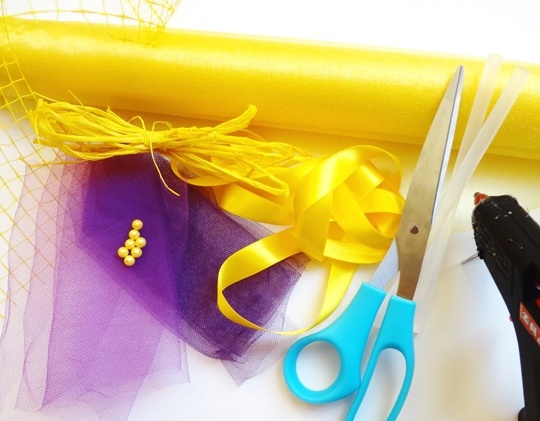
To do this, prepare the following:
- organza;
- belt tape;
- scissors;
- beads;
- glue gun;
- candle;
- additional decor at will.
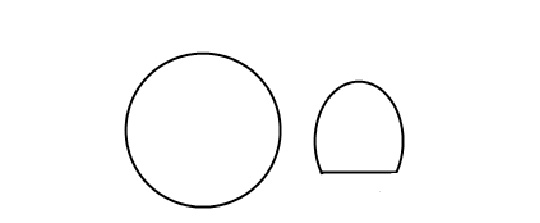
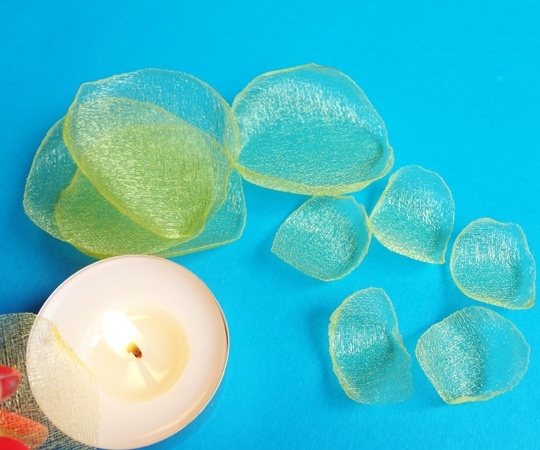
From the organza we cut out five circles and six petals, as shown in the diagram.
Alternately, we process the edges of each part with a candle. To do this, gradually move the edges of the workpiece near the fire. This must be done carefully so as not to damage them.
We fold the blanks of a round shape on top of each other, and lay out the petals in the form of a flower. Glue them together in the center.
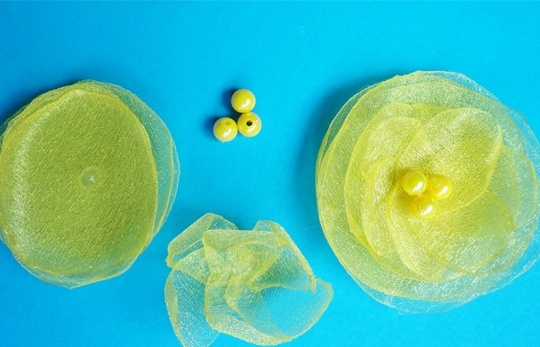
Glue beads in the center, as well as additional decor.
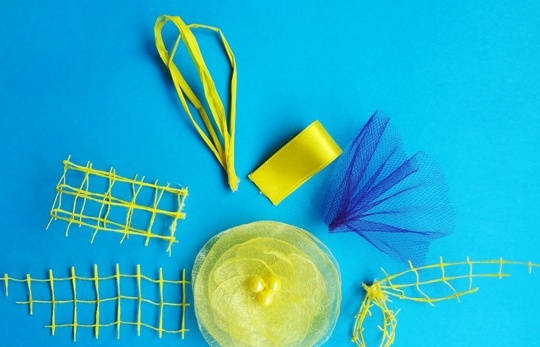
Glue the whole composition to the organza ribbon.
The original belt with flowers from fabric is ready!

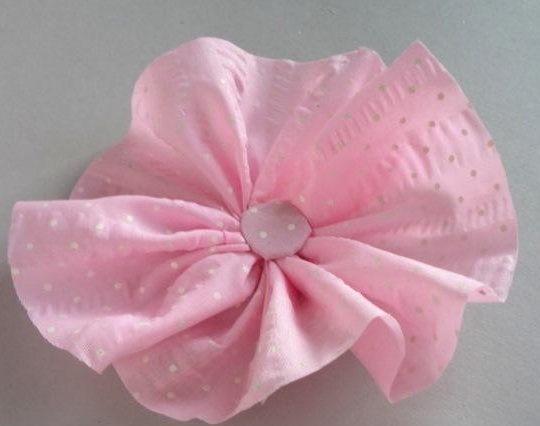
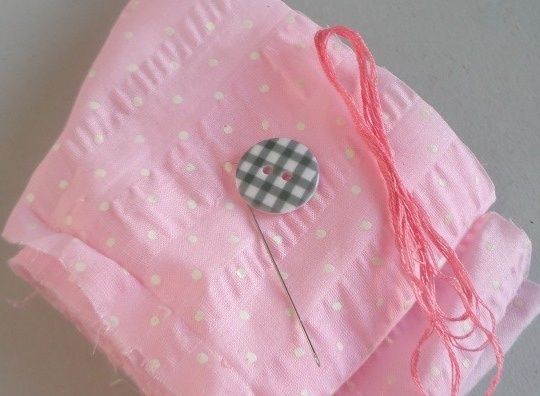
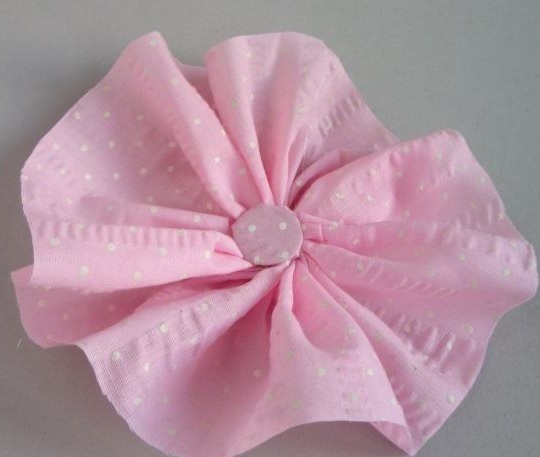
Chintz flower
Necessary materials:
- chintz;
- needle;
- scissors;
- button;
- thread to match the material.
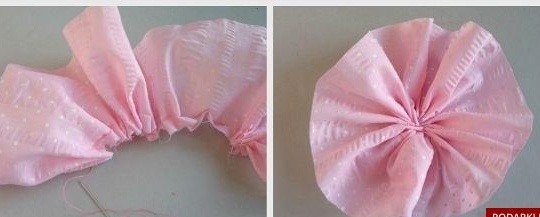
Cut a fairly wide strip of fabric. Starting from one edge, we collect it with a needle and thread and sew it.
From the fabric we cut out a circle more than a button. Wrap it and sew the edges.
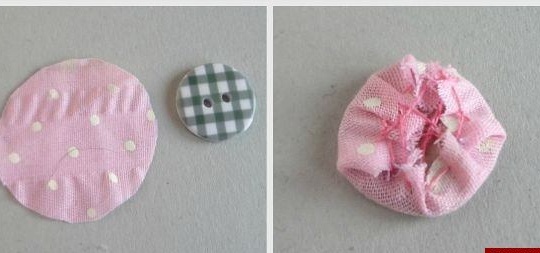
Sew a button in the center of the flower.
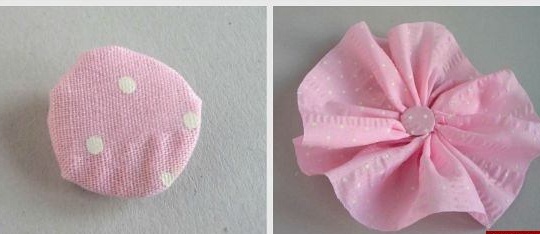
Beautiful flower is ready! It can be used as a decor on clothes or accessories.
Making beautiful flowers from fabric is not at all difficult. Simply follow the step-by-step master class and the result will pleasantly surprise you.